Assembly - Road Tiles
Contents
Assembly - Road Tiles#
What you will need
Knowledge of the Duckietown Appearance Specifications
Materials: compliant tiles, white, yellow and red road markings (Duckietown project shop)
Tools: scissors (or a sharp cutter) and a ruler
What you will get
You will have tiles that comply with the Duckietown operation standards
You can move on to Assembly of other components
Before we begin#
Tip
To ensure that your streets will last long, make sure to follow these steps:
Clean the tiles with a mixture of water and soap, or alcohol, and let them dry completely before attaching tapes.
Place the yellow tape on the tile and cut out pieces rather than pre-cutting them. This ensures proper adhesion by preventing loss of glue.
Straight Roads#
Each straight road segment has:
Solid white markings on the outer sides of the lanes (right of the direction of travel).
Dashed yellow markings at the center.
Each lane is 21 cm wide (from the end of the white to the beginning of the yellow).
Assembly#
Refer to Fig. 37 for the following steps:
Place the yellow tape in the middle of the tile
Ensure the yellow tape is properly centered, with a distance of 27.25 cm from the tape’s edge to the tile’s edge
Cut the yellow tape into 2.5 cm pieces, starting 5 cm from the tile’s outer edge.
Add white lane markings at the outer parts of the tile, 21 cm from the yellow tape
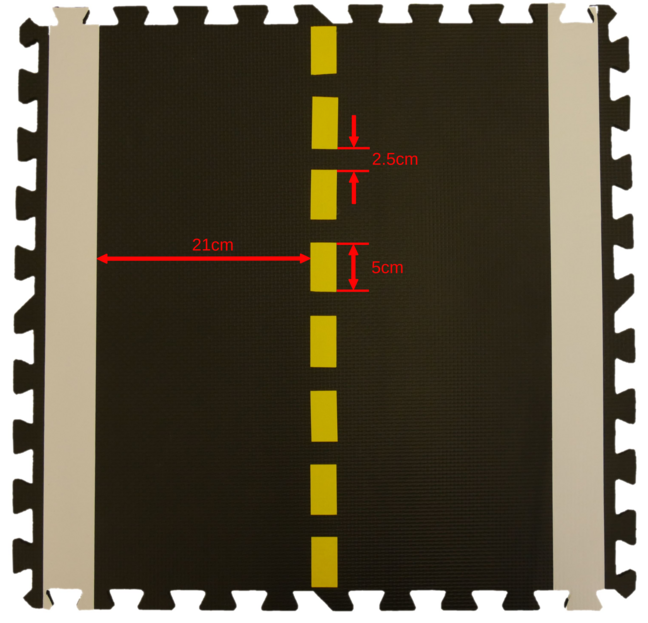
Fig. 37 Finished straight road segment with measurements.#
Curved Roads#
Each curved road segment has:
Solid white markings on the outer sides of the lanes (right of the direction of travel).
Dashed yellow markings at the center.
Each lane is 21 cm wide (from the end of the white to the beginning of the yellow).
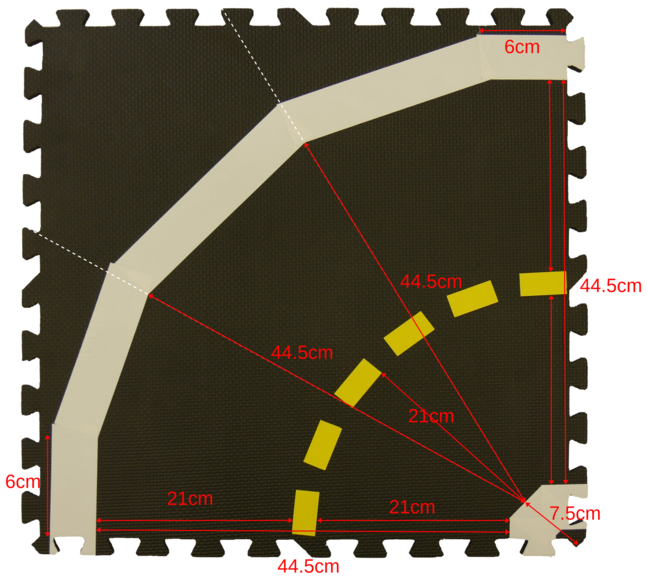
Fig. 38 Final result: curved Duckietown tile (with measurements)#
Assembly#
If you have a laser cutter, use the provided Duckietown curve tile construction template to proceed more swiftly and precisely in the assembly process.
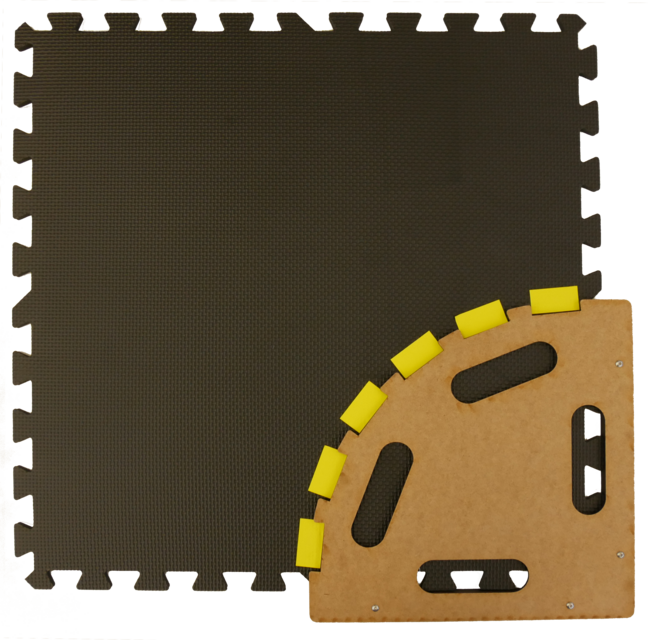
Fig. 39 Using the provided construction template makes building Duckietown curve tiles more joyful#
Without construction template, mark a quarter-circle path for the yellow tape using a string. Follow the guidelines for tape placement and lane width measurements in Fig. 40.
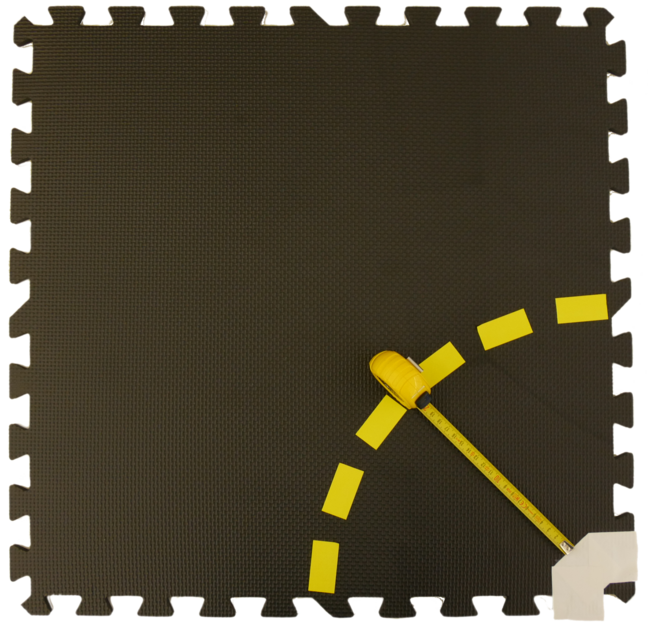
Fig. 40 Start from the yellow line and then measure the lane width to determine the position of the white tape#
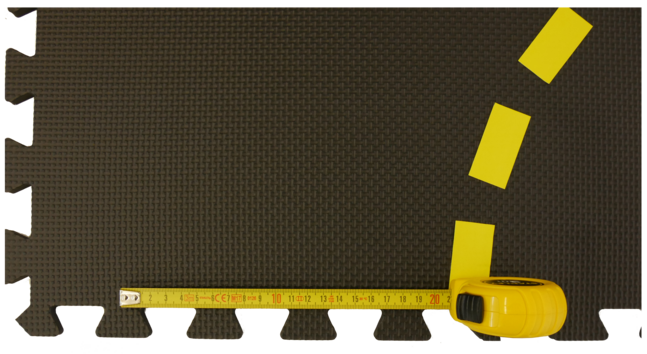
Fig. 41 Take 3-5 measurement points across the quarter-circumference to identify the location of the outer lane white tape. Aim to having the correct lane width but do not overdo it, autonomy algorithms should be robust to small variations of lane widths.#
Intersections#
Each intersection (3- or 4-way) has:
Solid white markings on the outer sides of the lanes.
Dashed yellow markings at the center.
Solid red markings for stop signs.
Each lane is 21 cm wide.
Assembly of 4-Way Intersection#
Place four yellow tape strips, centered and extending 6 cm from the tile’s edge.
Align red tape horizontally with the edge and cut it to 21 cm, as shown in Fig. 42.
Cut yellow markings into 5 cm pieces and add white tape at the corners.
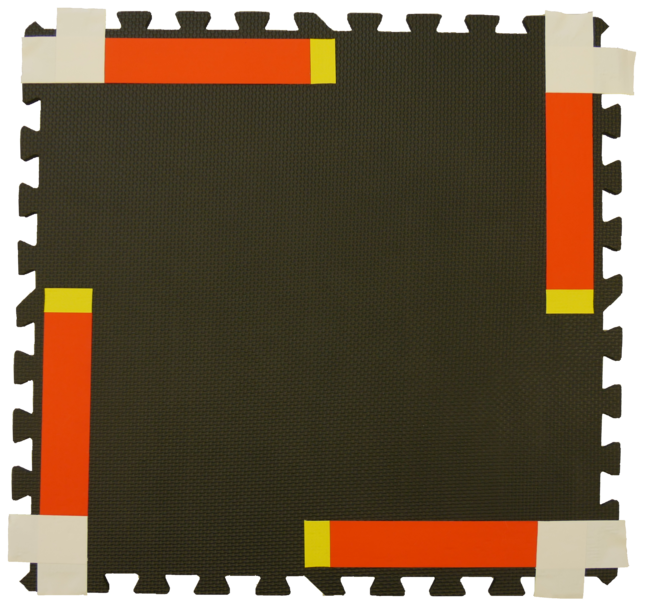
Fig. 42 4-way intersection road segment.#
Assembly of 3-Way Intersection#
3-way intersections follow the same process, except one edge uses white tape instead of red and yellow. The result can be seen in Fig. 43.
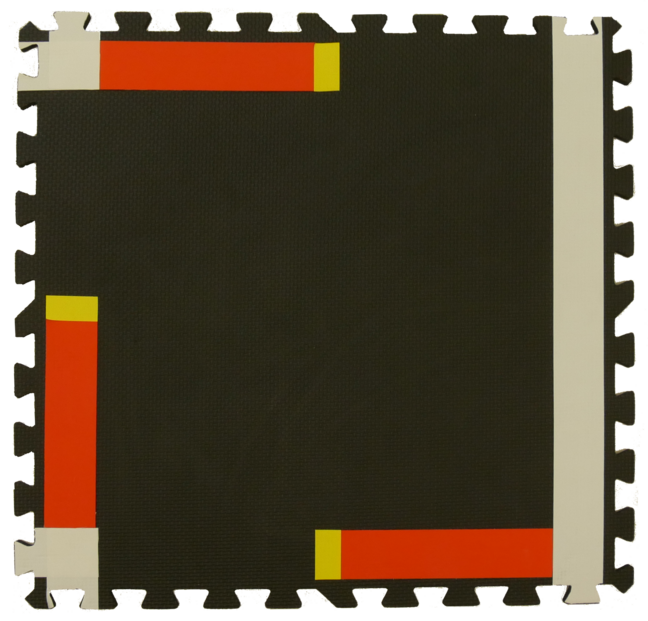
Fig. 43 3-way intersection road segment.#
Troubleshooting#
Troubleshooting
SYMPTOM
My tape tends to detach from the tiles. The glue is no good.
RESOLUTION
Follow these steps:
Clean tiles with a water and alcohol solution to remove residual oils, and dry them completely.
Apply tape directly to the tiles and cut on-site to maintain glue strength.
Use a heat source (e.g., a hair dryer) to warm the tape after application, softening the glue for better adhesion.