Autolab map editor
Contents
Autolab map editor#
Requires: Knowledge about what a Autolab is
Results: created map for Duckietown
Map editor#
You can launch the map editor, using command:
laptop $ dts map editor
You will see:
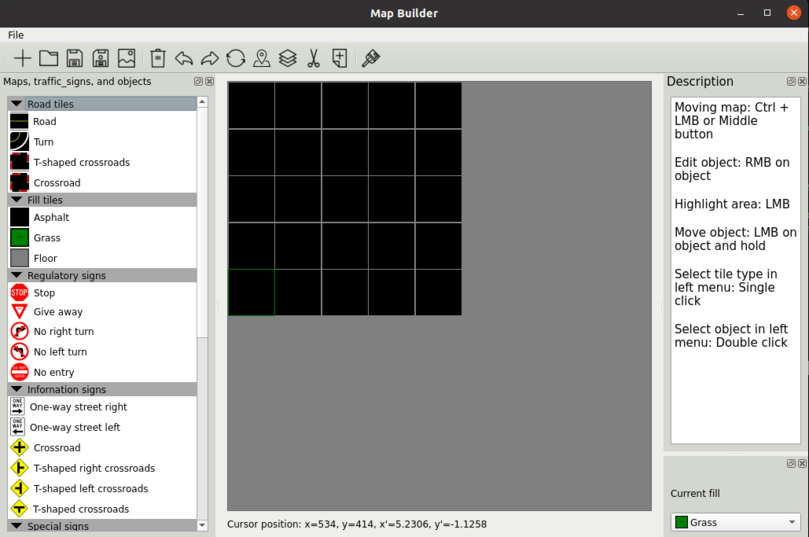
Fig. 2 Fig 1. Map editor interface#
How to create a new map?#
You should specify sizes(width, height) of the map, the size of tiles(width, height), map name and folder for saving map, base title for filling map.
Default map size: (5, 5)
Default tile size: (0.585, 0.585)
Default map name: map_1
Default folder in docker: /out/maps/map1
Default title: asphalt
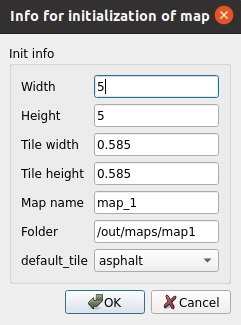
Fig. 3 Fig 2. Create map form#
Then the map generation process should be initialized. Sample editor window:
Fig. 4 Fig 3. Created map#
How to add an object to the map#
You can add any object(s) from the left menu except the first two blocks, “Road tiles” and “Fill tiles”, which describe the types of tiles. For adding an object, you should double-click on the object in the left menu.
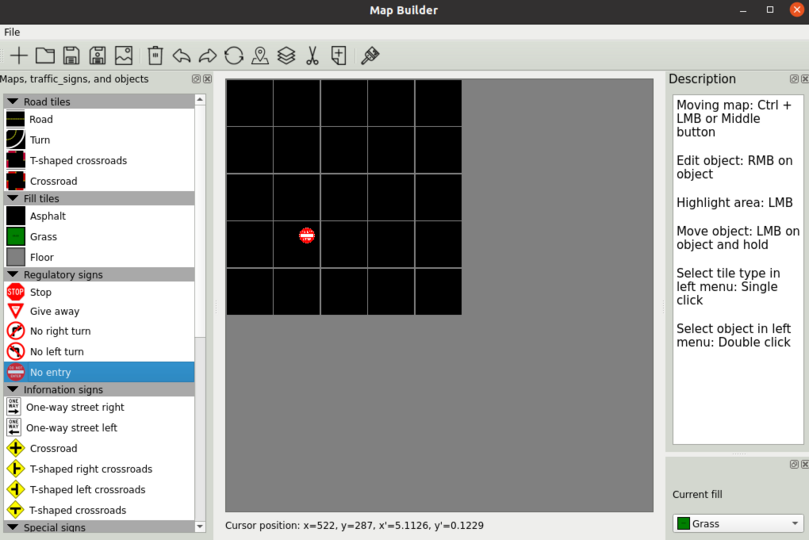
Fig. 5 Fig 4. Add object on map#
For editing attributes of an object you should do right-click on the object and edit its attributes in the opened window. The window should look like:
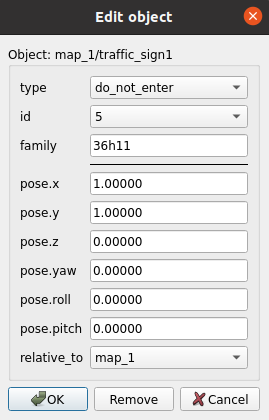
Fig. 6 Fig 5. Edit object form#
For editing tiles, you should activate the brush mode (see Fig.6). After that, you should choose the type of tiles in the left menu. Then, one could select/brush the grids to apply the selected tile type.

Fig. 7 Fig 6. Brush button#
See Fig. 7 for the illustrated outcome.
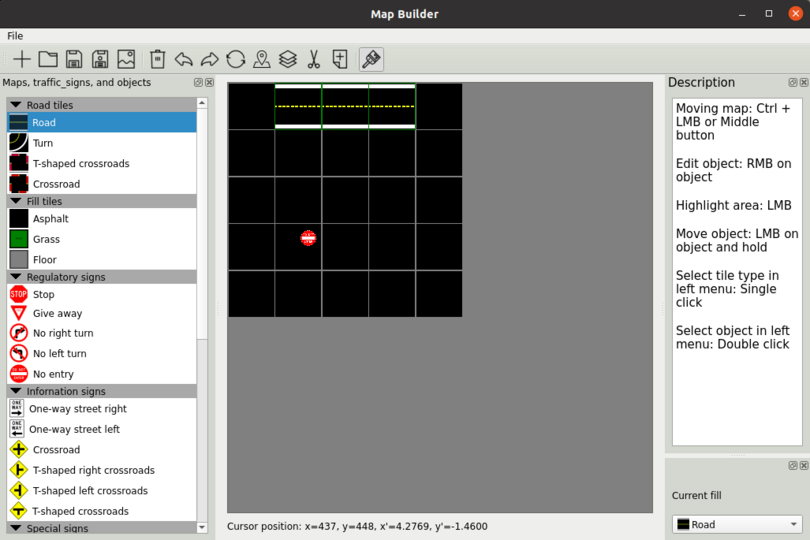
Fig. 8 Fig 7. Painting tiles#
Select objects#
For selecting objects you should click on them. See Fig. 8 for the illustrated outcome.
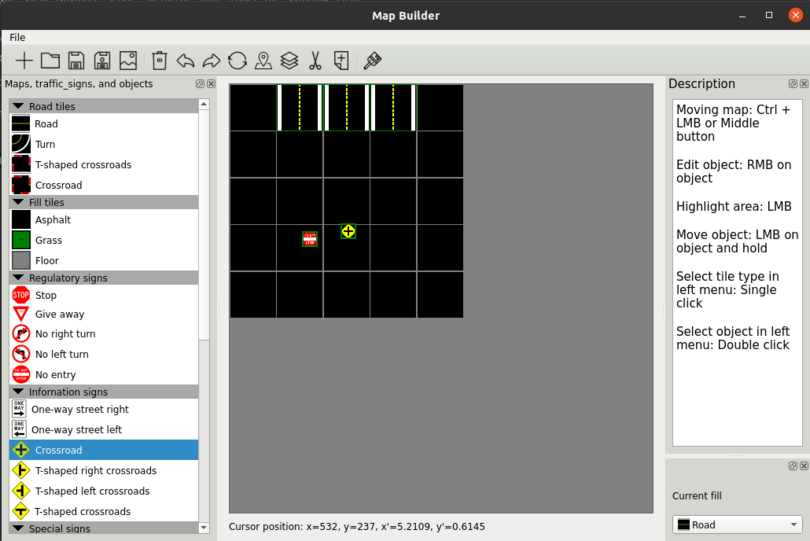
Fig. 9 Fig 8. Select objects#
Rotate tiles and objects#
For rotation you should select required tiles and objects and click the rotation button in the toolbar (see Fig. 9).

Fig. 10 Fig 9. Rotate button#
See Fig. 10 for the illustrated outcome.
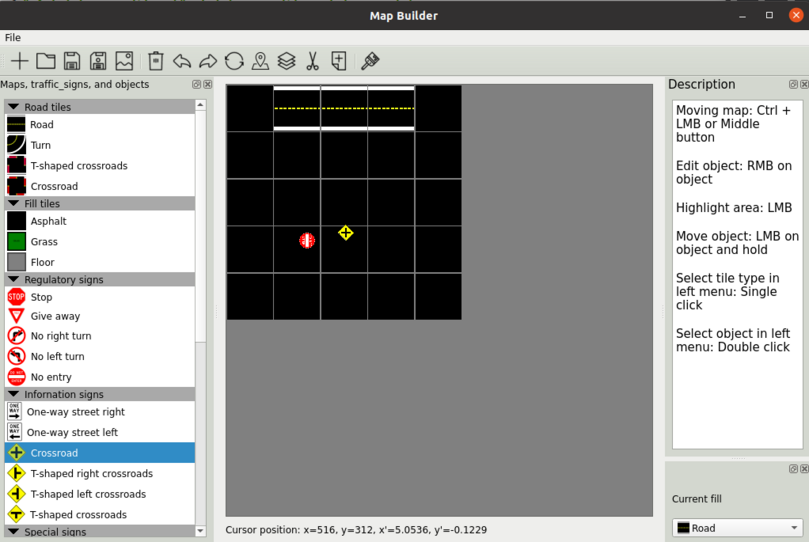
Fig. 11 Fig 10. Rotation result#
Delete objects#
For deletion you should select required objects and click the delete button in the toolbar (see Fig. 11).

Fig. 12 Fig 11. Delete button#
Copy tiles and objects#
For copy you should select required tiles and objects and click the copy button in the toolbar (see Fig. 12).

Fig. 13 Fig 12. Copy button#
For example select a straight road tiles on Fig. 13 and copy them.
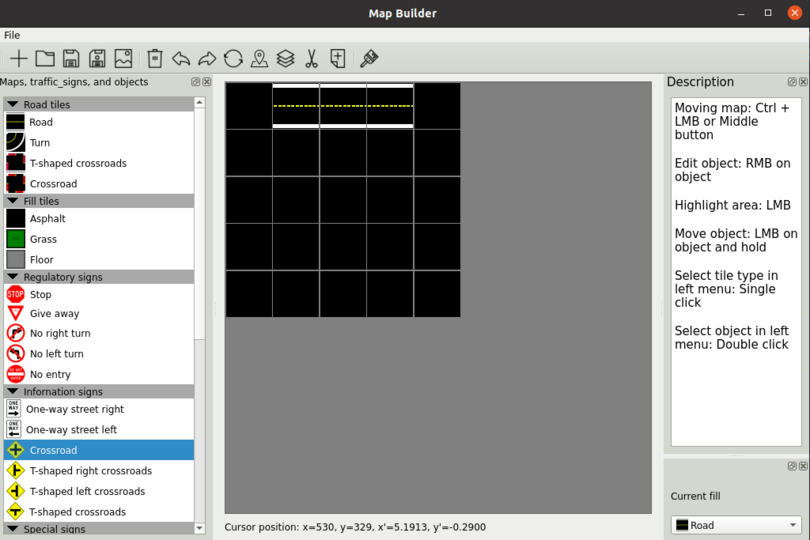
Fig. 14 Fig 13. Select tiles for copy#
Paste objects#
For paste you should copy tiles and objects, click on tile on map and then click the paste button in the toolbar (see Fig. 14).

Fig. 15 Fig 14. Paste button#
See Fig. 15 for the illustrated outcome.
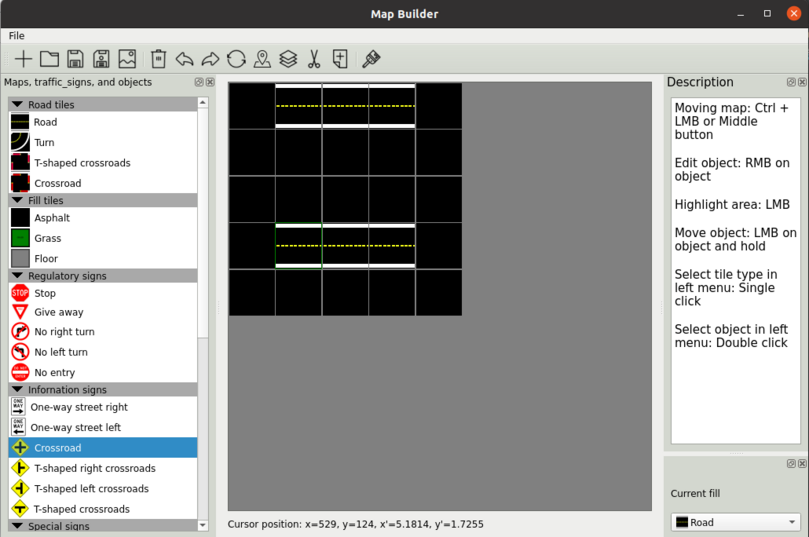
Fig. 16 Fig 15. Pasting result#
Cut objects#
For cut you should select required tiles and objects and click the cut button in the toolbar (see Fig. 16). Tiles will replace on type asphalt, objects will be deleted. Cut tiles and objects will copy.

Fig. 17 Fig 16. Cut button#
Save map to png#
For save map to image you should click the save to png button in the toolbar (see Fig. 17).

Fig. 18 Fig 17. Save map to png button#
Then select desired name for saving image and it’s height in form (see Fig. 18).
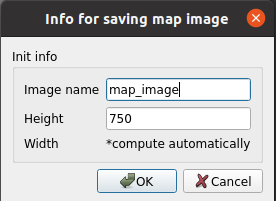
Fig. 19 Fig 18. Save map to png form#
The image is saved in the directory from which the editor is launched. See Fig. 19 for the illustrated outcome.
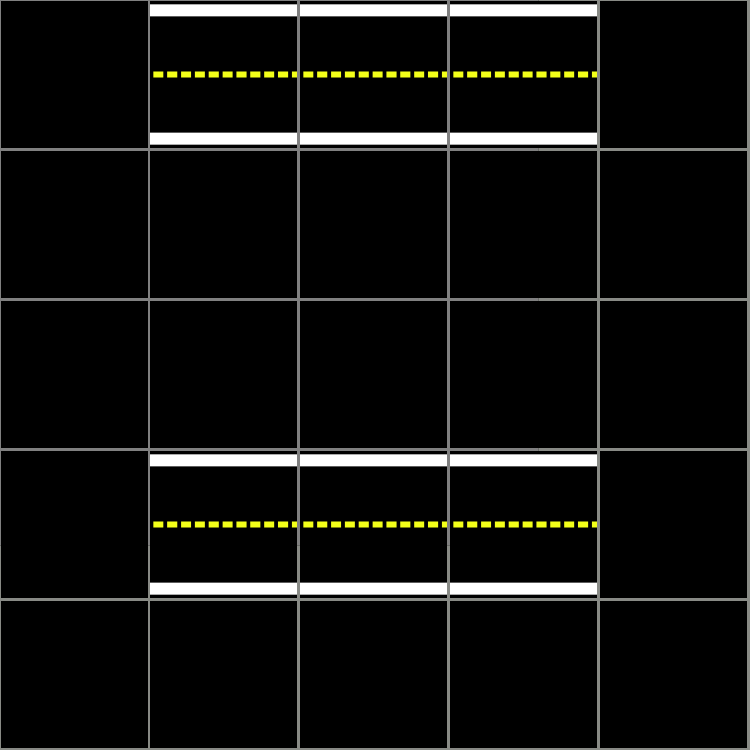
Fig. 20 Fig 19. Result saved map to png#
Save map#
For the save map you should click the save button in the toolbar (see Fig. 20). If you want to select a folder to save the map you should click the save map as button in the toolbar (see Fig. 21) and select the folder on the filesystem which will save the map (see Fig. 22).

Fig. 21 Fig 20. Save map button#

Fig. 22 Fig 21. Save map as button#

Fig. 23 Fig 22. Select folder in filesystem for saving map#
Open map#
For opening map you should click the open button in the toolbar (see Fig. 23) and select the folder on the filesystem which will open map (see Fig. 24).

Fig. 24 Fig 23. Open map button#
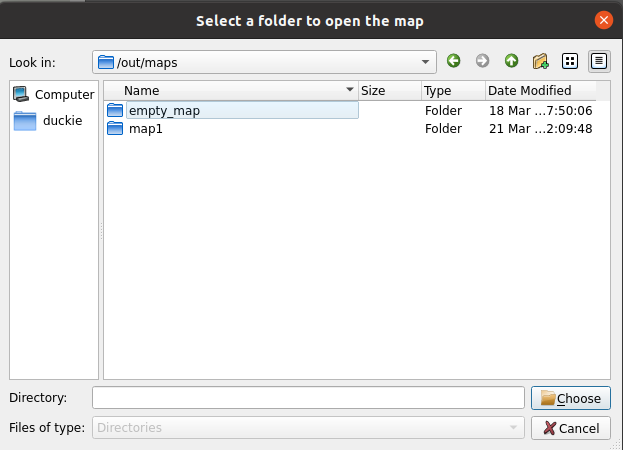
Fig. 25 Fig 24. Select folder in filesystem for opening map#
Moving map#
For moving map you should click the middle button on mouse and drag map (see Fig. 25).
Fig. 26 Fig 25. Map before dragging#
See Fig. 26 for the illustrated outcome.
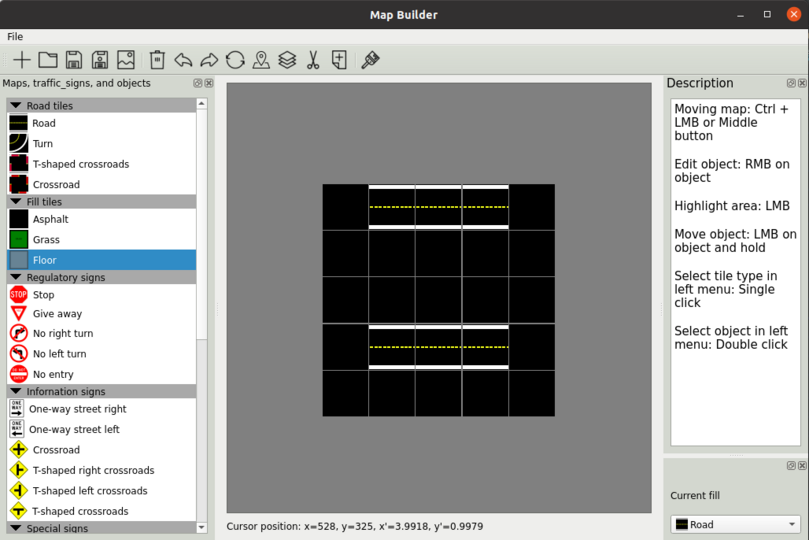
Fig. 27 Fig 26. Map after dragging#
For move the map to the left high corner of the window you should click the corner button in the toolbar (see Fig. 27).

Fig. 28 Fig 27. To the corner button#
Scale map#
For the scale map on the window you should roll the ring on the mouse.
Actions history#
For move through the history of changes, you need to click on the undo button (see Fig. 28) or the undo shift button (see Fig. 29).

Fig. 29 Fig 28. Undo button#

Fig. 30 Fig 29. Redo button#
Debug line#
On the bottom of the editor you will see a debug line with Qt coordinates and map-translated coordinates (see Fig. 30).
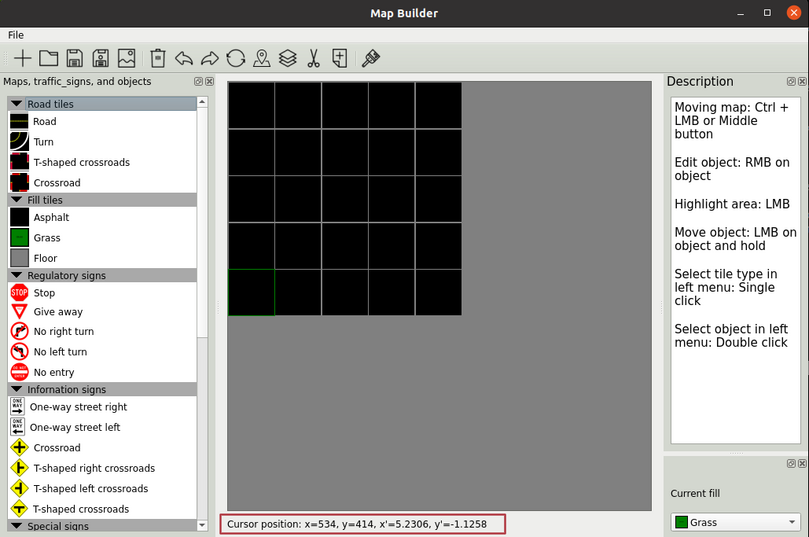
Fig. 31 Fig 30. Debug line#
Dynamic layers#
Dynamic layers are layers that are not defined in dt-maps, but can be read and configured directly from a file. At the moment, only reading and displaying such layers in the editor is available without the possibility of adding new objects of dynamic layers to the map.
To add a layer, create a file with the name of the layer, add layer objects with the desired configuration to it (Fig. 31). In the frame layer, add the location of the objects (Figure 32).
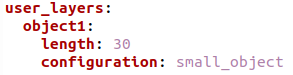
Fig. 32 Fig 31. Example of dynamic layer in yaml-file#
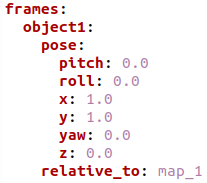
Fig. 33 Fig 32. Added frame objects for dynamic layers#
When opening the map, the objects of dynamic layers will be displayed as gray icons (Fig. 33).

Fig. 34 Fig 33. Dynamic layer objects on map#
Objects of dynamic layers can be changed using the edit form (Fig. 34).
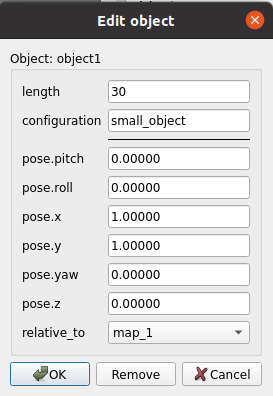
Fig. 35 Fig 34. Edit form for dynamic object#
Hotkeys#
Exit: Ctrl+Q
Create map: Ctrl+N
Open map: Ctrl+O
Save map: Ctrl+S
Save map as: Ctrl+Alt+S
Save to png: Ctrl+P
Delete: Ctrl+D
Undo: Ctrl+Z
Shift undo: Ctrl+Shift+Z
Rotate: Ctrl+R
To the corner: Ctrl+M
Copy: Ctrl+C
Cut: Ctrl+X
Paste: Ctrl+V
Brush mode: Ctrl+B