Layer - Tilemap
Contents
Layer - Tilemap#
The tilemap layer is the one defining the road network, i.e., the nodes and edges of the road system where Duckiebots will drive in.
Duckietown roads are obtained by applying colored lane markings to a black background.
Duckietown cities are a concatenation of fundamental building blocks. We often refer to these block as tiles, because of the medium we assemble them upon: foam “puzzle” tiles.
Each tile has rigorously defined geometry and color pattern and
represents one road element: straight, curve, 3-way intersection, 4-way intersection
and empty tile. These road elements are positioned in specific orders to create compliant Duckietowns.
The road elements are shown in Table 1.
Note
Road markings convey important information to the Duckiebots:
delimiting the lanes (white and yellow markings), and
identifying stop signs (red markings).
Note
The left turn and right turn tiles are symmetric: one is the 90 degree rotation of the other.
Each tile is square and measures 61 cm x 61 cm (2 ft x 2 ft) from the outer edges of the interlocking dents. The thickness of the tiles is not as important as the surface roughness, as long as the tiles are thick enough not to buckle. Tiles are used to guarantee a good grip between the Duckiebots and the road, to minimize slipping of the wheels.
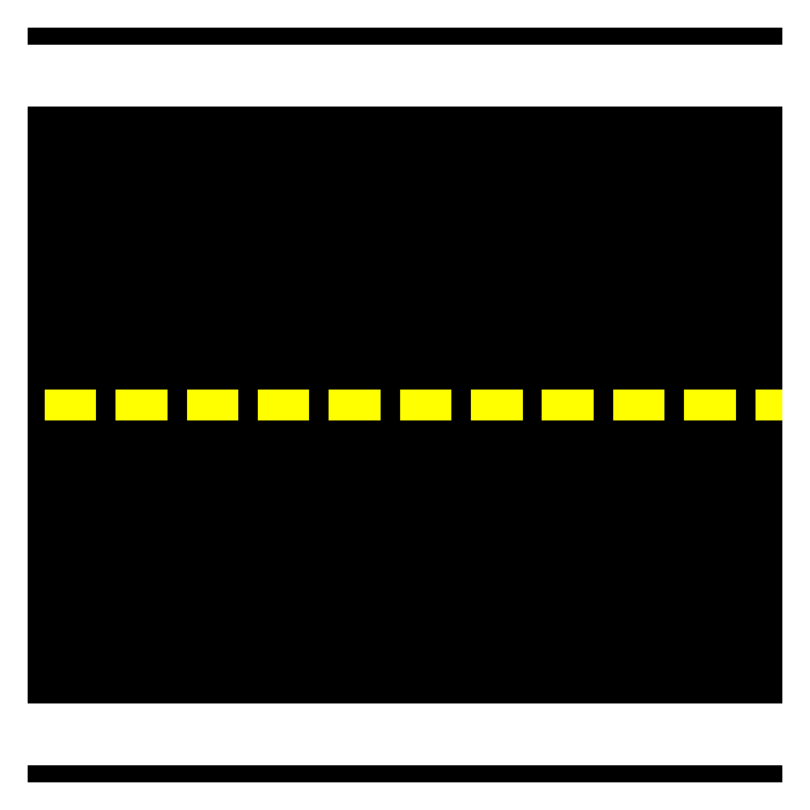
Fig. 1 The straight tile# |
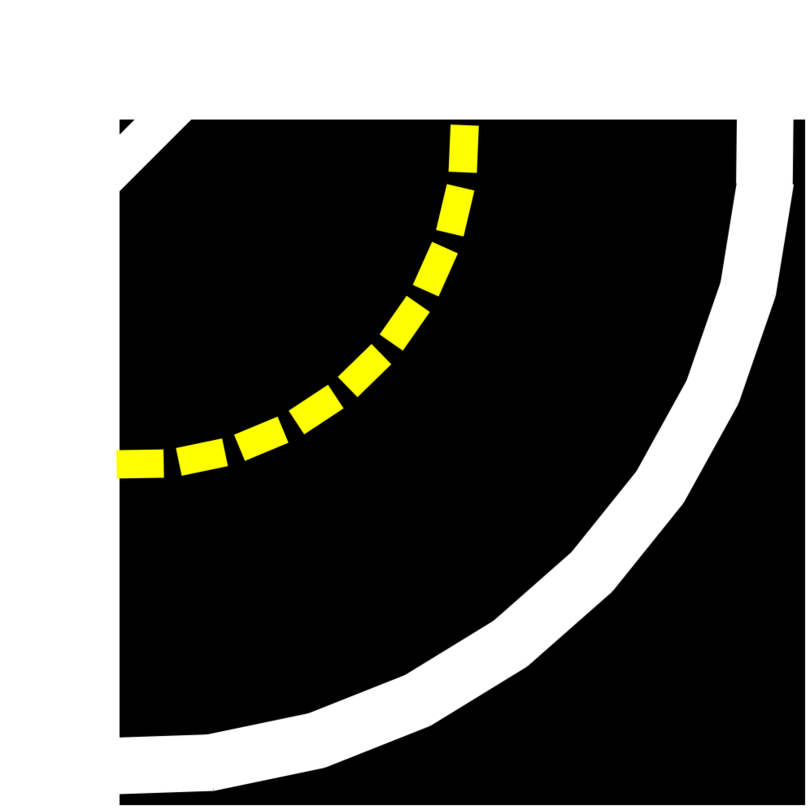
Fig. 2 The left curve tile# |
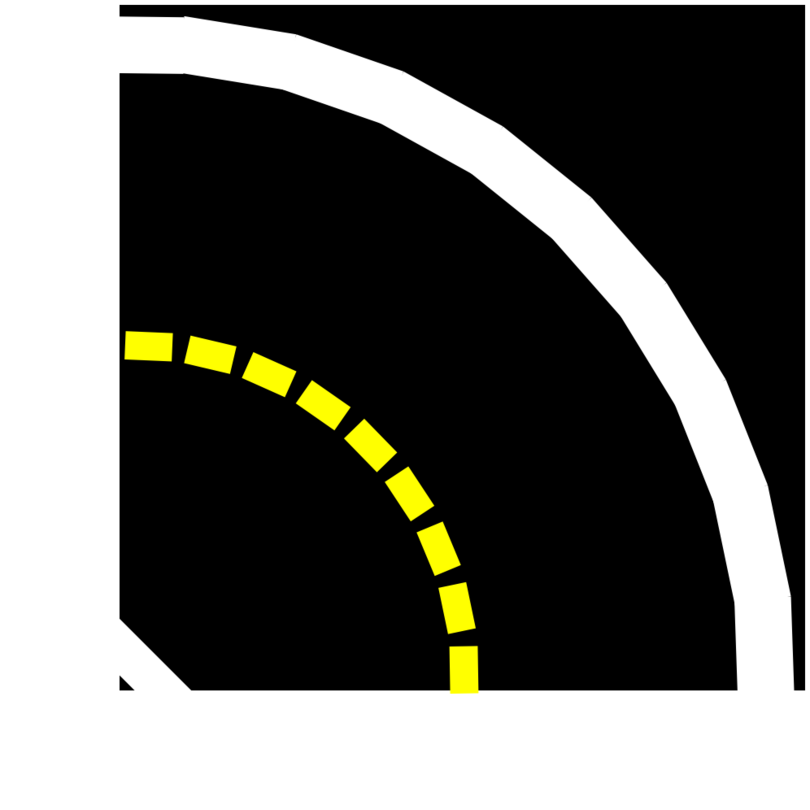
Fig. 3 The right curve tile# |
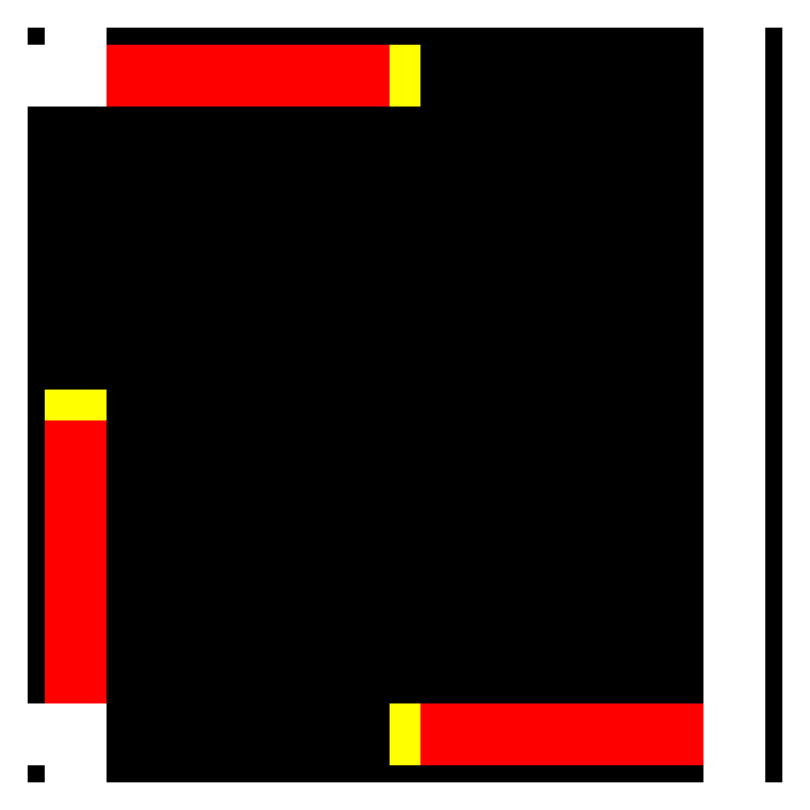
Fig. 4 The 3-way intersection tile# |
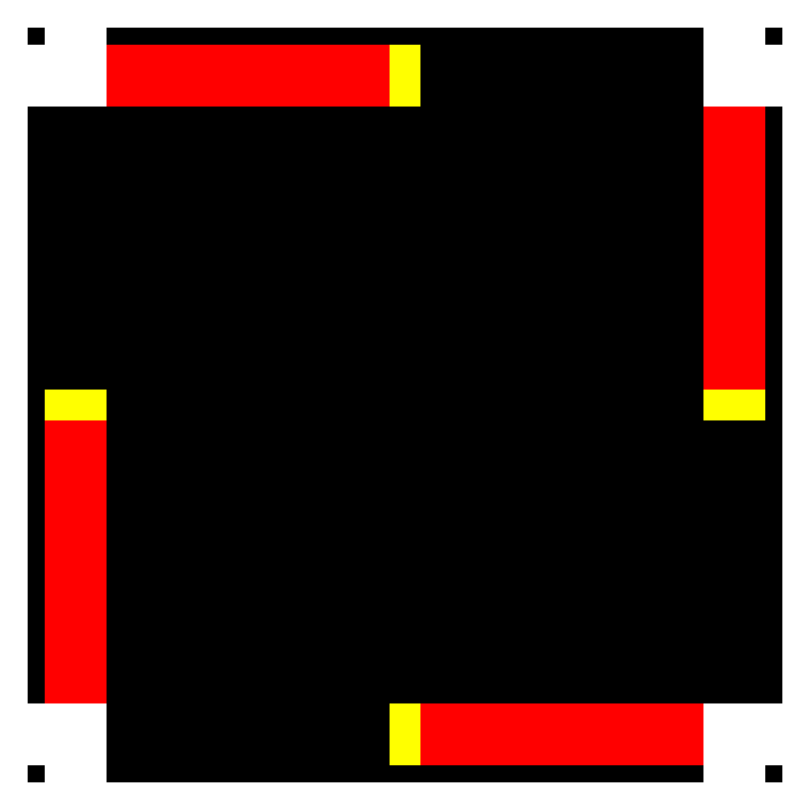
Fig. 5 The 4-way intersection tile# |

Fig. 6 The empty tile# |
Note
Empty tiles are not actually green, but have a black backround as all other tiles. We represent them as green here (recalling grass) to clearly distinguish them from road tiles.
The empty tiles can be of covered with, e.g., felt of any color. We discourage using the same colors as the road markings (red, white and yellow) or any material with reflective surface to minimize disturbances to the Duckiebots.
For tiles to become road elements, we need to apply road markings. Road markings can be obtained through the application of tapes of different colors and sizes.
Tapes#
There are 3 colors of tapes used in Duckietown: white, yellow, and red. All tapes used should have a matte surface.
The white tape#
Proposition
A Duckiebot on a road never collides with Duckiebots or other Duckietown elements if it never crosses or touches a white tape strip.
Here are some facts about the white tapes:
White tapes must be solid (not dashed);
The width of the white tape is roughly 4.8 cm (1.88 inches);
The white tape is always placed on the right hand side of a lane. We assume that the Duckiebots drive on the right hand side of the road.
For curved roads, the white lane marker is formed by five pieces of white tape, while the inner corner is formed by three pieces, placed according to the specifications in the image below, where the edge pieces are matched to adjacent straight or curved tiles (Fig. 7).
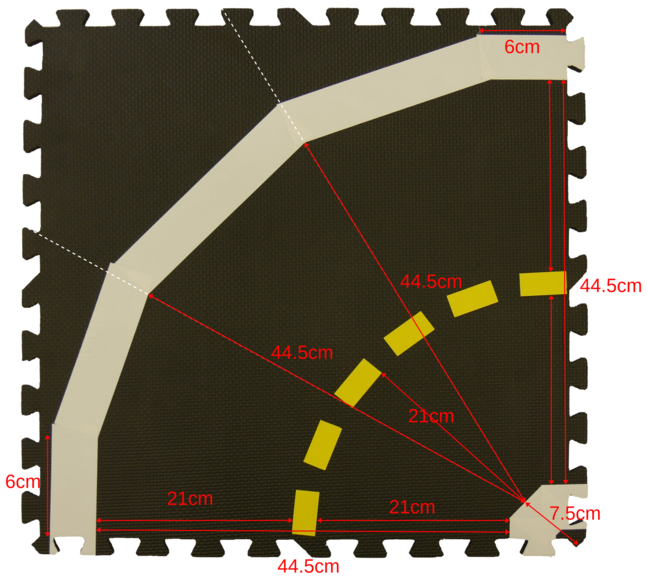
Fig. 7 The specification for a curved road tile#
The yellow tape#
Here are some facts about the yellow tapes:
Yellow tape must be dashed (not solid);
Each piece should be 5 cm long and placed with a 2.5 cm gap between each piece;
The width of the yellow tape is roughly 2.4cm (0.94 inches);
The yellow tape is always placed on the left hand side of a lane, i.e., in the center of the road. We assume that the Duckiebots drive on the right hand side of the road.
Yellow tapes on curves: see curved road image (Fig. 7) in white tape section. Pieces at tile edges should be in center of lane, piece at the middle of the curve should be approximately 21 cm from middle of inner center white piece of tape, with approximated circular arc in between.
The red tape#
Red tapes MAY only appear on intersection tiles.
The width of the red tape must be the same as the white roll (roughly 4.8cm or 1.88 inches) and should cross the entire lane perpendicular to the road.
The placement of red tape should always be under yellow and white tape, as shown, e.g., in Fig. 9 or Fig. 10.
A Duckiebot navigates Duckietown by a sequence of:
Navigating one or more straight tiles until a red tape appears,
Waiting for the coordination signal,
Executing an intersection traversal,
Re-localizing in a straight tile.
Proposition
If the Duckiebot stops before or ON the red strip, no collisions are possible.
Topological Constraints During Map Construction#
Here are some topological rule constraints that must be met:
An intersection can NOT be adjacent to a curved road tile or another intersection tile.
Any two adjacent non-empty tiles must have a feasible path from one to the other of length two: if they are adjacent, they must be connected.
Here are some examples of conforming topologies:

Fig. 8 A 3-by-3 city loop#

Fig. 9 Four way intersection usage#
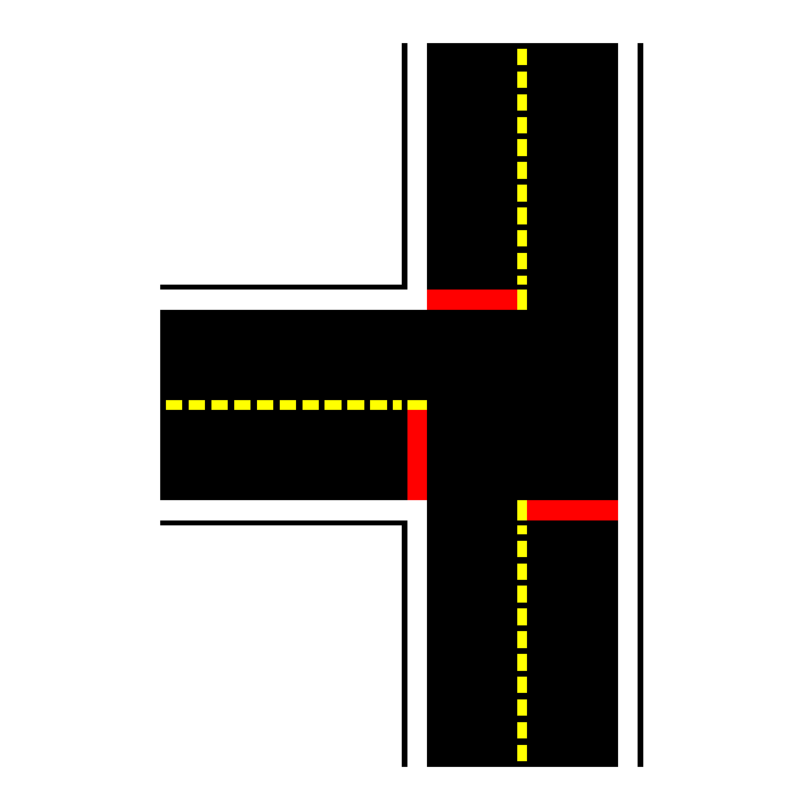
Fig. 10 Three way intersection usage#
Some examples of non-conforming topologies are shown in the figure below.
 Fig. 11 Topology violates rule 2 since the bottom two curved tiles are adjacent but not connected# |
 Fig. 12 Topology violates rule 1 since curved tiles are adjacent to intersection tiles# |
 Fig. 13 Topology violates rule 2 since left-most tiles are adjacent but not connected# |