Calibration - Kinematics
Contents
Calibration - Kinematics#
This section describes how to perform the kinematics calibration procedure for your Duckiebot.
What you will need
You can make your Duckiebot move.
What you will get
Your Duckiebot’s kinematics will be calibrated.
Attention
Complete both the camera and kinematics calibration procedures before running any Duckietown demos.
The easiest way to perform the kinematics calibration procedure for your Duckiebot is by using the Keyboard Controller.
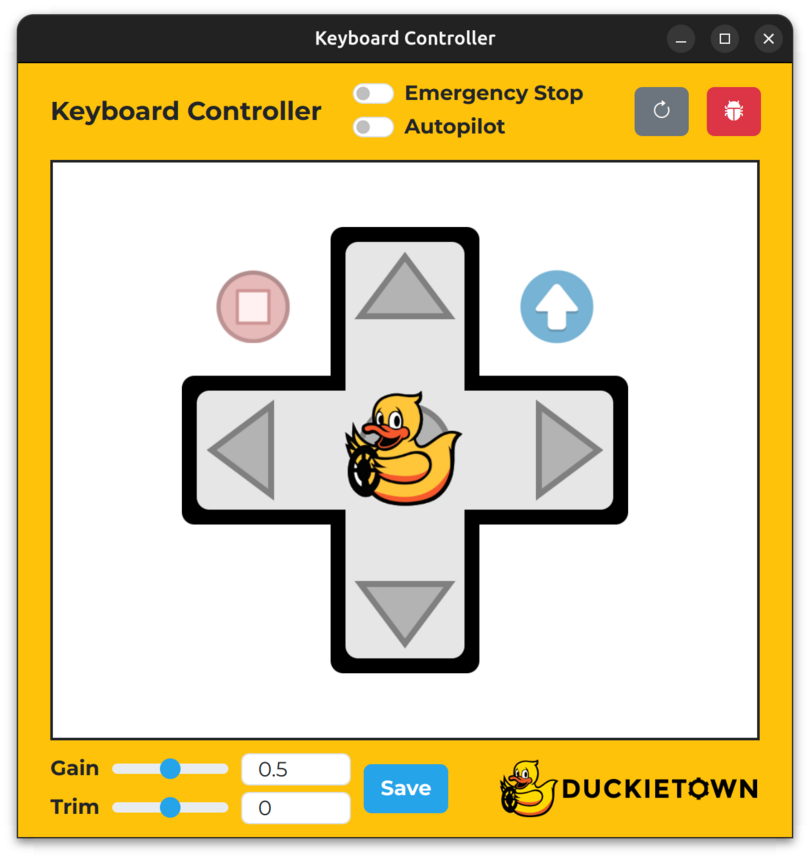
Fig. 62 The Keyboard Controller.#
To activate the Keyboard Controller, run:
dts duckiebot keyboard_control ![DUCKIEBOT_NAME]
Note the keys in the table below.
Key |
Function |
|---|---|
W |
Drive forwards |
S |
Drive backwards |
A |
Turn left |
D |
Turn right |
E |
Toggle the |
F |
Toggle the |
X |
Increase the |
Z |
Decrease the |
V |
Increase the |
C |
Decrease the |
Space |
Save the |
R |
Refresh the window |
T |
Open the |
Procedure#
To perform the kinematics calibration procedure:
Create a slightly greater than
2 mlong straight line on your floor using tapePlace your Duckiebot at one end of the line
Note your Duckiebot’s position
Face your Duckiebot towards the other end of the line
Drive your Duckiebot forward for about
2 mNote your Duckiebot’s position
Measure the distance between the center of the tape and the center of your Duckiebot’s axle using a ruler, making sure that the ruler is perpendicular to the tape
Decrease (resp., increase) the
Trimand repeat steps 2-8 if your Duckiebot drifted to the left (resp., right) side of the tape by more than10 cmSet the
GainClick the
Savebutton
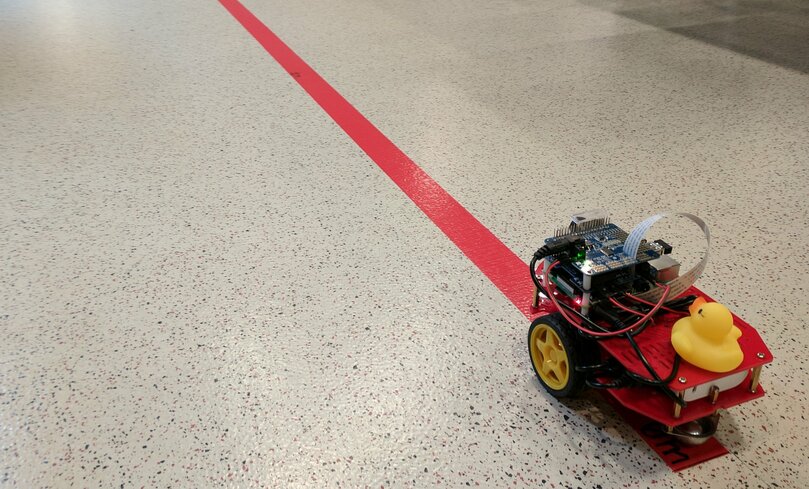
Fig. 63 A straight line used for the kinematics calibration procedure.#
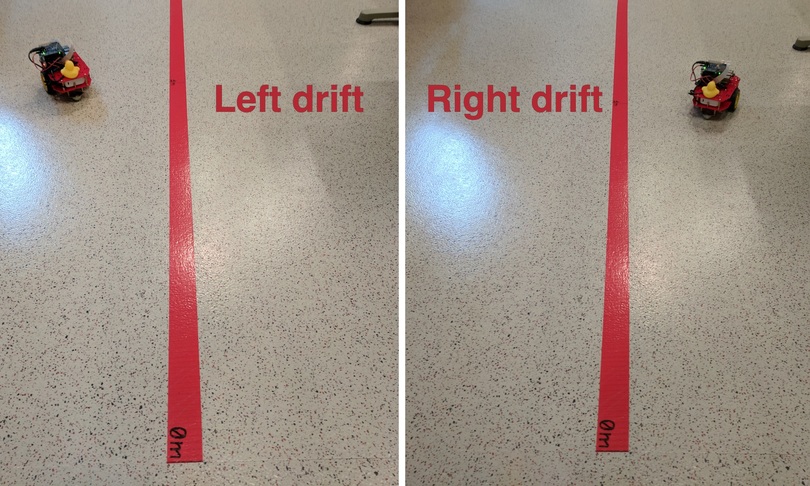
Fig. 64 Left/right drift.#
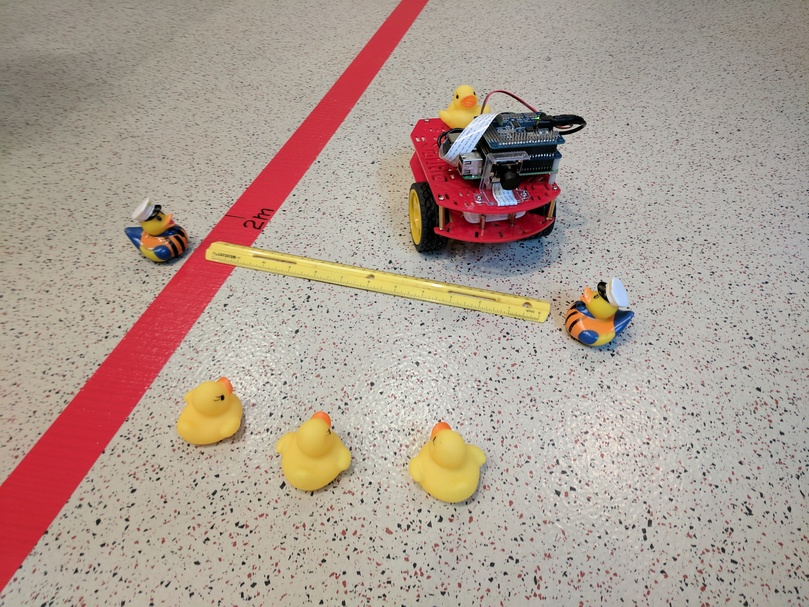
Fig. 65 Measuring the amount of drift after driving forward for about 2 m.#
To confirm that a new kinematics calibration file has been created on your Duckiebot, run the following command and inspect the contents of the Kinematics panel:
dts duckiebot dashboard ![DUCKIEBOT_NAME] --page robot/calibrations
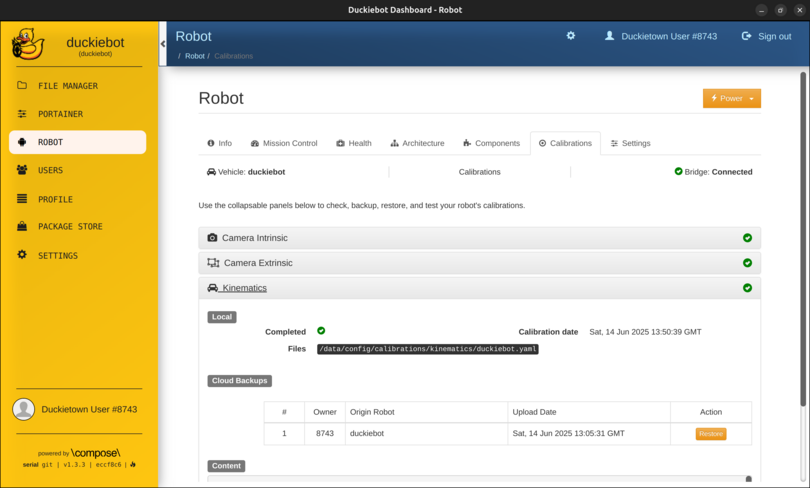
Fig. 66 The Kinematics panel on the Robot page of the Dashboard.#
Note
Within the Kinematics panel, under Local, you should see a tick next to Completed, the calibration date next to Calibration date and /data/config/calibrations/kinematics/![DUCKIEBOT_NAME].yaml next to Files.
For more information on odometry and odometry calibration, review:
Troubleshooting#
Troubleshooting
SYMPTOM
My Duckiebot does not move after going through Operation - Make it Move - Troubleshooting.
RESOLUTION
Contact support.