Subscribe to camera
Contents
Subscribe to camera#
What you will need
A Duckietown robot turned ON and visible on
dts fleet discover
What you will get
Learn how to receive camera images from your robot using a ROS Subscriber
Topic and message type of interest#
As you should know by now, ROS allows different processes to communicate with one another by exchanging messages over topics. In order for two ROS nodes to be able to talk, they need to agree on a topic name (e.g., camera images), and a message type (e.g., each message is a JPEG image).
In ROS, a topic is identified by a string (e.g., camera/image), while message types are defined using
the official messages description language.
In the case of the camera sensor, the topic used by the Duckiebot to publish camera frames
is /ROBOT_NAME/camera_node/image/compressed, while the message type used over this topic is the standard
sensor_msgs/CompressedImage,
and contains the following fields.
std_msgs/Header header
string format
uint8[] data
where,
header: is the standard ROS header object;format: specifies the format of the data, for example,pngorjpeg;data: is an array of bytes containing the actual image in the format specified;
Create Subscriber ROS Node#
In Create a new Catkin package, we learned how to make a new Catkin package. We will assume that a
catkin package already exists, i.e., packages/my_package/. You can reuse the one we created earlier.
We now use our favorite text editor to create the file
camera_reader_node.py inside the src/ directory of our catkin package and add the following content,
#!/usr/bin/env python3

import os
import rospy
from duckietown.dtros import DTROS, NodeType
from sensor_msgs.msg import CompressedImage

import cv2
from cv_bridge import CvBridge

class CameraReaderNode(DTROS):

    def __init__(self, node_name):
        # initialize the DTROS parent class
        super(CameraReaderNode, self).__init__(node_name=node_name, node_type=NodeType.VISUALIZATION)
        # static parameters
        self._vehicle_name = os.environ['VEHICLE_NAME']
        self._camera_topic = f"/{self._vehicle_name}/camera_node/image/compressed"
        # bridge between OpenCV and ROS
        self._bridge = CvBridge()
        # create window
        self._window = "camera-reader"
        cv2.namedWindow(self._window, cv2.WINDOW_AUTOSIZE)
        # construct subscriber
        self.sub = rospy.Subscriber(self._camera_topic, CompressedImage, self.callback)

    def callback(self, msg):
        # convert JPEG bytes to CV image
        image = self._bridge.compressed_imgmsg_to_cv2(msg)
        # display frame
        cv2.imshow(self._window, image)
        cv2.waitKey(1)

if __name__ == '__main__':
    # create the node
    node = CameraReaderNode(node_name='camera_reader_node')
    # keep spinning
    rospy.spin()
Again, we make our node executable,
chmod +x ./packages/my_package/src/camera_reader_node.py
Define launcher#
Similarly to what we did in the section Define launcher, we create a new launcher file
./launchers/camera-reader.sh with the content,
#!/bin/bash

source /environment.sh

# initialize launch file
dt-launchfile-init

# launch subscriber
rosrun my_package camera_reader_node.py

# wait for app to end
dt-launchfile-join
Let us now re-compile our project using the command
dts devel build -f
Launch the node#
We are now ready to run our camera reader node,
dts devel run -R ROBOT_NAME -L camera-reader -X
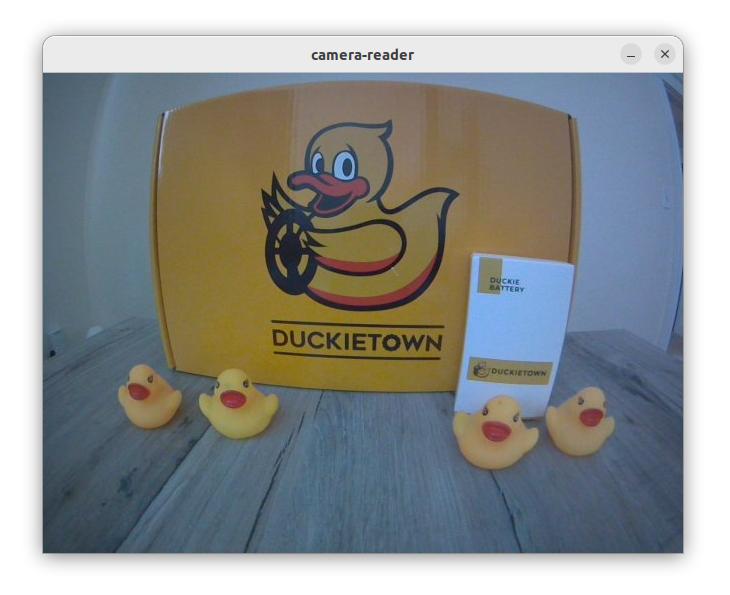
This will open a new window like the following,

Fig. 10 Camera feed window.#
If you want to stop the node, just use Ctrl+C in the terminal.
Note
We used the flag -X to instruct dts to allow this project to create new windows on this computer’s screen.
Attention
The trick we learned in Run locally to speed up our development
workflow becomes mandatory here. In fact, this particular node needs access to a screen to be able to open
the window showing the camera feed, hence the need to run it locally as the Duckiebot is not connected to
a monitor.
You can put this to the test by attempting to build and run this node
on the Duckiebot (using the -H ROBOT_NAME) flag, you will be presented the error cannot open display.
Congratulations 🎉
You just built and run your first ROS node connected to the existing ROS network exposed by the Duckiebot.
