Initializing the Flight Controller
Contents
Initializing the Flight Controller#
What you will need
A base station computer
Flight Controller
USB to USB-C cable
What you will get
An up-to-date, initialized Flight Controller
The Flight Controller (FC) implements several low-level behaviors, e.g., stabilizing the Duckiedrone around roll, pitch, and yaw through three different PID controllers. Correctly configuring the Flight Controller is critical for flying safely.
Installing Dependencies and Flashing Ardupilot Firmware#
1. Install dfu-util and screen:#
Connect the flight controller to a laptop running Ubuntu.
Update the package list:
sudo apt update
Install
dfu-utilandscreen:
sudo apt install dfu-util
2. Entering DFU Mode:#
Disconnect the USB cable connecting the Flight Controller to the Raspberry Pi and reconnect it while keeping the BOOT button on the side of the flight controller pressed.\
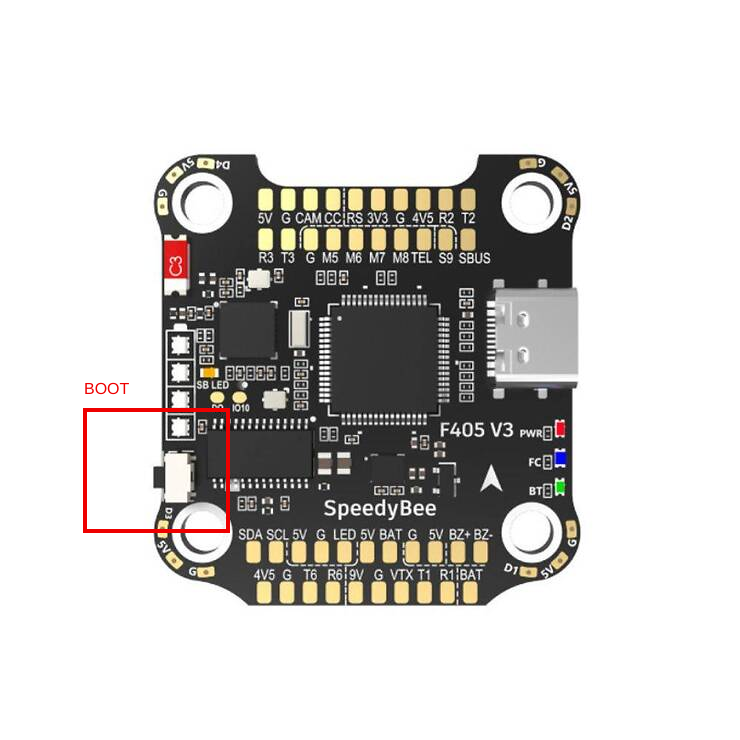
Fig. 15 SpeedyBee F405v3 BOOT button location.#
After a couple of seconds you can release the BOOT button.
Execute the command
sudo dfu-util -l, you should see a list of devices available to be flashed, as in the following image:
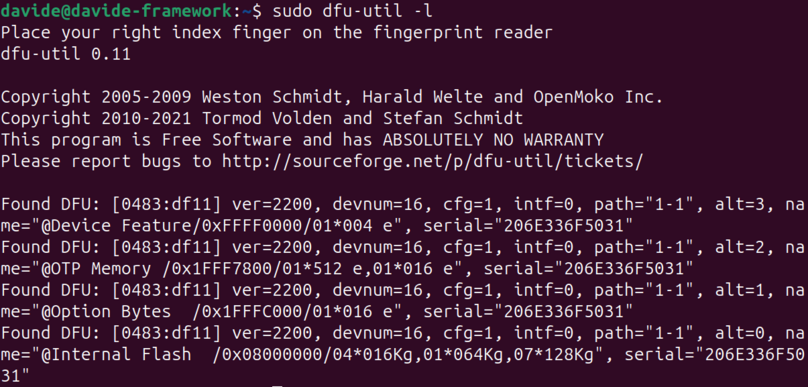
Fig. 16 List of devices in DFU mode output by dfu-util.#
3. Download and Flash the Firmware:#
Run the following command:
wget https://github.com/duckietown/duckiedrone-ardupilot-driver/blob/6f3bfa7fe7ad8ab06c829e1f915409ab7486f42f/assets/speedybeef4v3_bl.bin
Run dfu-util to flash the firmware:
sudo dfu-util -a 0 -s 0x08000000:leave -d 0483:df11 -D speedybeef4v3_bl.bin
Tip
Explanation of the dfu-util command:
sudo: Grants administrative privileges to run the command.dfu-util: The name of the utility used for flashing firmware.-a 0: Selects the first DFU device (adjust if there are multiple).-s 0x08000000:leave: Sets the address and size for the new firmware.-d 0483:df11: Defines the vendor ID (0483) and product ID (df11) for Ardupilot devices.-D speedybeef4v3_bl.bin: Specifies the filename of the firmware to be flashed.
The flashing process might take a few minutes. Once finished, the flight controller will reboot.
Install the Ardupilot firmware#
You will need to flash a custom build of the Ardupilot firmware, it can be downloaded from this link.
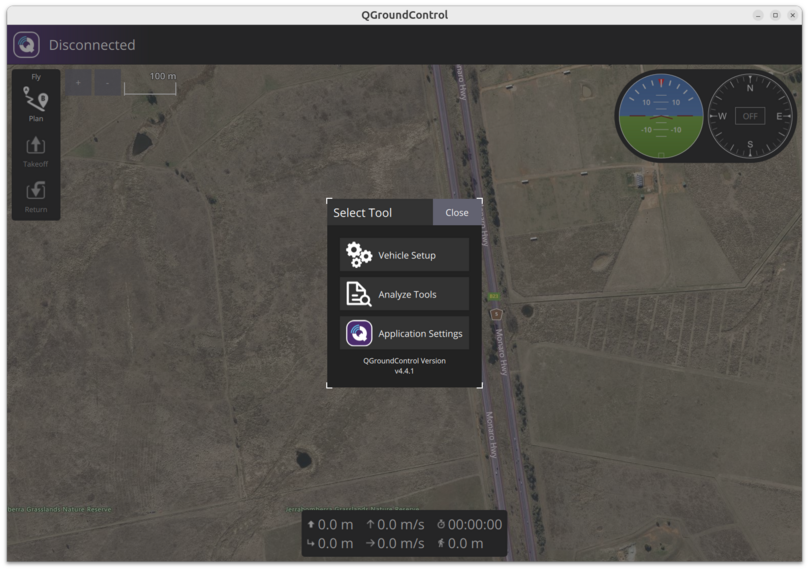
Start QGroundControl.
Go into the “Vehicle Setup” tab by first clicking on the QGroundControl logo.
Go into the “Firmware Flasher” tab by clicking on “Firmware” in the left sidebar.
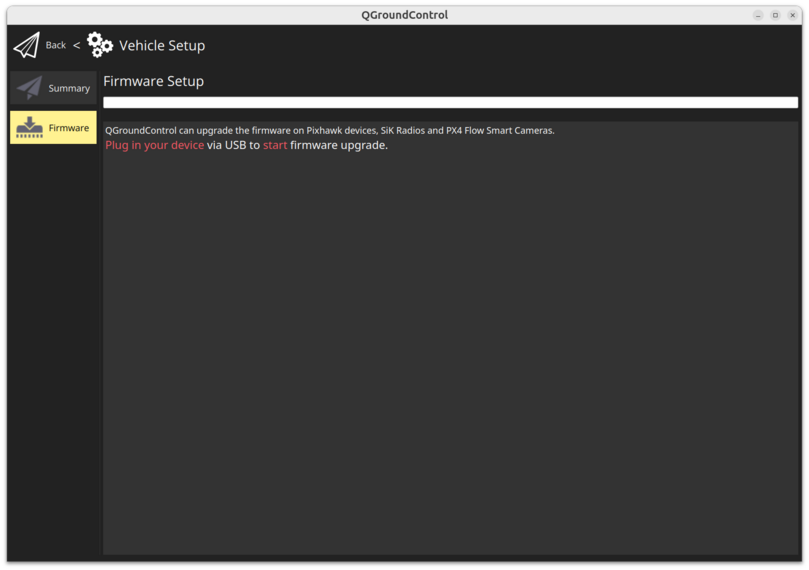
Connect the Flight Controller through USB and select the
Ardupilotoption for the firmware, tickingAdvanced Settingsand then selectingCustom firmware file.... A file manager window will open to allow you to pick thearducopter.binfile you have just downloaded.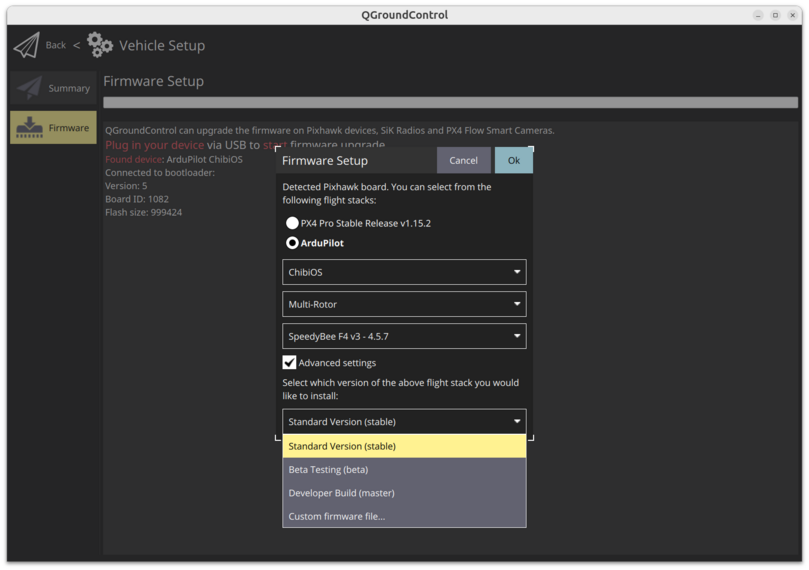
Here is a video summing up the process:
Starting the drone software stack#
Now you will need to start the drone software stack, allowing you to connect to the flight controller from your laptop.
To do so you need to use the Duckietown shell dts.
Attention
Make sure that the dts on your laptop is:
Running the
entedistribution. You can check by runningdts profile listUpdated to the latest version by running:
dts update
To start the flight software stack execute the command
dts duckiebot update -t duckiedrone --distro=ente -f [ROBOT_NAME]
Wait for the command to terminate before proceeding to the next step.
Connecting to the Flight Controller#
Attention
Unplug the battery from your drone!
Installing QGroundControl and Restoring the correct parameters#
By following these steps, you will be able to install QGroundControl, connect to your flight controller via TCP, and restore your vehicle’s parameters from a .param file. You can download the correct .param file from this link.
Install QGroundControl:`
Go to the QGroundControl website and download the installer for your operating system (Windows, macOS, or Linux).
Follow the installation instructions for your OS:
Windows: Run the installer and follow the prompts.
macOS: Download the
.dmgfile, open it, and drag the QGroundControl icon into your Applications folder.Linux: Follow the package manager or AppImage instructions provided on the QGroundControl download page.
Once installed, launch QGroundControl.
Connect to Your Vehicle via TCP:
Open QGroundControl on your computer.
Go to the Comm Links section by clicking on the Q application icon in the top left corner.
Select Add to create a new communication link.
Choose TCP Link from the dropdown.
Set the Host Address to
<robot_name>.localand the Port to5760.Click Connect to establish the connection with your flight controller.
Access the Vehicle Setup:
Once connected, open the menu by clicking on the by clicking on the Q application icon in the top left corner and open the Vehicle Setup page from the popup menu that appears.
Navigate to Parameters:
In the Vehicle Setup menu, select the Parameters tab to view the configurable parameters for your vehicle.
Load the
.paramFile:In the Parameters screen, click on the Tools menu in the top right corner.
Select Load from file… from the dropdown menu.
Browse to the location of your
.paramfile on your computer, select it, and click Open.
Apply the Parameters:
QGroundControl will load and apply the parameters from the file to your vehicle. Progress indicators or messages will confirm that the parameters are being applied.
Reboot the Vehicle:
After loading the parameters, it is usually necessary to reboot the flight controller for changes to take effect.
You can reboot the vehicle by selecting Reboot Vehicle from the Tools menu.
Here is a video summing up how to restore the parameters after having connected to the Flight Controller:
Additional Tips#
Multiple Loads: Some parameters may require multiple loads until they are all applied correctly.
Check for Errors: Ensure QGroundControl does not report any errors during the parameter loading process.
Troubleshooting#
Troubleshooting
SYMPTOM
I am having issues following the instructions!
RESOLUTION
We’re happy to support and to hear your feedback! Please post a question on our StackOverflow, you can find the instructions on how to join it here.
You can also contact us via Slack at the following channel: duckietown-sky-help