New project
Contents
New project#
What you will need
Basic knowledge of Python
What you will get
Learn how to use DTProjects, the most important building block in Duckietown
Learn how to create a new DTProject from a template
Duckietown-compliant Docker images are built out of Duckietown Projects, in short DTProjects.
A boilerplate for the simplest DTProject is provided by the
duckietown/template-basic
repository.
Create project from a template#
Visit the template repository page duckietown/template-basic. Click on the button that reads “Use this template” and then choose “Create a new repository” from the dropdown menu.
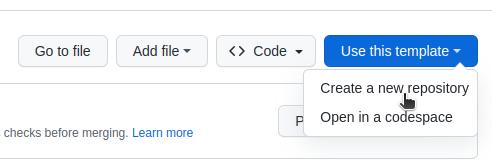
Fig. 3 Use template repository on GitHub.#
This will take you to a page that looks like the following:
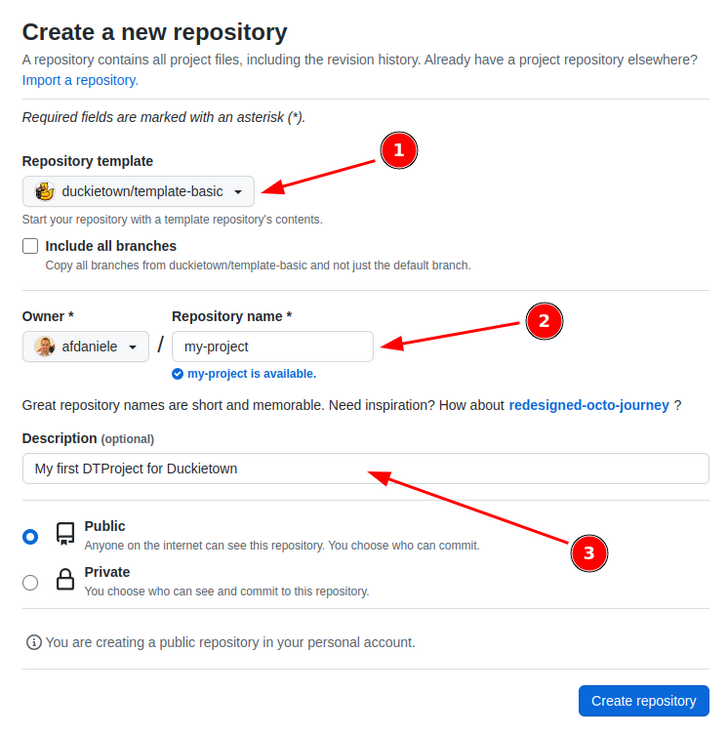
Fig. 4 Creating a repository from template.#
Pick a name for your repository (say my-project) and press the button Create repository from template.
Note, you can replace my-project with the name of the repository that you prefer, if you do change it,
make sure you use the right name in the instructions going forward.
This will create a new repository and copy everything from the repository template-basic to your
new repository. You can now open a terminal and clone your newly created repository.
git clone https://github.com/YOUR_NAME/my-project
cd my-project
Note
Replace YOUR_NAME in the link above with your GitHub username.
Edit placeholders#
The repository contains already everything you need to create a Duckietown-compliant Docker image
for your program. Before doing anything else, we need to head over to the Dockerfile and edit the
following lines using a text editor:
ARG REPO_NAME="<REPO_NAME_HERE>"
ARG DESCRIPTION="<DESCRIPTION_HERE>"
ARG MAINTAINER="<YOUR_FULL_NAME> (<YOUR_EMAIL_ADDRESS>)"
Replace the placeholders strings with, respectively,
the name of the repository (i.e.,
my-project);a brief description of the functionalities of the module
your name and email address to claim the role of maintainer;
For example,
ARG REPO_NAME="my-project"
ARG DESCRIPTION="My first Duckietown project"
ARG MAINTAINER="Duckie ([email protected])"
Save the changes. We can now build the image, even though there is not going to be much going on inside it until we place our code in it.
Build the project#
Now, in a terminal, move to the directory created by the git clone instruction above and run the
following command (beware that it might take some time):
dts devel build -f
The flag -f (short for --force) is needed in order to allow dts to build a module
out of a non-clean repository. A repository is not clean when there are changes that are
not committed (and in fact our changes to Dockerfile are not).
This check is in place to prevent developers from forgetting to push local changes.
If the build is successful, you will see something like the following:
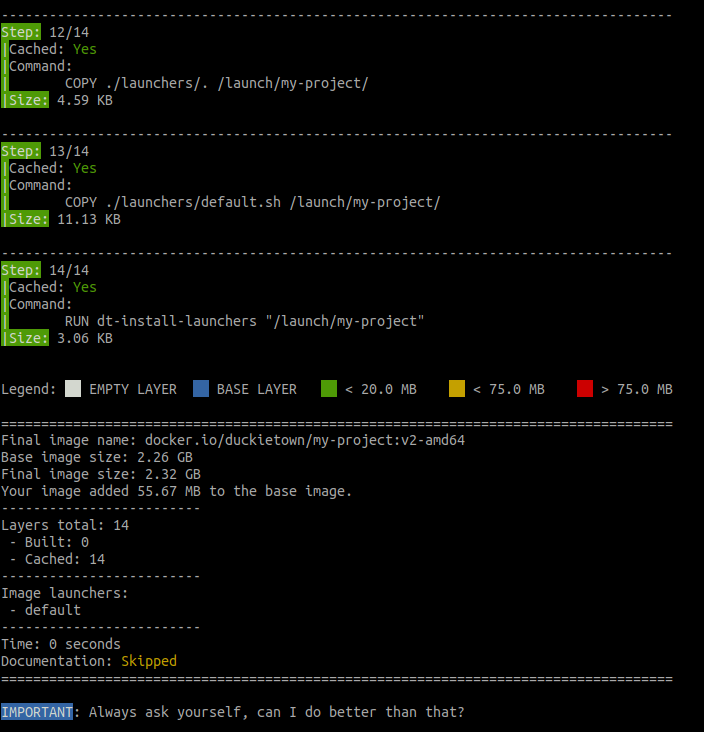
Fig. 5 Building a container through the development command in the Duckietown shell.#
As discussed above, building a project produces a Docker image. This image is the
compiled version of your source project. You can find the name of the resulting
image at the end of the output of the dts devel build command.
In the example above, look for the line:
Final image name: docker.io/duckietown/my-project:v2-amd64
Run the project#
You can now run your container by executing the following command.
dts devel run
This will show the following message:
...
==> Launching app...
This is an empty launch script. Update it to launch your application.
<== App terminated!
Congratulations 🎉
You just built and run your first Duckietown-compliant Docker image.