New project
Contents
New project#
What you will need
Basic knowledge of Python
What you will get
Learn how to use DTProjects, the most important building block in Duckietown
Learn how to create a new DTProject from a template
Duckietown-compliant Docker images are built from Duckietown Projects, abbreviated as DTProjects. Read the introduction to DTprojects if not already done.
A boilerplate for the simplest DTProject is provided by the duckietown/template-basic repository.
Create a DTproject from a template#
Visit the template repository page:
duckietown/template-basic.
Select the button labeled Use this template, then choose Create a new repository from the dropdown menu.
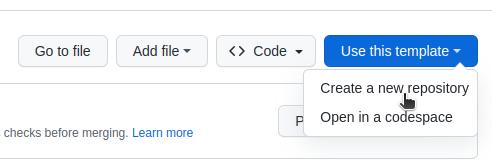
Fig. 3 Use template repository on GitHub.#
This will redirect to a new page:
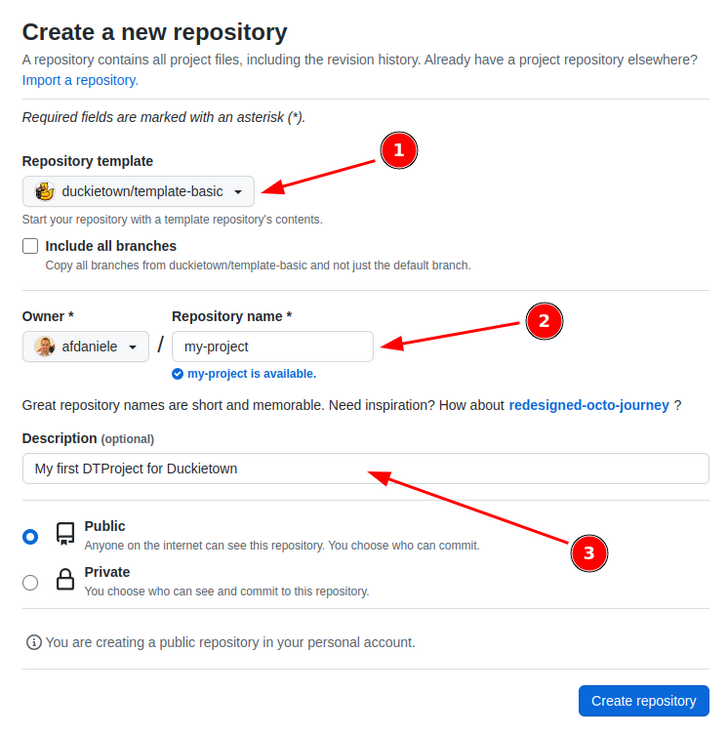
Fig. 4 Creating a repository from template.#
Choose a name for the repository, for instance my-project, and press the Create repository from template button.
It is possible to replace my-project with any preferred name. If so, make sure to update all following references accordingly.
This creates a new repository containing a copy of all content from template-basic. Next, clone it locally using a terminal:
git clone https://github.com/YOUR_NAME/my-project
cd my-project
Note
Replace YOUR_NAME with your actual GitHub username.
Edit placeholders#
Before continuing, update placeholder metadata inside the Dockerfile. Open the file and replace the following lines:
ARG REPO_NAME="<REPO_NAME_HERE>"
ARG DESCRIPTION="<DESCRIPTION_HERE>"
ARG MAINTAINER="<YOUR_FULL_NAME> (<YOUR_EMAIL_ADDRESS>)"
For example:
ARG REPO_NAME="my-project"
ARG DESCRIPTION="My first Duckietown project"
ARG MAINTAINER="HappyDuckie ([email protected])"
Save and close the file. It is now possible to build the image, although the contents will still be minimal.
Build the project#
In a terminal, navigate to the root directory of the cloned repository and execute:
dts devel build -f
The -f flag (--force) allows the build to proceed even if the repository is not “clean”, i.e., as after making local edits.
Upon a successful build, a Docker image will be created. Look for a message similar to the following in the terminal output:
Final image name: docker.io/duckietown/my-project:v2-amd64
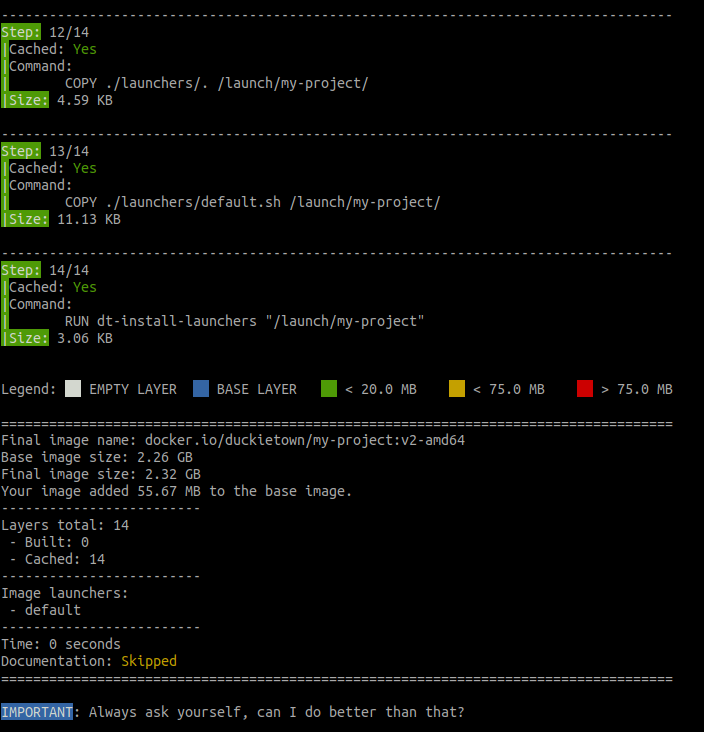
Fig. 5 Building a container through the Duckietown development command.#
Run the DTproject#
To launch the container:
dts devel run
This will display:
...
==> Launching app...
This is an empty launch script. Update it to launch your application.
<== App terminated!
Congratulations 🎉
You have just built and run your first Duckietown-compliant Docker image.