dts code build
Contents
dts code build#
What does it do?#
The dts code build command builds the learning experience package into a Docker image that will be
used by each of the other commands in the workflow.
The first step to working through any learning experience is to build it.
Hint
Strengthen your iterative development habits by beginning every work session with a fresh build of your LX. This will help ensure that you don’t continue development on top of any previous errors.
Prerequisites#
Always make sure that your system is up-to-date before starting a new learning experience. If you haven’t yet installed the Duckietown shell and configured your development environment, return to the Step 1: Environment Setup before continuing.
Update the shell commands:
dts update
Update your laptop/desktop:
dts desktop update
Update your Duckiebot:
dts duckiebot update [ROBOT_NAME]
How do I run it?#
First, navigate into the directory containing the hello-world learning experience (or the root directory of the LX you are working on completing).
duckietown-lx/hello-world-lx
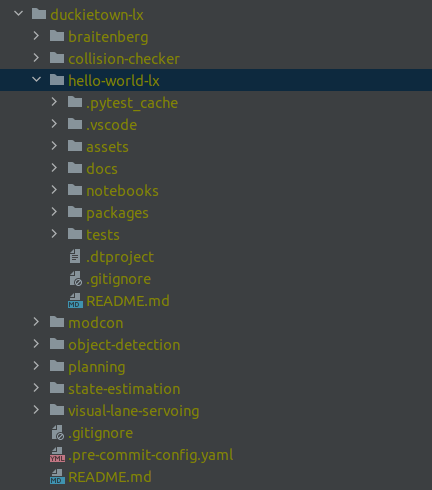
Fig. 1 List of LX directories with the hello-world-lx directory highlighted.#
Important
All dts code commands should be executed inside the root directory of the learning experience.
Then run
dts code build
You will see the following message once your LX has built successfully,
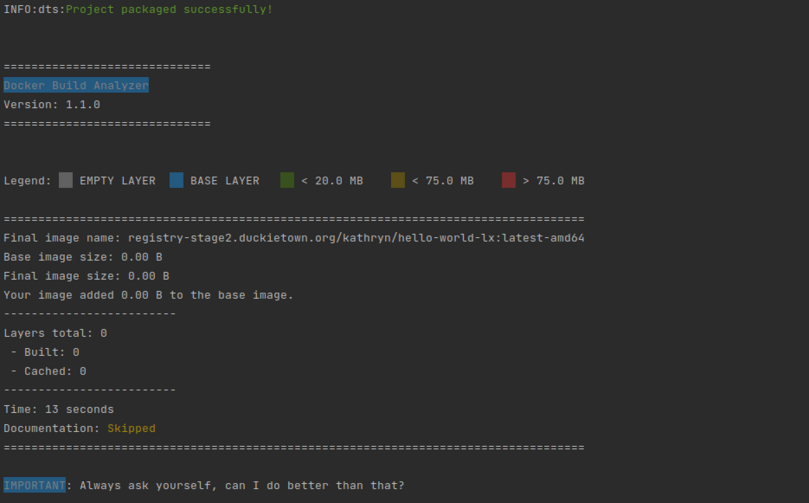
Fig. 2 Success message that indicates a successful LX build.#
For more information about what is happening during your build process, you can run any dts code command in debug
mode using the --debug flag.
dts --debug code build
Troubleshooting#
If you run into any issues while building the image, you can search the troubleshooting symptoms below or reference the How to get help section of this manual.
Troubleshooting
SYMPTOM
dts : The path '/home/myuser/not_an_lx_directory' does not appear to be a Duckietown project. : The metadata file '.dtproject' is missing.
RESOLUTION
You need to be in the root directory of the LX in order to run the dts code commands.
What’s Next?#
Now that you’ve built the hello-world learning experience, continue on to the next page to open the editor and complete your first notebook activities.
Extra Options#
Warning
If this is your first time using the dts code workflow, don’t worry about the following section just yet.
Continue on to the next page to open you first LX activity.
Once you are comfortable with the dts code workflow, you may want to use some additional control provided
over each command. This section documents each of the flags available to extend the dts code build command.
You can also explore the Behind the Scenes - dts code build chapter
for more details on what happens in the background when you run the dts code build command.
Command options#
usage: dts [-h] [-C WORKDIR] [-H MACHINE] [-u USERNAME] [--no-pull] [--no-cache] [--push] [--recipe RECIPE] [--registry REGISTRY] [-L LAUNCHER] [-b BASE_TAG] [-v] [--quiet]

optional arguments:
  -h, --help            show this help message and exit
  -C WORKDIR, --workdir WORKDIR
                        Directory containing the project to be built
  -H MACHINE, --machine MACHINE
                        Docker socket or hostname to use
  -u USERNAME, --username USERNAME
                        The docker registry username to use
  --no-pull             Skip updating the base image from the registry
  --no-cache            Ignore the Docker cache
  --push                Push the resulting Docker image to the registry
  --recipe RECIPE       Path to use if specifying a custom recipe
  --registry REGISTRY   Docker registry to use
  -L LAUNCHER, --launcher LAUNCHER
                        The launcher to use as entrypoint to the built container
  -b BASE_TAG, --base-tag BASE_TAG
                        Docker tag for the base image. Use when the base image is also a development version
  -v, --verbose         Be verbose
  --quiet               Be quiet