Flying your Duckiedrone
Contents
Flying your Duckiedrone#
What you will need
Fully assembled drone with flight controller initialized
Charged battery
Base station with the Duckietown Dashboard reachable (see Preparing the software stack)
Safety goggles
Highly textured planar surface
What you will get
Your Duckiedrone airborne
A delighted duckie captain
Environment checks#
Warning
Flying your Duckiedrone is safe only when done in an appropriate environment. Make sure:
You are in an open space that is free of obstructions.
You have alerted those around you that you are going to fly and have told them to clear the area.
You are wearing safety goggles.
The surface you are flying over is not reflective and is not uniform — the visual-odometry node needs texture to lock on. Ideally, place a highly textured poster or a patterned carpet underneath the drone.

Fig. 55 Example of a highly textured planar surface.#
Hardware checks#
If the battery is still connected, unplug it before the following checks.
Wire management#
Spin the props with your finger and make sure there are no wires in the way. If wires get close, use a zip tie to fasten them to the frame, away from the props.
USB connections#
Make sure that the Flight Controller USB cable is plugged into the Raspberry Pi (any of the USB ports is fine). Make sure the camera flat cable is fully seated on both the Pi and the camera side.
Power up and open the dashboard#
Plug the battery into your drone. The Raspberry Pi will boot up.
Wait ~45 seconds for all the Duckiedrone containers to come up.
Open
http://ROBOT_NAME.local/in your browser and click Mission Control.Confirm that every widget in the default mission is healthy — see Preparing the software stack for the checklist.
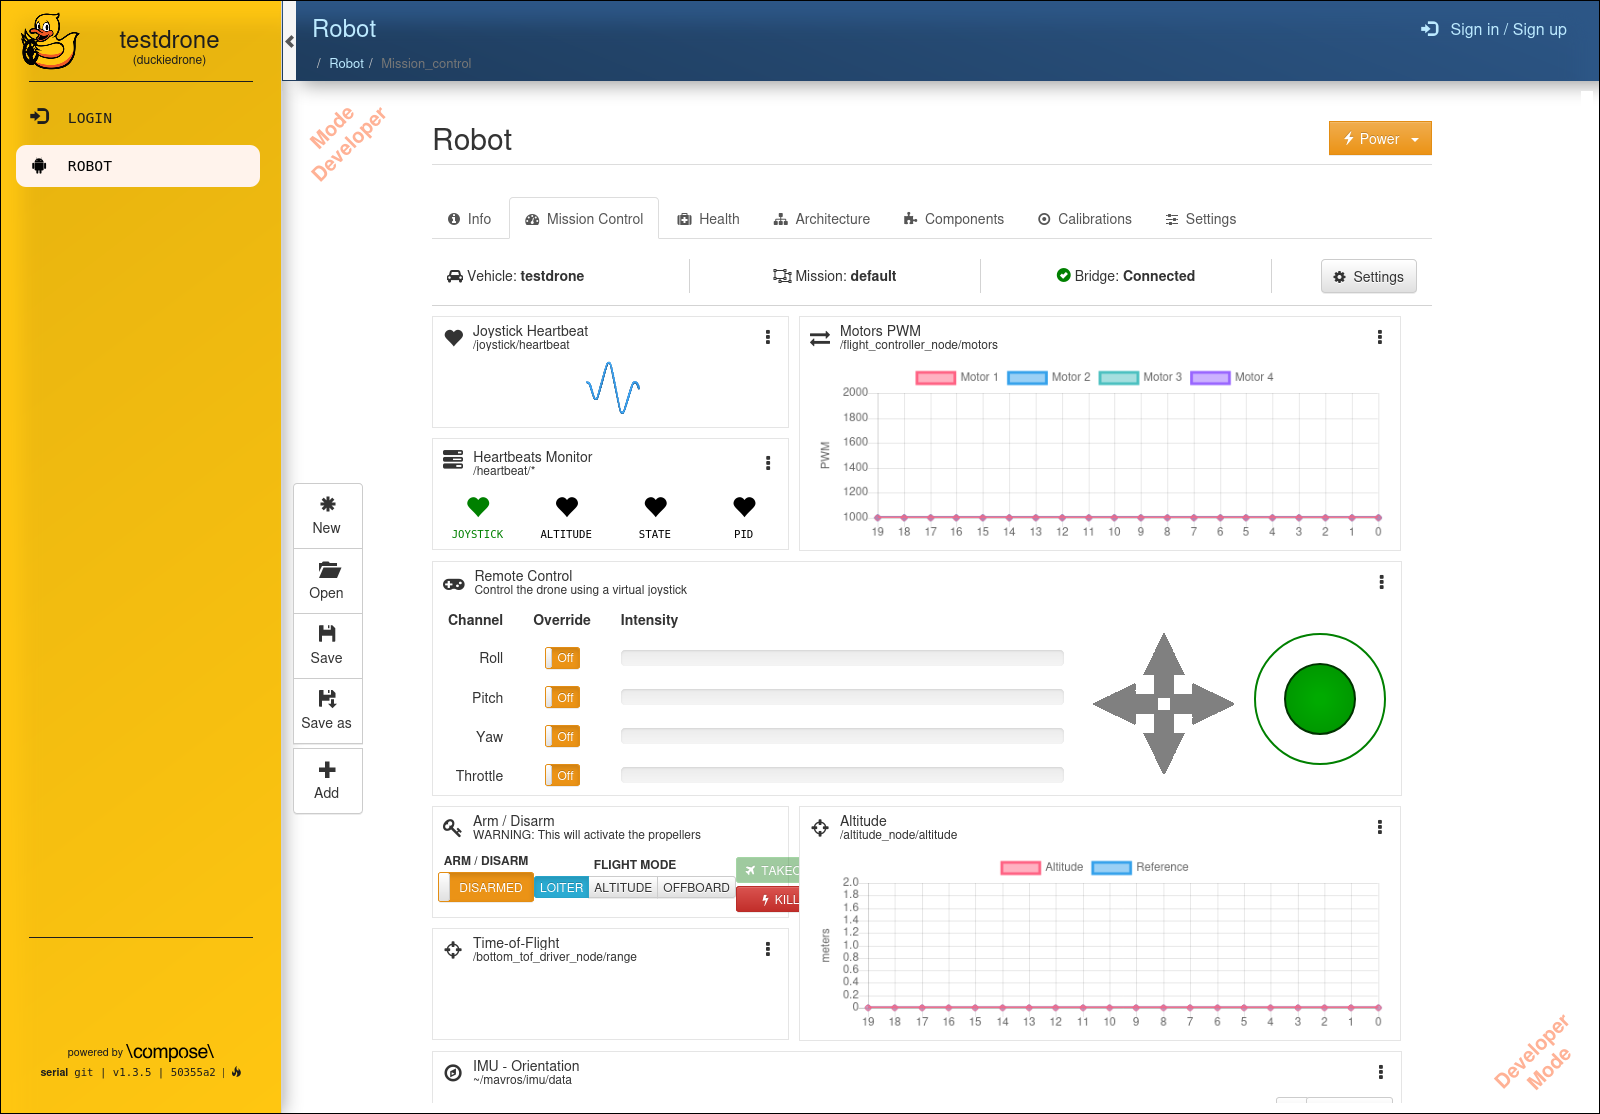
Fig. 56 The Duckiedrone default mission, before arming.#
Understanding the Arming widget#
The Arm / Disarm widget is the primary flight control. It has three elements:
An ARM / DISARM toggle at the top-left of the widget.
A three-button FLIGHT MODE selector:
LOITER,ALTITUDE,OFFBOARD.A red KILL switch that cuts motor power immediately when clicked.
The widget reflects live state — it polls /mavros/state and refreshes its ARM and FLIGHT MODE indicators whenever the flight controller changes. If the toggle flips on its own, that reflects a real transition on the flight controller (for example an auto-disarm).
Flight modes#
The drone runs PX4 through MAVROS. The dashboard exposes three of PX4’s flight modes:
Mode |
PX4 name |
When to use |
|---|---|---|
|
|
Ground-safe default. The drone is idle and armable but will not accept manual stick input. |
|
|
PX4 holds altitude automatically; you command roll, pitch and yaw from the virtual joystick (or from a physical RC). Use this when you want PX4’s internal attitude control loops to do the stabilization. |
|
|
PX4 tracks setpoints published by an external node on |
Important
PX4 only accepts an OFFBOARD request when it is already receiving setpoints on /mavros/setpoint_raw/local (or an equivalent topic) at >2 Hz. If no setpoints are being published, PX4 will silently ignore the mode switch and the drone will stay in its previous mode. Start your setpoint publisher before clicking OFFBOARD.
ALTITUDE similarly requires valid manual-control input (stick values on /mavros/manual_control/send) or it will fall back to LOITER.
The Remote Control (virtual joystick) widget#
Next to the arming widget, the Remote Control widget publishes stick values to /mavros/manual_control/send. In ALTITUDE mode, moving the joystick tilts the drone; in OFFBOARD mode the joystick is ignored (your setpoint publisher takes over).
First flight#
Danger
Be prepared to hit the KILL switch at any moment. The kill switch will disarm the drone instantly regardless of the current mode.
Place the drone on your textured surface, camera forward.
Verify on the Mission Control page that:
The
FLIGHT MODEindicator showsLOITER.The altitude trace is centred around
0 m.The IMU orientation indicator is level.
Click the ARM toggle. The motors will start spinning at idle RPM.
If the motors spin fast, or you hear strange noises, immediately click the KILL switch.
If the motors do not spin at all, read Common issues.
Click the toggle again to disarm. The motors should stop almost immediately. Repeat arming and disarming once or twice to verify responsiveness.
Arm the drone again.
Choose a flight mode:
In the Remote Control widget, centre the sticks and set
Throttleslightly above the mid-point.In the arming widget, click ALTITUDE.
The
FLIGHT MODElabel should update toALTITUDE. If it stays onLOITER, PX4 rejected the request — check that the Remote Control widget is actively publishing.
Gradually increase throttle. The drone will ascend and PX4 will hold altitude once the sticks are centred.
Use roll/pitch on the virtual joystick to move horizontally. Yaw on the secondary joystick rotates the drone.
To land, decrease the throttle gradually. When the drone is close to the ground, click DISARM.
Start your setpoint publisher on the drone before clicking
OFFBOARD. A minimal publisher should streammavros_msgs/PositionTargetmessages on/mavros/setpoint_raw/localat ≥20 Hz.Click OFFBOARD.
If the flight-mode label flips to
OFFBOARD, PX4 has accepted external control.If it snaps back to
LOITER, the setpoint stream was not running or the setpoint values were outside the accepted envelope.
Your controller now owns the drone. Monitor altitude and motor PWM from the dashboard.
To land, command a descent from your controller and click DISARM once the drone is grounded.
Always finish the flight by clicking DISARM. If anything goes wrong, click KILL.
Danger
Do not put your hands near the propellers while the drone is armed. Always disarm before approaching.
Monitoring during flight#
Keep the Mission Control page visible while the drone is in the air. Useful widgets:
Altitude — a sudden dip here while in
ALTITUDEmode is usually a ToF dropout; the PID controller may oscillate.Motors PWM — if all four bars saturate at 2000, the drone is calling for maximum thrust, typically a sign the altitude estimate is wrong.
Heartbeats Monitor — if any heartbeat goes red during flight, the corresponding node stopped publishing.
Troubleshooting#
Troubleshooting
SYMPTOM
The ARM toggle snaps back to DISARM a second after I click it.
RESOLUTION
PX4 rejected the arming request because a preflight check failed. Typical causes on a DD24:
The EKF is still converging — wait 10–15 seconds after plugging the battery.
The accelerometer bias is out of range — recalibrate the IMU from QGroundControl.
The drone is not level — place it on a flat surface and retry.
The ToF sensor is returning invalid distances — see Common issues.
You can read the rejection reason from the drone logs:
dts devel run -H ROBOT_NAME -L default – –rm docker logs dt-px4 | tail -20
Troubleshooting
SYMPTOM
Clicking OFFBOARD does nothing — the mode indicator stays on LOITER.
RESOLUTION
PX4 silently rejects OFFBOARD when no external setpoint stream is running. Make sure your controller publishes on /mavros/setpoint_raw/local (or another valid setpoint topic) at >2 Hz before you click the button. Once setpoints are flowing, retry the mode switch.
Troubleshooting
SYMPTOM
The drone auto-disarms a few seconds after arming even though I never clicked DISARM.
RESOLUTION
This is PX4’s auto-disarm-on-no-takeoff safety. If the drone is armed on the ground without moving the throttle up, PX4 disarms after ~10 s. Simply re-arm and lift off within the timeout window.
Troubleshooting
SYMPTOM
The Mission Control page shows the widgets but no data is updating.
RESOLUTION
Rosbridge may not be running, or it is resolving ~ to the wrong namespace. In the browser, open the widget settings (gear icon on the widget header) and confirm the topic paths start with a /, not ~/. The shipped default mission uses absolute paths; custom missions may not.
Troubleshooting
SYMPTOM
The motors don’t spin at all after arming.
RESOLUTION
Check the flight controller initialization (Initializing the Flight Controller). Verify that:
The USB cable between the Raspberry Pi and the flight controller is seated.
The ESC/Motor protocol matches what the DD24 parameter file expects.
The arming service returned
success=True— click DISARM, reopen the dashboard, and watch the browser console for error messages.
Congratulations on your first Duckiedrone flight!