The Fast Way
Contents
cd /etc/NetworkManager/system-connections/
What you will need
A computer (the “base station”) with an internet connection
A microSD card (64 GB, U3, Class 10 recommended), e.g., the one from your Duckiedrone box
A microSD card reader, e.g., the one from your Duckiedrone box
What you will get
An initialized Duckiedrone, ready for first boot
The Fast Way#
This procedure consists of downloading a preset image, and burning it to the SD card using Balena Etcher. The advantages of going the “fast” way are that:
it works on any operating system
all important configuration parameters are pre-set
The disadvantages of this procedure are:
the Duckiedrone has default parameters, listed in the “cheatsheet” below, and the
robotnamecannot be changedsince every robot on the network needs to have a unique
robotname, this procedure should not be used if planning on using several Duckiedrones on the same network at the same time.
Cheatsheet
Default robot name: amelia
Default ssh user name: duckie
Default ssh user password: quackquack
Defaul network configuration (robot will connect to this network after the first boot)
SSID:
duckietownPassword:
quackquack
1. Install Balena Etcher#
Balena Etcher is a program to flash disk images to drives.
Download and install the version appropriate for your operating system from Balena Etcher’s website.
2. Download the Duckietown image#
Legalities
By downloading this image you are accepting the Duckietown Software License, Terms and Conditions and Privacy Policy, as well as robot configuration-specific licenses due to the presence of third party software in the SD card.
Download the latest drone ente image to your base station:
3. Flash the image to the SD card#
Connect the microSD card to the base station. Use the micro SD to USB card reader if the base station does not have a micro SD port.
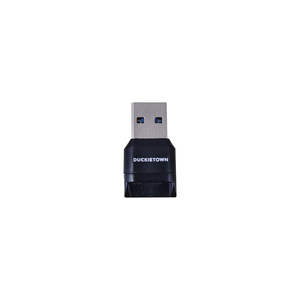
Fig. 48 Micro SD Card adapter#
Open Balena Etcher and select the downloaded drone image, then select the micro SD card as the drive to flash. Finally, click the "Flash" button.
Warning
Double check that the “drive” is your micro SD card.
You may be prompted to enter the base station password to proceed. This is normal: flashing an SD card deletes everything that is on it, so Etcher is making sure this process is OK with you.
Note
Flashing will take 15 - 20 minutes.
4. Proceed to the first boot#
Remove the SD card from your base station and insert it in the SD card adapter of your Raspberry Pi. You are now ready for the first boot.
Note
Through this approach, the Duckiedrone will boot searching for the default network. It is recommended to set up a duckietown:quackquack network before the first boot, or to connect the Duckiedrone to your router with an ethernet cable. Once the first boot is complete, you can add or remove networks by following: Network configuration.
Troubleshooting#
Troubleshooting
SYMPTOM
I am using a Mac and the flashing step fails for lack of permissions.
RESOLUTION
Go to your computer’s System Preferences > Security & Privacy > Files and Folders and enable access to Removable Volumes.
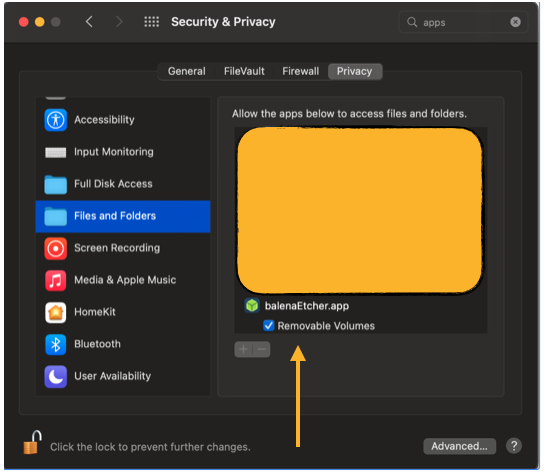
Troubleshooting
SYMPTOM
dts init_sd_card fails with “unknown robot type duckiedrone”.
RESOLUTION
Your Duckietown Shell is out of date or the wrong profile is active. Run:
dts profile list # ‘ente’ must be the active profile pipx upgrade duckietown-shell dts update
then rerun the dts init_sd_card command.
Troubleshooting
SYMPTOM
The drone does not join my Wi-Fi after the first boot.
RESOLUTION
Double-check the
--countryflag you passed todts init_sd_card. Wi-Fi is disabled by default if the regulatory domain is unset.Re-insert the SD card into your base station and inspect
config/wpa_supplicant.conf. Confirm that yourssidandpskare correct and that the file has Unix line endings.If you are still stuck, flash again with the correct flags (see First connection).