Configuring the Flight Controller
Contents
What you will need
A base station computer
An initialized Flight Controller running PX4
ESCs already flashed with Bluejay
A data-capable USB-A-to-USB-C cable and any required adapter
What you will get
A Flight Controller with the Duckiedrone parameters loaded
Configuring the Flight Controller#
In the previous step, we prepared the flight controller (FC) for configuration by flashing the bootloader and installing PX4. It is now time to access the FC and configure it for the Duckiedrone DD24-B.
By following these steps, you will be able to install QGroundControl, connect to your flight controller over USB, and configure your vehicle’s parameters from a Duckietown preset parameters file.
Attention
Before you begin, remove the propellers and disconnect the battery from the Duckiedrone.
Installing QGroundControl#
Go to the QGroundControl website and download the installer for your operating system (Windows, macOS, or Linux).
Windows: Run the installer and follow the prompts.
macOS: Download the
.dmgfile, open it, and drag the QGroundControl icon into your Applications folder.Linux: Follow the package manager or AppImage instructions provided on the QGroundControl download page.
Once installed, launch QGroundControl.
Connecting to the Flight Controller#
Connect to your Duckiedrone over USB:
Connect a data-capable USB-A-to-USB-C cable from your computer to the Flight Controller.
Open QGroundControl on your computer.
QGroundControl automatically detects and connects to the flight controller over USB.
Wait a few moments for the top toolbar to show that the vehicle is connected. QGroundControl will then display the summary page.
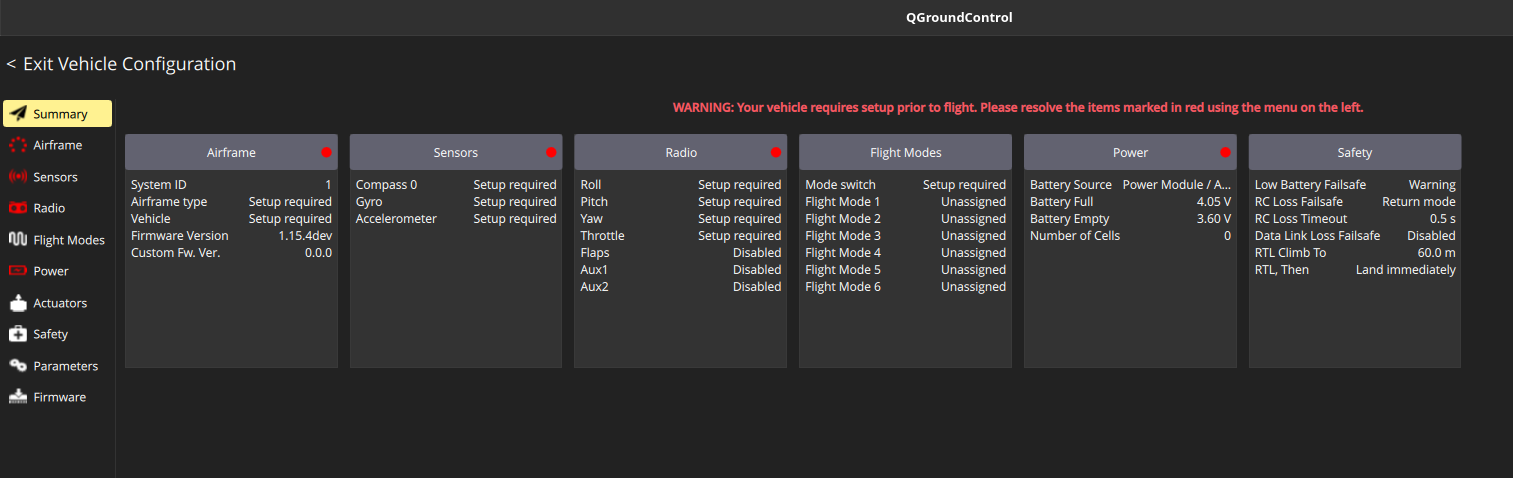
The Airframe and Sensors sections are red, indicating that they still need to be configured.
Load the preconfigured parameter set#
Open the Parameters tab and load the
.paramsfile:Important
Import exactly this file:
duckiedrone-px4-v4.paramsClick the Parameters tab from the left panel to view the configurable parameters for your vehicle.
In the Parameters screen, click on the Tools menu in the top-right corner.
Select Load from file for review… from the dropdown menu.
Browse to the location of your
.paramsfile on your computer, select it, and click Open.QGroundControl will load and apply the parameters from the file to your vehicle. There should be no errors during this step.
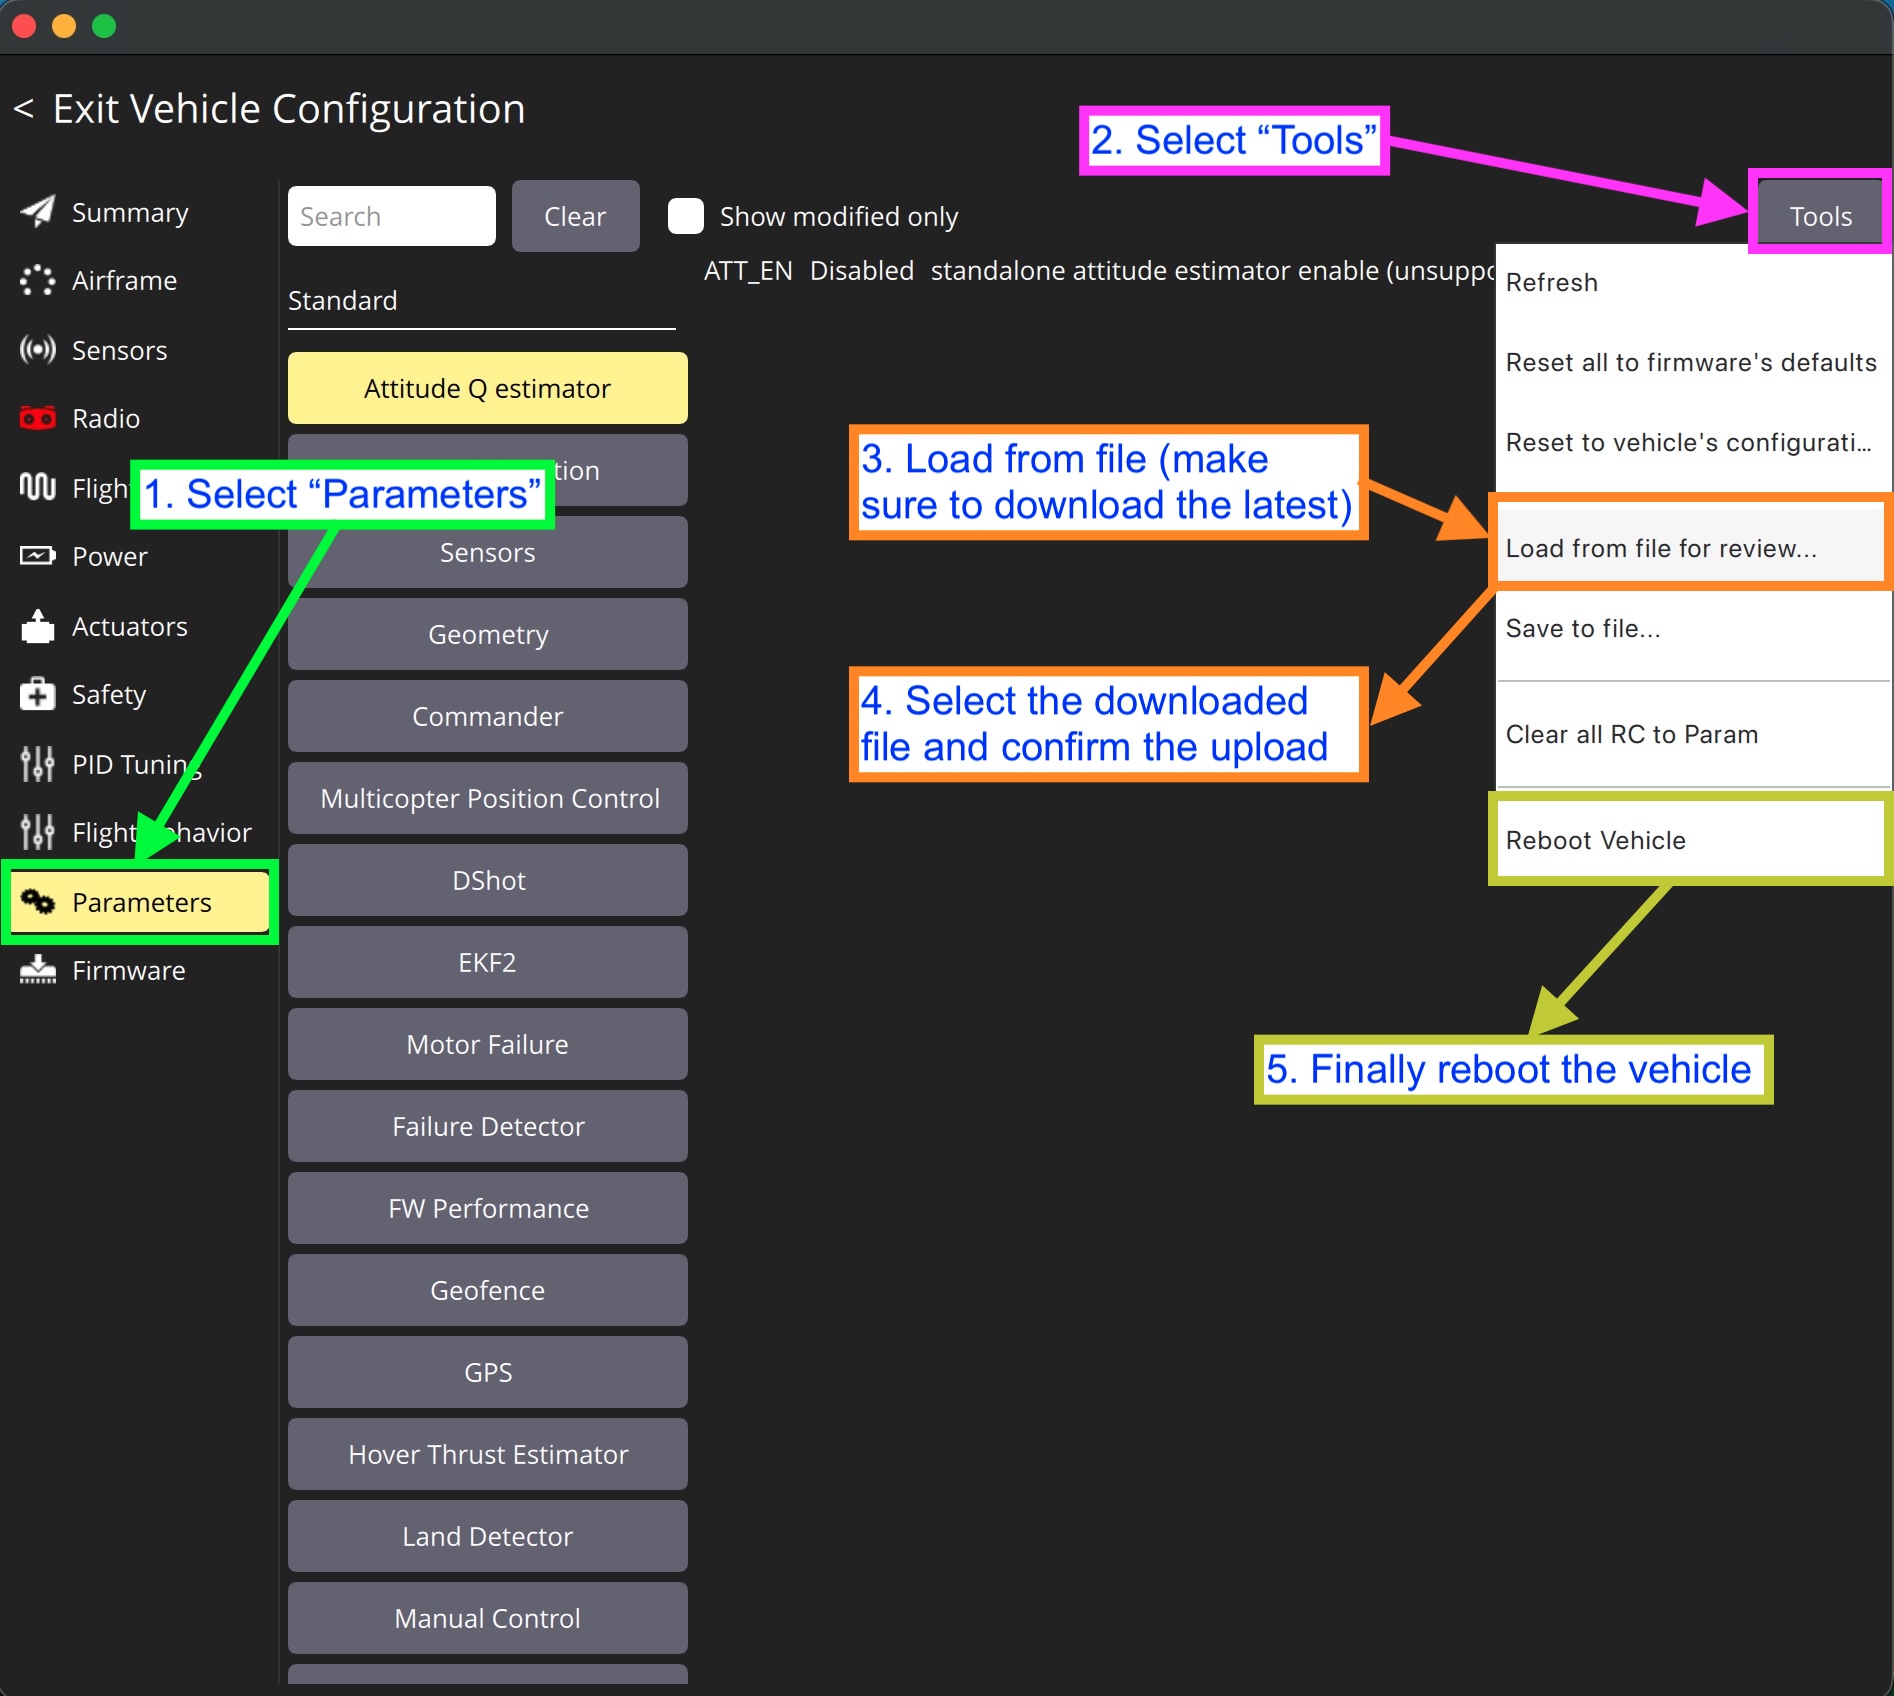
Fig. 63 Load the downloaded parameter file by following these steps.#
Reboot the vehicle#
After loading the parameters, reboot the Flight Controller for changes to take effect.
Select Reboot Vehicle from the Tools menu.
After rebooting, reconnect to the vehicle. You will then see a summary page similar to the one below:
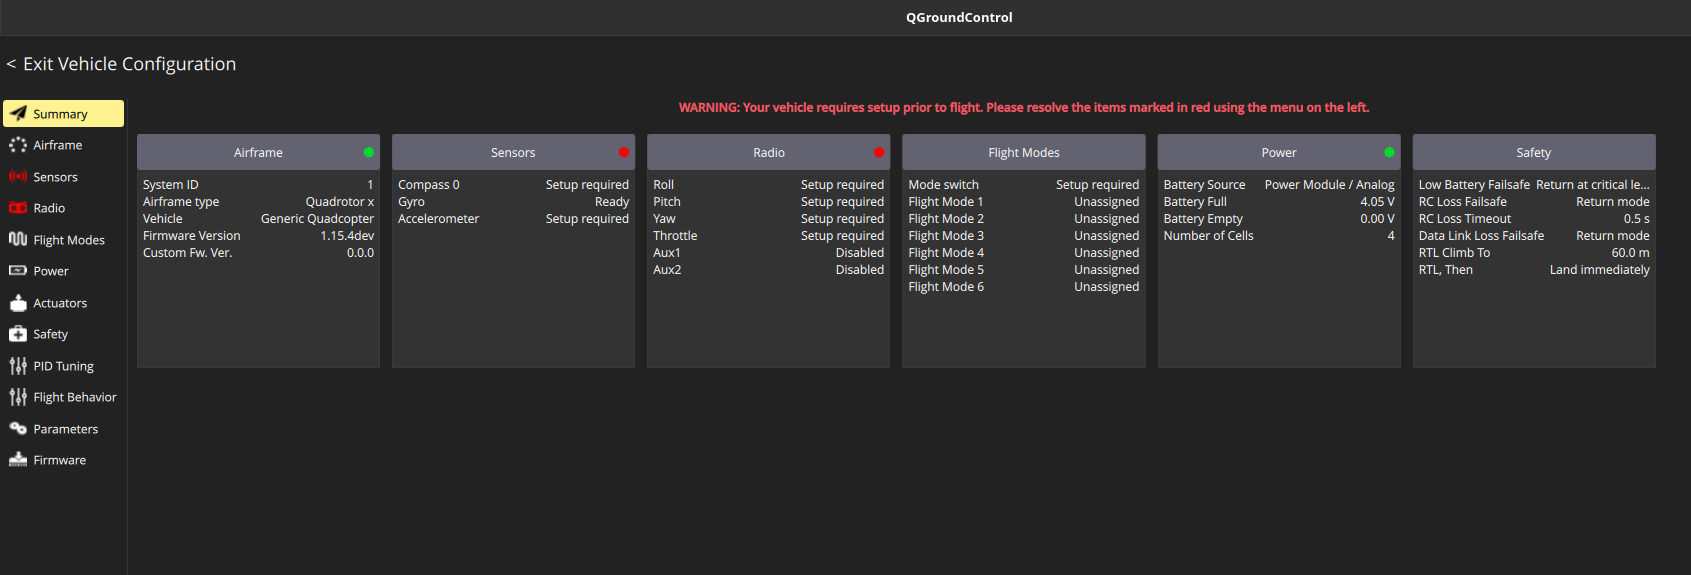
Fig. 64 QGroundControl summary page after uploading FC parameters, before performing calibrations.#
Enabling vision fusion later
The shipped param file sets EKF2_EV_CTRL = 0 so the EKF does not try to fuse vision before a VIO is online. Once a VIO publishes VISION_POSITION_ESTIMATE / ODOMETRY over MAVLink, raise EKF2_EV_CTRL to 7 (fuse vision position and velocity) or 15 (also fuse vision yaw — recommended on this magless airframe).
Why the Radio page stays red
This is expected. The Duckiedrone has no RC transmitter; the flight controller is commanded over MAVLink from the Raspberry Pi, so no radio configuration is needed.
Additional Tips#
Check for Errors: The
duckiedrone-px4-v4.paramsfile loads cleanly in a single pass. If QGroundControl reports any parameter failing to load, you are on the wrong firmware build or using an outdated param file.On-board calibration is mandatory: the shipped
.paramsfile deliberately omits allCAL_*(accelerometer/gyro calibration) entries because those are tied to a specific board’s sensor IDs. Run the Sensors calibration in QGroundControl on the actual flight controller after loading the parameters.
Troubleshooting#
Troubleshooting
SYMPTOM
I am having issues following the instructions.
RESOLUTION
We are happy to help and hear your feedback. Ask a question in the duckietown-sky-help Slack channel. See instructions for joining the Duckietown Slack workspace.