Setup - Duckiebot First Boot
Contents
Setup - Duckiebot First Boot#
What you will need
A flashed Duckiebot SD card: Duckiebot SD Card preparation - introduction
A Duckiebot of the same model chosen during the SD card flashing procedure
A charged battery (>50%)
What you will get
An online (successfully initialized) Duckiebot
(if network is correctly configured) A Duckiebot connected to the network
You are now ready to boot up your Duckiebot#
Insert the initialized SD card into your Duckiebot’s Jetson Nano until your feel a “click”. Then, push the button on the battery to power up the Duckiebot.
Warning
Be sure your Duckiebattery is well charged before attempting to boot the Duckiebot for the first time.
The external power supply might not be able to provide sufficient current if the battery is low, causing the on-board computer to reboot. Should that happen during the first boot, you will likely have to burn the SD card again.
Monitoring the First Boot#
Make sure your desktop or laptop computer is connected to the same Wi-Fi network the Duckiebot was instructed to connect to.
Then open a terminal and run:
dts fleet discover
The command above will show a list of all the Duckiebots reachable on your local network. For each Duckiebot, dts fleet discover will also show the model that was used to flash the SD card, the hostname of your robot, and a status indicator.
Leave this tool open, it will refresh automatically every second, so there is no need to manually restart it.
Within a few minutes of powering up the robot with the SD card in, your Duckiebot will appear in the list with status Booting. If it does not appear within 5 minutes, check out the Troubleshooting guide at the end of this page.
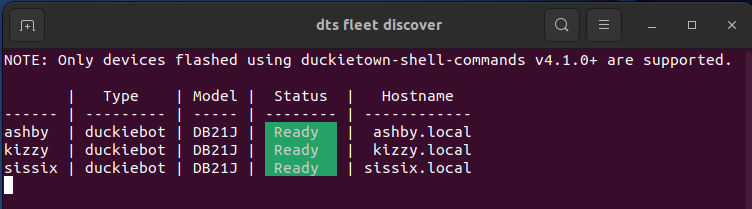
Fig. 18 Output of ‘dts fleet discover’#
Attention
During the first boot, the robot will automatically reboot several times. Wait for the “Status” column to read “Ready” and turn solid green.
Software and Hardware Updates#
Once the status of your Duckiebot is Ready, you are ready to update your Duckiebot. The software update is required now, while the hardware update is conditional and also can be carried out later.
Duckiebot Software Update#
It is good practice to keep your Duckiebot’s software stack up to date with the latest code by following: Operations - Duckiebot Software Update.
dts duckiebot update ROBOT_NAME
Confirming the First Boot#
Once the Duckiebot is Ready and Updated (software), you are ready to access your Duckiebot’s Dashboard and perform the first login Dashboard setup.
Troubleshoot - First Boot#
Troubleshooting
SYMPTOM
I pressed the power button on top but nothing happened.
RESOLUTION
Power on your Duckiebot using the button on the side of the Duckiebattery. The top button is only for powering off. You can also learn more about how to handle your Duckiebot in Duckiebot Handling Cheatsheet (DB21).
Troubleshooting
SYMPTOM
My Duckiebot does not appear to boot after pressing the power button on the battery. I don’t see a green light on the HUT or the Jetson Nano.
RESOLUTION
Refer back to Assembly Instructions (DB21J), and check each of your cable connections. Confirm the start and end port of each power cable from the battery. The battery must be charged fully as shown in the first assembly step.
Troubleshooting
SYMPTOM
My Duckiebot is getting power but does not appear to be booting. The Wi-Fi dongle is not blinking.
RESOLUTION
Make sure you flashed the SD card following the instructions in Duckiebot SD Card preparation - introduction.
Troubleshooting
SYMPTOM
My Duckiebot is getting power but does not appear to be booting. The Wi-Fi dongle is not blinking.
RESOLUTION
Make sure that you correctly specified the model of your Duckiebot when initializing the SD card.
If you have a Duckiebot with a 2GB Jetson Nano - the model is DB21M
If you have a Duckiebot with a 4GB Jetson Nano - the model is DB21J
If you are not using a Jetson Nano, the model is the model of your Duckiebot (e.g., DB19 or DBR4)
Troubleshooting
SYMPTOM
The Duckiebot screen does no turn on even though it shows up in dts fleet discover and the dashboard is accessible.
The time of flight (ToF) sensor and front bumper are not detected on the Dashboard Components page.
RESOLUTION
Disconnect the ToF sensor from the front bumper and use the long cable that originally connected the front bumper to the HUT to connect the ToF sensor directly to that same HUT port. Then reboot. This bypasses a known multiplexer issue affecting some front bumpers.
Troubleshooting
SYMPTOM
My Duckiebot appears to be booted and the screen is on, but I can’t see it using dts fleet discover.
RESOLUTION
Your Duckiebot must be connected to the same network as the computer you are using to run the dts commands. Check
the networking section of the book to see if your network is set up correctly.
Troubleshooting
SYMPTOM
I am not sure whether my Duckiebot is properly initialized.
RESOLUTION
As long as the fleet discover tool shows ready, your Duckiebot should be ready.
You can also visit the dashboard to confirm that the Duckiebot is serving its status.
Generally as long as you see the Duckiebot dashboard is up, your Duckiebot should be correctly initialized.