Camera Calibration
Contents
What you will need
A working Duckiebot: Duckiebot subsystems
What you will get
A Duckiebot with a calibrated camera.
Camera Calibration#
This chapter describes how to perform the camera calibration procedure for your Duckiebot.
Introduction to camera calibration#
Every camera is unique due to manufacturing and assembly differences. Therefore, a camera calibration procedure needs to be performed to account for small manufacturing discrepancies.
This procedure involves displaying a predetermined pattern in front of the camera and using it to solve for the camera’s parameters.
For more information about the mathematics behind the process, review the appropriate learning experience.
Calibration board#
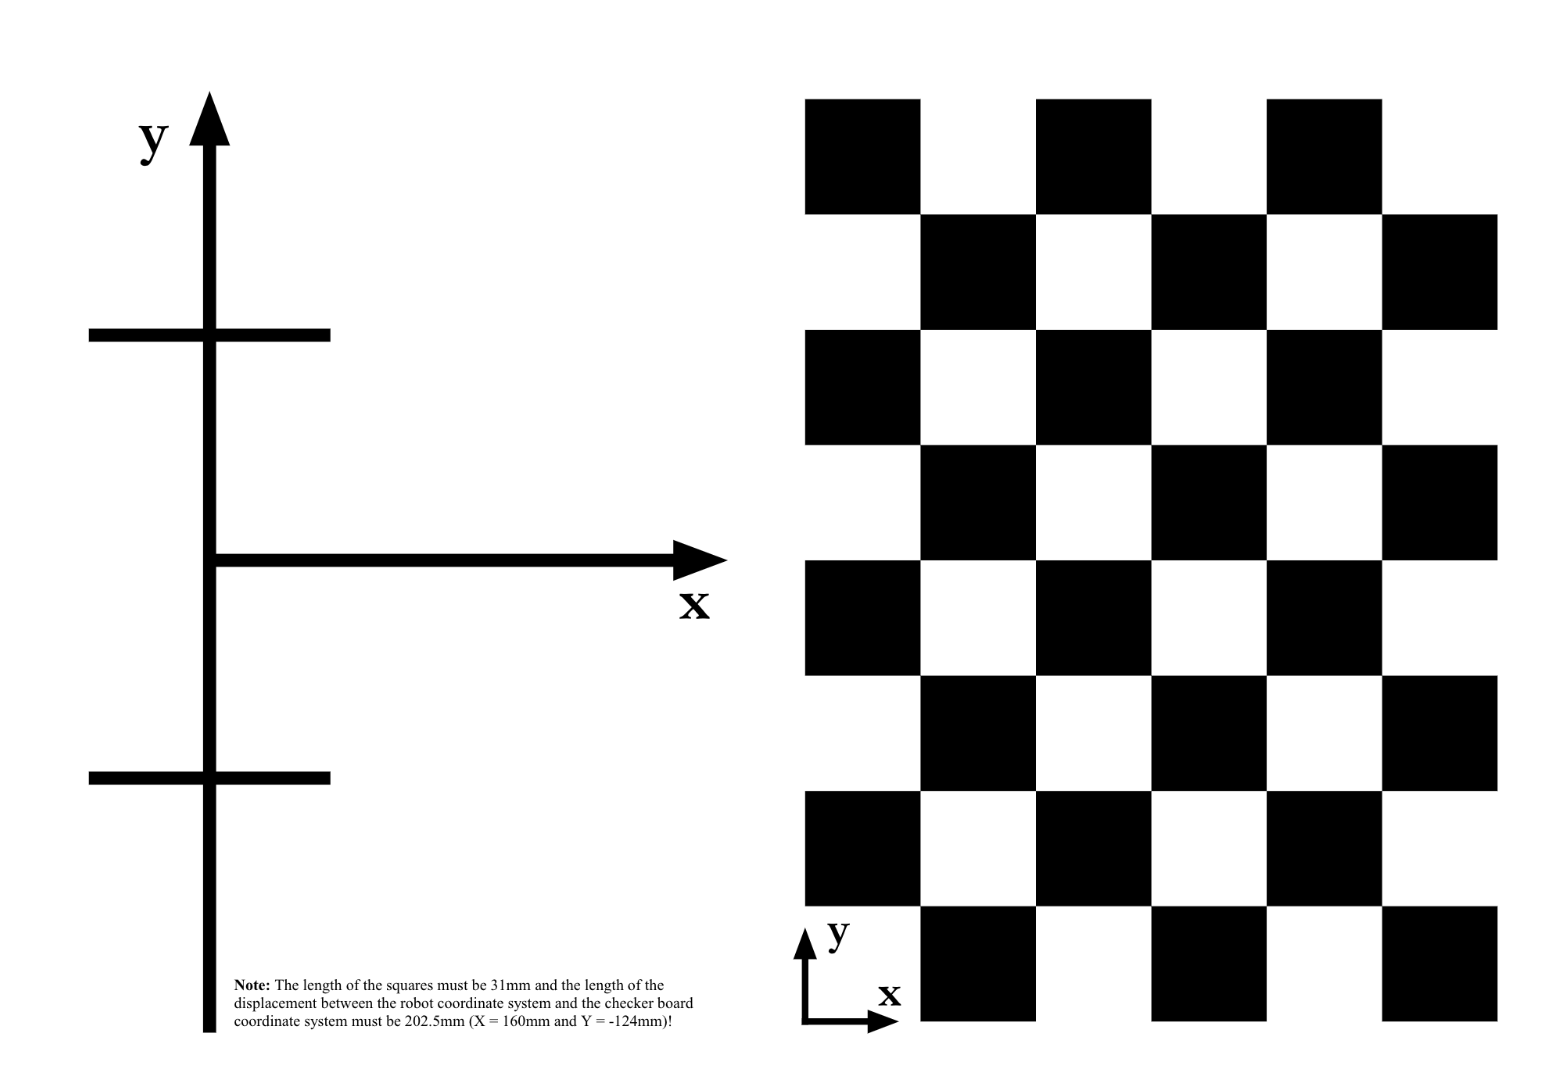
Fig. 31 Duckietown camera calibration pattern.#
If you do not already have a Duckietown calibration board:
Download the Duckietown calibration pattern
Print it in A3 format
Make sure the printing settings have not deformed the pattern, by measuring the features as indicated on the pattern itself
Fix it to a rigid planar surface that you can move around
Note
The squares must have side lengths equal to 0.031 m (3.1 cm). Measure this, as having the wrong size may lead to your Duckiebot crashing.
In case your squares are not the correct size, make sure that your printer settings are set to A3 format, with no automatic scaling and size set to
100%.
Warning
If the pattern is not rigid, the calibrations should not be used. You can print on thick paper or adhere to something rigid to achieve this.
Intrinsic calibration#
The instrinsic camera calibration procedure identifies parameters that enable creating a relationship between the 2D image plane and the 3D world around the Duckiebot. These parameters account for various optical specifications such as the camera’s focal length, the pixel aspect ratio, and the distortion field applied by the fisheye lens.
For optimal performance, repeat this procedure if you change the focus of the camera by rotating the lens.
The Intrinsics Calibrator#
To perform the intrinsic camera calibration procedure for your Duckiebot, run:
dts duckiebot calibrate_intrinsics DUCKIEBOT_NAME
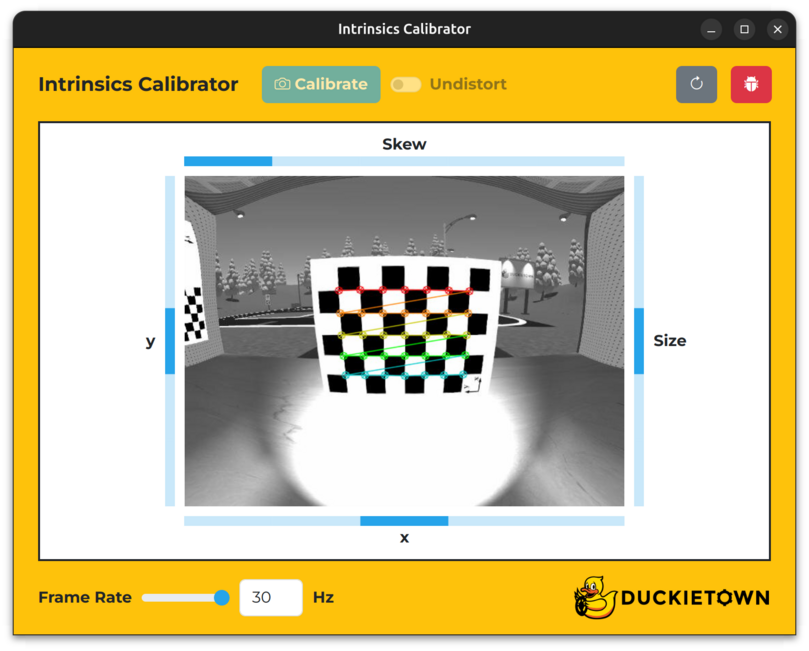
Fig. 32 The Duckietown intrinsics camera calibration interface.#
Note the keys in the table below.
Key |
Function |
|---|---|
X |
Increase the |
Z |
Decrease the |
Space |
Calibrate the camera |
F |
Toggle the |
R |
Refresh the window |
T |
Open the |
Intrinsic calibration procedure#
To perform the intrinsic calibration procedure:
Move the calibration pattern in front of your Duckiebot’s camera such that the entire checkerboard pattern is within its field of view and colored lines begin to overlay the checkerboard pattern.
Rotate the mechanical focus ring on the lens until you can clearly read the
xandylabels on the checkerboard pattern (do not adjust the focus again or place the lens cover back onto the lens unless you plan on repeating this procedure).Slowly move the calibration board left, right, up, down, forwards and backwards, relative to your Duckiebot’s camera, until each region within the
x,yandSizebars is filled in.Slowly tilt and pan the calibration board, relative to your Duckiebot’s camera, until each region within the
Skewbar is filled in.Click the
Calibratebutton.Wait for the spinner to disappear.
(optional) Click the
Undistortswitch to see an undistorted view of what your Duckiebot sees.
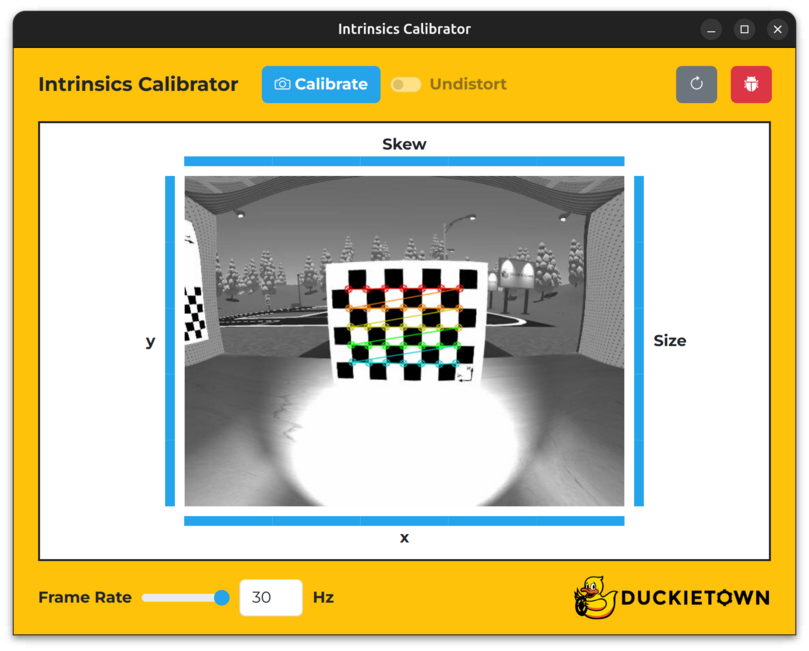
Fig. 33 The Duckietown intrinsics camera calibration interface (Intrinsics Calibrator) with all of its bars filled in.#
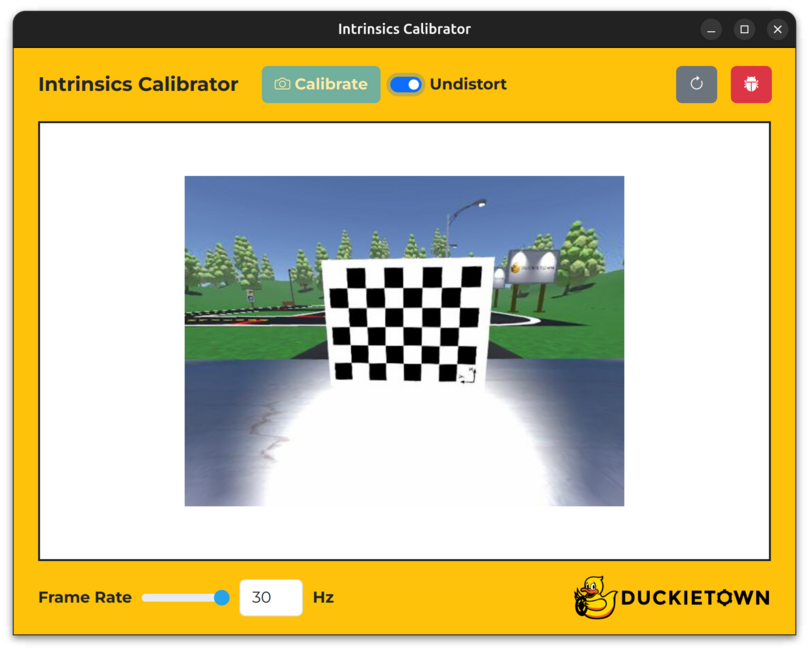
Fig. 34 The Intrinsics Calibrator with the Undistort switch set to on.#
To confirm that a new intrinsic calibration file has been created on your Duckiebot, run the following command and inspect the contents of the Camera Intrinsic panel:
dts duckiebot dashboard DUCKIEBOT_NAME --page robot/calibrations
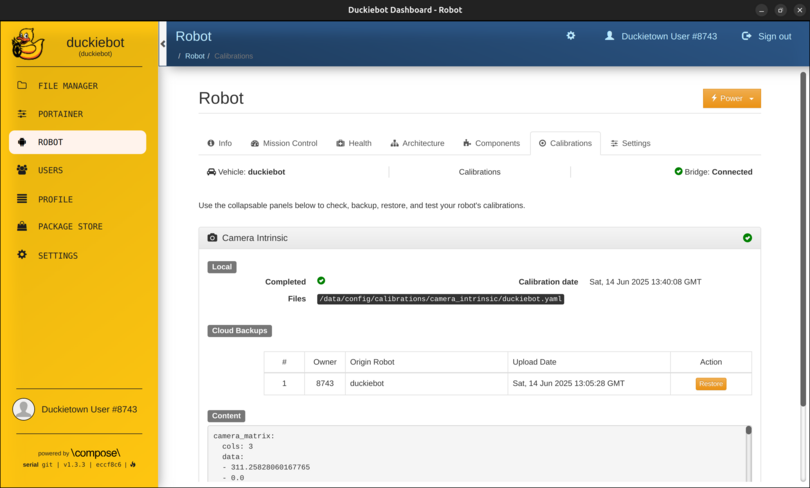
Fig. 35 The Camera Intrinsic panel on the Robot page of the Dashboard.#
Note
Within the Camera Intrinsic panel, under Local, you should see a tick next to Completed, the calibration date next to Calibration date and /data/config/calibrations/camera_intrinsic/DUCKIEBOT_NAME.yaml next to Files.
Extrinsic camera calibration procedure#
This camera calibration procedure outputs the relative pose between the camera and Duckiebot frame.
For optimal performance, repeat this procedure if you ship the Duckiebot or otherwise touch the camera holder.
The Extrinsics Calibrator#
The easiest way to perform the extrinsic camera calibration procedure for your Duckiebot is by using the Extrinsics Calibrator.
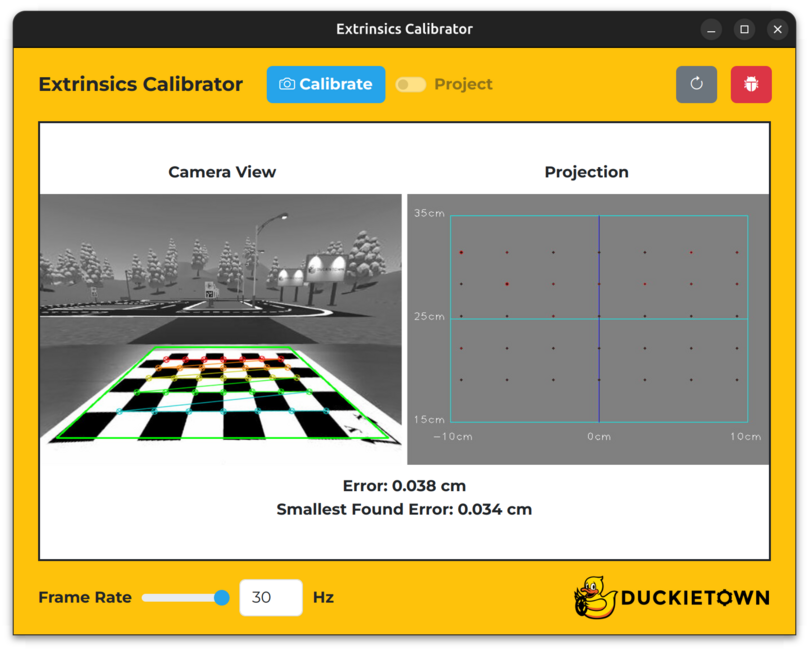
Fig. 36 The Extrinsics Calibrator.#
To open the Extrinsics Calibrator, run:
dts duckiebot calibrate_extrinsics DUCKIEBOT_NAME
Note the keys in the table below.
Key |
Function |
|---|---|
X |
Increase the |
Z |
Decrease the |
Space |
Calibrate the camera |
F |
Toggle the |
E |
Toggle the |
R |
Refresh the window |
T |
Open the |
Extrinsic calibration procedure#
To perform the extrinsic calibration procedure:
(optional) Click the
Check errorswitch to enforce a pose error bound for your Duckiebot’s camera based on it’s known intrinsic parameters (a trapezoid in the image underCamera Viewshould appear).Position your Duckiebot on the calibration board such that it faces the checkerboard pattern, your Duckiebot’s axle is parallel to and directly above the large
y-axis of the calibration board, and the axis that is perpendicular to and midway between your Duckiebot’s axle is directly above the largex-axis of the calibration board (if theCheck errorswitch is set toon, the trapezoid in the image underCamera Viewshould turn from black to blue).Click the
Calibratebutton.Wait for the spinner to disappear.
(optional) Click the
Projectswitch to see a top-down view of what your Duckiebot sees underProjection.
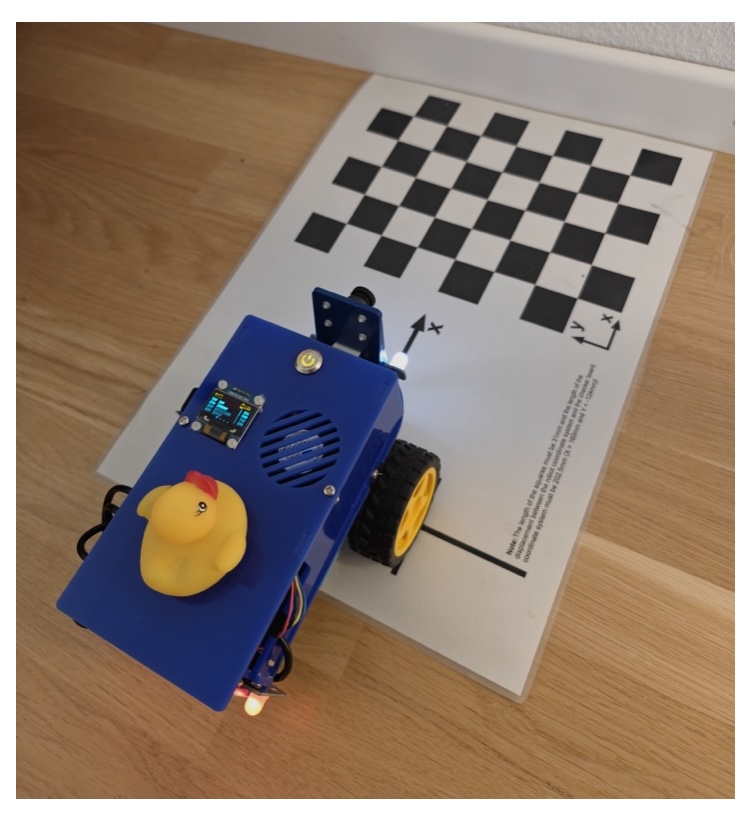
Fig. 37 Extrinsic calibration setup: align the Duckiebot with the marks on the calibration pattern, on a white backdrop.#
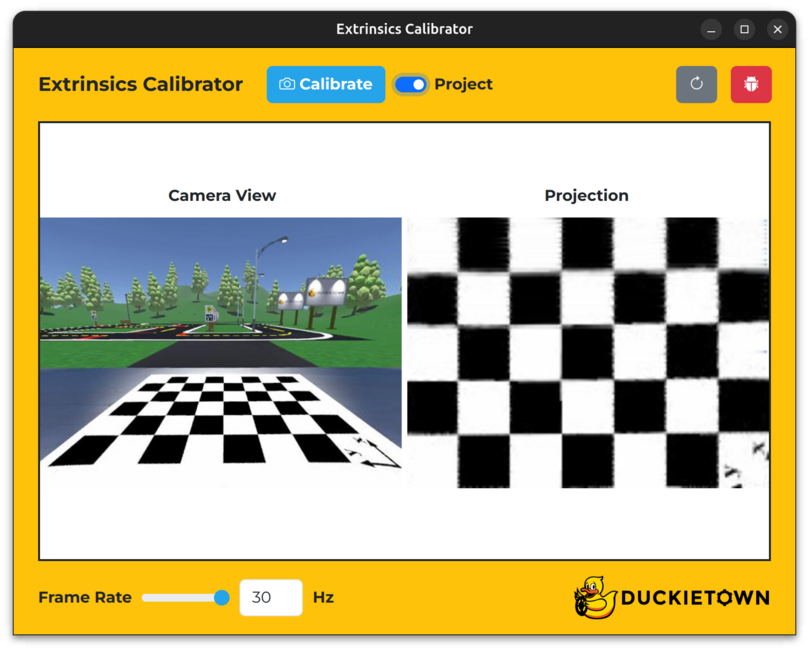
Fig. 38 The Extrinsics Calibrator with the Check error switch set to on.#
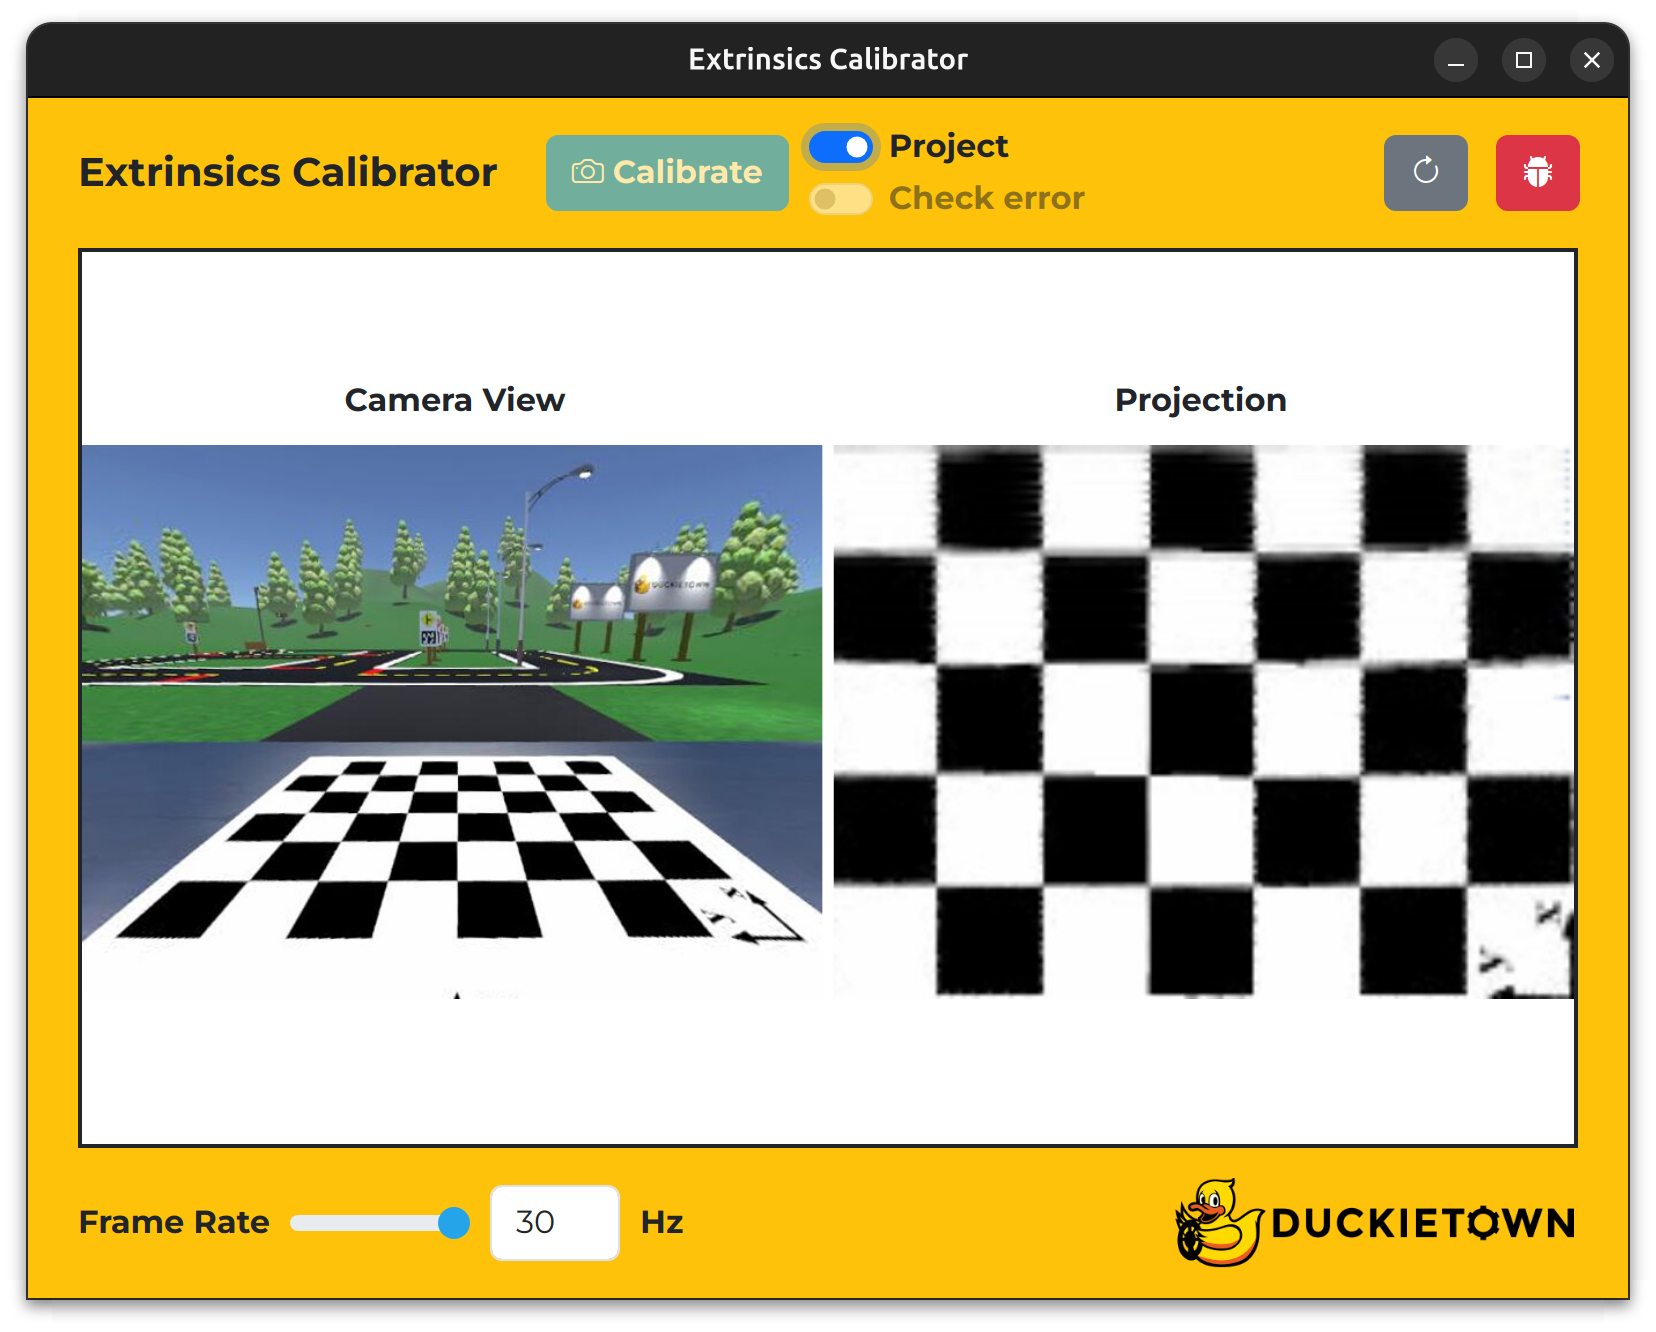
Fig. 39 The Extrinsics Calibrator with the Project switch set to on.#
To confirm that a new extrinsic calibration file has been created on your Duckiebot, run the following command and inspect the contents of the Camera Extrinsic panel:
dts duckiebot dashboard DUCKIEBOT_NAME --page robot/calibrations
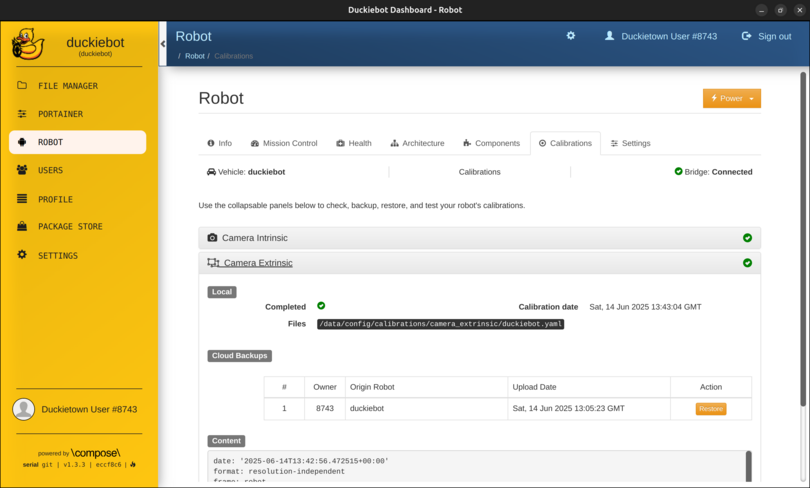
Fig. 40 The Camera Extrinsic panel on the Robot page of the Dashboard.#
Note
Within the Camera Extrinsic panel, under Local, you should see a tick next to Completed, the calibration date next to Calibration date and /data/config/calibrations/camera_extrinsic/DUCKIEBOT_NAME.yaml next to Files.
Troubleshooting#
Troubleshooting
SYMPTOM
I do not see what my Duckiebot sees after refreshing the window and following .
RESOLUTION
Contact support.