Software initialization
Contents
Software initialization#
What you will need
A computer (a.k.a. “base station”) with an internet connection
Balena Etcher or similar program
A micro SD card (32GB, U3, Class 10), e.g., that from your Duckiebox
A micro SD card reader, e.g., that from your Duckiebox
What you will get
A DD21 initialized and customized micro SD card
Flashing the SD card#
In this section you will install the Duckiedrone software on the microSD card.
If you have not already, on a base station, download the image flashing tool Etcher.
If you have not already, on a base station, download the latest drone image:
Connect the micro SD card to the base station. Use the micro SD to USB card reader if the base station does not have a micro SD port.

Fig. 10 Micro SD Card adapter#
Open Etcher and select the downloaded drone image. Then select the micro SD card as the drive to flash. Finally, click the
"Flash"button.
Watch this video to see how the process looks like.
Warning
Double check that the “drive” is your micro SD card.
You may be prompted to enter the base station password to proceed. This is normal: flashing an SD card deletes everything that is on it, so Etcher is making sure this process is OK with you.
Note
Flashing will take 10 - 15 min.
Customizing the Duckiedrone hostname and client network settings#
Warning
This step is particularly important.
Skipping it means having to re-flash the SD card.
Changing the Duckiedrone hostname (also known as the “robot name”) is needed to prevent conflicts when multiple Duckiedrones are operating in the same environment. If you intend to operate the drone in isolation from other Duckiedrones (e.g., at home), you can maintain the default settings.
Warning
The hostname can only be changed at this stage in the process. It cannot be changed later.
Attention
The hostname must start with a lower case letter and can contain only lower case letters (of the latin alphabet) and numbers:
Using special characters will break things and require re-flashing
Examples:
✅
argo✅
mydrone01❌
mydrone_01❌
My Drone❌
Argo
Attention
If you are in an environment where multiple drones are operating at the same time, make sure your hostname is unique!
To change your robot’s
hostnamenavigate to the newly flashed SD card.You will have to unplug it from your base station first and plug it back in as Balena Etcher dismounts the drive after finishing the flashing process.
If the flashing is successful, you will see that it has one partition named
boot, with many files inside andoverlaysfolder. Do not manually alter these files.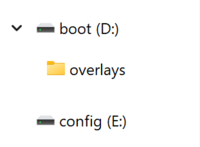
Fig. 11
bootpartition, do not alter!#
There will be a second partition called
config. Open this partition. You will find two files inside:hostnamewpa_supplicant.conf
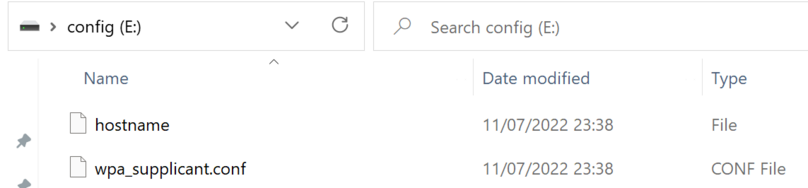
Fig. 12
configpartition content#Open the
hostnamefile with any text editor program (e.g., Notepad on Windows) and replace the default robot name,amelia, with one of your choosing.Warning
Make sure to follow the naming guidelines in the
attentionbox above.A wrong
hostnamewill mean having to reflash the SD card and start from step 1.Attention
Save the file before closing it.
Open the
wpa_supplicant.confwith a text editor of your choice and either edit the default connection settings or duplicate them to add a new network. These parameters will be used only when booting the Duckiedrone in client-network mode, i.e. connecting to an existing Wi-Fi access point.ctrl_interface=DIR=/var/run/wpa_supplicant GROUP=netdev update_config=1 country=US # NOTE: the following block is a template, use it to define connection to custom wifi networks network={ id_str="network_1" ssid="duckietown" psk="quackquack" key_mgmt=WPA-PSK }
country: change it if you are not in the US (e.g.,CHfor Switzerland,CAfor Canada; full list of country codes)id_str: an identifier for the network; change it if adding a new one;SSID: name of the Wi-Fi you want the Duckiedrone to connect to;psk: password for the above Wi-Fi;
You can add as many Wi-Fi settings as you want, e.g., for home, school, office, etc., by copying and pasting the first block.
Note
This file can be edited after the first boot as well if you want to add other networks.
ctrl_interface=DIR=/var/run/wpa_supplicant GROUP=netdev update_config=1 country=US # NOTE: the following block is a template, use it to define connection to custom wifi networks network={ id_str="network_1" ssid="duckietown" psk="quackquack" key_mgmt=WPA-PSK } network={ id_str="network_2" ssid="example-second-network" psk="quackquack2" key_mgmt=WPA-PSK } network={ id_str="network_3" ssid="example-third-network" psk="quackquack3" key_mgmt=WPA-PSK }
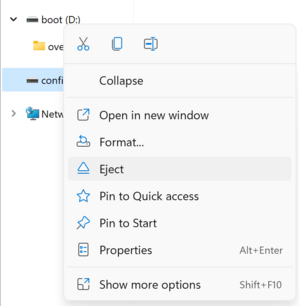
Eject your SD card safely.
Do not just unplug the SD crad from the base station
You are now ready for the first boot.
Troubleshooting#
Troubleshooting
SYMPTOM
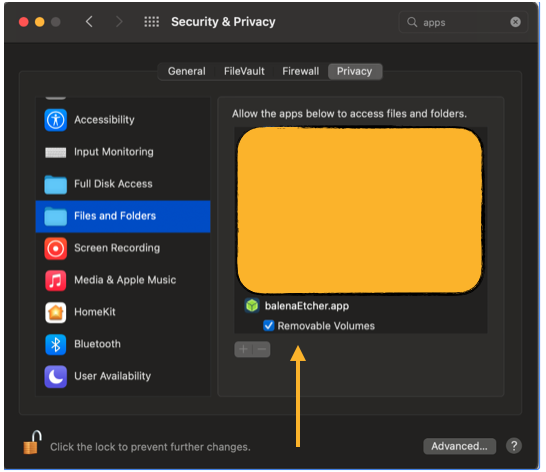
I’m using a Mac and the Flashing step fails for lack of permissions.
RESOLUTION
Go to your computer’s System Preferences > Security & Privacy > Files and Folders and enable access to Removable Volumes