General Procedure for Running Learning Experiences
Contents
General Procedure for Running Learning Experiences#
What you will need
A computer with
dtsinstalled and correctly set up: Initial setup(recommended) A successful Duckiematrix installation: Duckiematrix first steps
(optional) A “Ready to Go” Duckiedrone: Software Initialization
What you will get
A computer ready to run any Duckiedrone learning experience
This page describes the setup and general workflow for Duckiedrone learning experiences. The learning experiences currently available for the Duckiedrone are listed in Supported Learning Experiences, and each repository’s README documents the steps specific to that experience.
Note
to create a new LX, see the Duckietown Manual instructions on creating LXs.
to share an LX, reach out to info@duckietown.com
Forking the LX Repositories#
The recommended way to use the repository of an LX is to make a fork, and then clone that fork. Forking can be done through the GitHub web interface, and creates a personal copy that can still be synchronized with the upstream Duckietown code.
Cloning the repository directly also works, at the cost of not being able to push personal changes.
Create a fork: navigate to the repository of the learning experience, for example the Duckiedrone altitude PID tuning repository.
Find and press the “Fork” button on the top right:
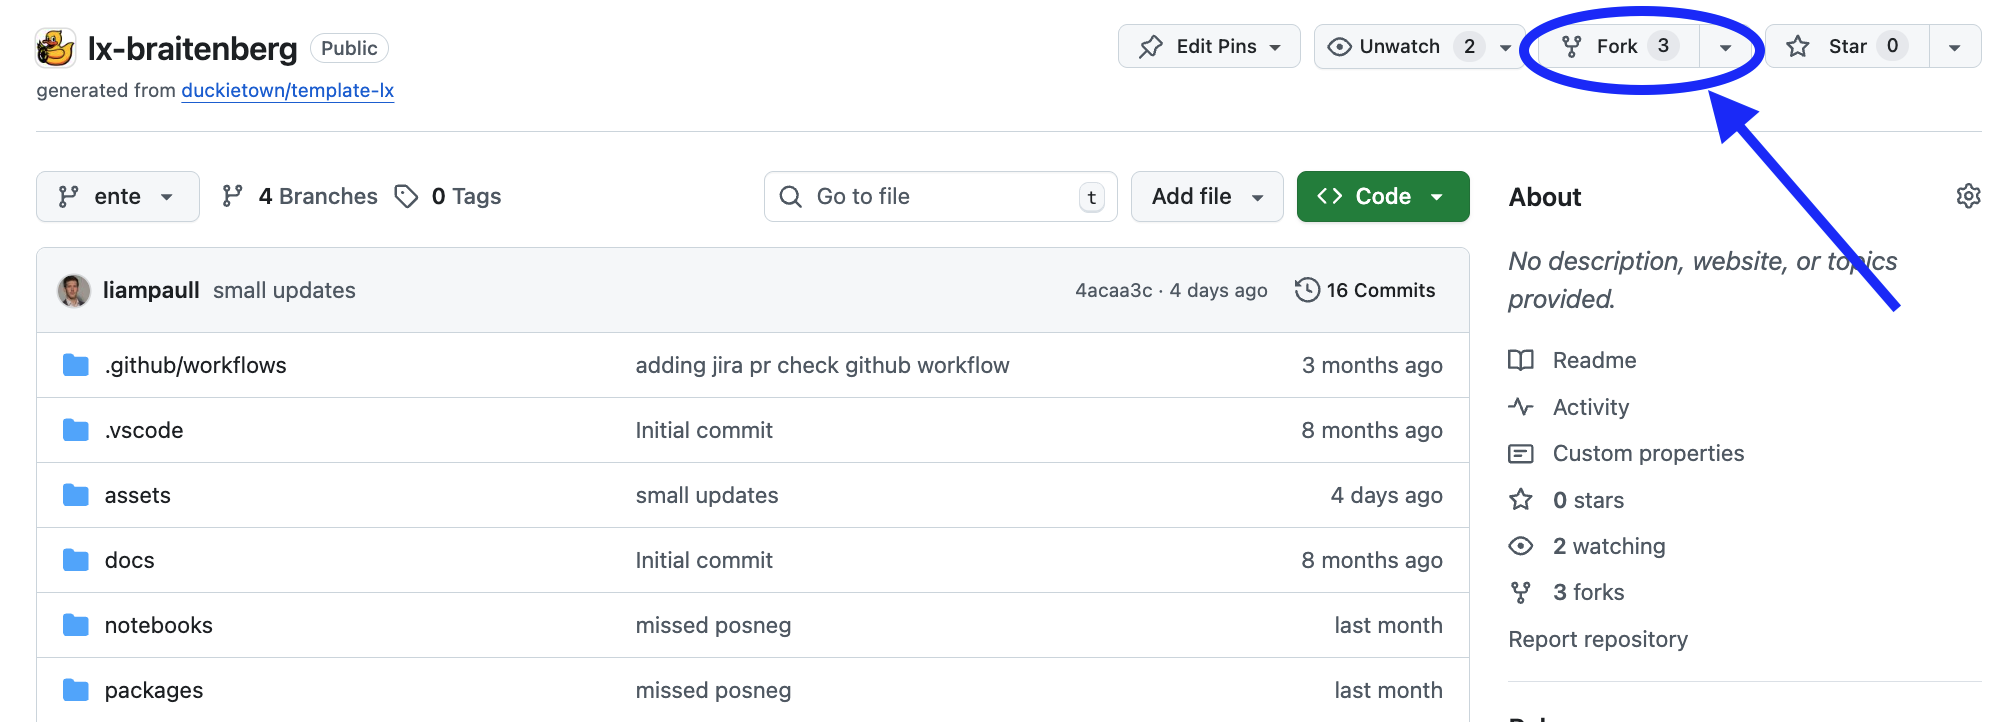
Fig. 77 Fork the LX to be able to make local changes while still being able to receive updates.#
This creates a new repository at
<your_github_username>/<lx-name>.Clone the fork: clone the fork on the computer, replacing the GitHub username in the command below, and navigate to the new folder:
 git clone [email protected]:<your_github_username>/<lx-name>
 cd <lx-name>
Configure upstream repo: configure the Duckietown version of this repository as the upstream repository to synchronize with the fork.
List the current remote repository for the fork,
git remote -v
Specify a new remote upstream repository,
git remote add upstream https://github.com/duckietown/<lx-name>
Confirm that the new upstream repository was added to the list,
git remote -v
Work can now be pushed to the personal repository using the standard GitHub workflow, and the beginning of every exercise prompts a pull from the upstream repository, updating the exercises to the latest version.
Keeping the System Up To Date#
💻 These instructions are for
entelearning experiences. Ensure that the Duckietown Shell is set to anenteprofile (and not adaffyone). The current profile is shown by:dts profile list
To switch to an
enteprofile, follow Initial setup.💻 Pull from the upstream remote to synchronize the fork with the upstream repo:
git pull upstream ente
💻 Make sure the Duckietown Shell is updated to the latest version:
pipx upgrade duckietown-shell
💻 Update the shell commands:
dts update💻 Update the computer and the Duckiedrone: follow How to update the software.
SSL Certificate Setup#
Note
This procedure is only needed the first time an LX is run on a new computer.
Duckietown uses SSL certificates and TLS encryption to guarantee the highest standard of safety and privacy. Set up a local SSL certificate needed to run the LX editor inside the browser:
sudo apt install libnss3-tools
dts setup mkcert
Note
If a Duckietown Workspace is in use, install mkcert on the host system by following the workspace setup instructions instead of running these commands inside the dev container.
Launching the Code Editor#
Important
All dts code commands must be executed inside the root directory of the learning experience.
From inside the directory of the learning experience, open the code editor by running:
dts code editor [--bind 0.0.0.0]
The --bind flag is used when working in a Duckietown Workspace and the browser does not open the editor automatically.
Wait for a URL to appear on the terminal, then click on it or copy-paste it in the address bar of the browser to access the code editor. The first thing shown in the code editor is a version of these instructions specific to the LX being run. The LX-specific indications shown in the code editor take precedence over this page.
Walkthrough of Notebooks#
Inside the code editor, use the navigator sidebar on the left-hand side to navigate to the notebooks directory and open the first notebook.
Follow the instructions on the notebook and work through them in sequence.
In many cases the last notebook instructs the learner to write some code inside the learning experience directory. That code needs to be built before testing it.
Testing with the Duckiematrix#
Testing code in the Duckiematrix requires a virtual Duckiedrone attached to an ongoing session.
1. Creating and starting a virtual Duckiedrone#
If this has not been done already (e.g., for a different LX), create a virtual Duckiedrone with the command:
dts duckiebot virtual create --type duckiedrone --configuration DD24 [VDRONE]
where [VDRONE] is the hostname. It can be any name, subject to the same naming constraints of physical Duckiedrones.
Then start the virtual robot with the command:
dts duckiebot virtual start [VDRONE]
The robot appears with status Booting and finally Ready in the output of dts fleet discover:
         | Hardware |    Type     | Model |  Status  |    Hostname
-------- | -------- | ----------- | ----- | -------- | --------------
[VDRONE] |  virtual | duckiedrone | DD24  |  Ready   | [VDRONE].local
Note
The Duckiedrone software stack runs on ROS 2. When running ROS 2 commands against a virtual or physical Duckiedrone from the computer, the ROS_DOMAIN_ID must match the one used by the robot.
2. Starting the Duckiematrix with the virtual Duckiedrone#
Once the virtual robot is ready, start the Duckiedrone simulation environment:
dts matrix run --standalone --map sandbox_drone --embedded
where --standalone starts both the Duckiematrix Engine and the Renderer in the same environment, and --embedded loads sandbox_drone, the Duckiedrone map shipped with the Duckiematrix.
Note
This command must be run from a local terminal and not from inside a Duckietown Workspace.
The Unity-based Duckiematrix simulator starts up in the sandbox_drone map, which contains a single Duckiedrone. For more details about using the Duckiematrix see the Duckiematrix manual.
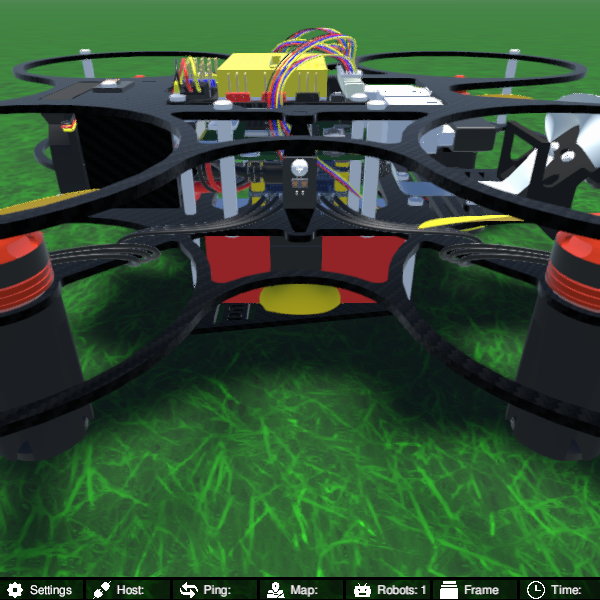
Fig. 78 The Duckiedrone in the Duckiematrix sandbox map used by the Duckiedrone learning experiences.#
To activate the Duckiematrix window, click anywhere on it and press ENTER. Press ESC at any time to disengage the mouse.
While the window is active, the point of view is moved with the W, A, S, and D keys, and the viewing angle with the mouse. All available keyboard commands are summarized in the “Settings” tab at the bottom left of the Duckiematrix window.
3. Attaching the virtual Duckiedrone to the Duckiematrix#
The virtual Duckiedrone and the Duckiematrix run as separate entities, and are connected with:
dts matrix attach [VDRONE] map_0/vehicle_0
where [VDRONE] is the name of the virtual Duckiedrone, and map_0/vehicle_0 is the name of the Duckiedrone entity in the sandbox_drone map. Once attached, the sensor data produced by the Duckiematrix reaches the robot, and the commands produced by the robot move the Duckiedrone in the simulation.
Other useful virtual Duckiedrone commands#
To disconnect the virtual Duckiedrone from the Duckiematrix without stopping it:
dts matrix detach [VDRONE]
Once the work session is over, stop the virtual robot:
dts duckiebot virtual stop [VDRONE]
The status of all virtual robots can be checked at any time with:
dts duckiebot virtual list
Building the Code#
From inside the learning experience root directory, build the code with:
dts code build -R [ROBOT_NAME]
where [ROBOT_NAME] is the name of either a physical or a virtual Duckiedrone.
This command packages the LX code and its dependencies into the image that will run on that Duckiedrone. The image is prepared for the selected robot, but the build command does not deploy it.
Deploying the code on a (physical or virtual) Duckiedrone#
Warning
Deploying an LX on a physical Duckiedrone can make the propellers spin. Before running the commands below on a physical Duckiedrone, review Safety and Flying your Duckiedrone, keep the drone in a clear area, and keep the RC transmitter within reach to take over at any moment.
To test the code on the Duckiedrone:
dts code workbench -R [ROBOT_NAME]
This command deploys the image built in the previous step to the specified Duckiedrone and starts the workbench, so that the code can be tested on the robot.
While the workbench is running, an interactive shell can be attached to its container from a second terminal:
dts code workbench -R [ROBOT_NAME] --shell
The shell can be used to inspect the running environment and execute commands inside the container.
After every change to the learning experience code, stop the workbench, then run dts code build -R [ROBOT_NAME] and dts code workbench -R [ROBOT_NAME] again to ship the new changes.
Troubleshooting#
Symptoms encountered while building or running an LX can be looked up below, or in Common issues.
Troubleshooting
SYMPTOM
dts : The path '...' does not appear to be a Duckietown project. : The metadata file '.dtproject' is missing.
RESOLUTION
The dts code commands must be run from the root directory of the LX.
Troubleshooting
SYMPTOM
Running dts code editor returns the error: dts : No valid DTProject found at '/path/to/lx'
RESOLUTION
Execute the commands from inside a learning experience folder (e.g., */dd24-pid-tuning/).
Troubleshooting
SYMPTOM
The virtual robot (named, e.g., VDRONE) hangs indefinitely when trying to update it.
RESOLUTION
Restart it with: dts duckiebot virtual restart VDRONE