Camera Calibration
Contents
What you will need
A working Duckiebot: Duckiebot Subsystems
A functional
dtsinstallation: Duckietown Shell (dts)A camera calibration pattern, e.g., as provided in a Duckiebox.
What you will get
A Duckiebot with the extrinsics camera calibration performed.
Camera Calibration#
This chapter describes how to perform the camera calibration procedure for your Duckiebot.
Introduction to camera calibration#
Every camera is unique due to manufacturing and assembly differences. Therefore, a camera calibration procedure needs to be performed to account for small manufacturing discrepancies.
This procedure involves displaying a predetermined pattern in front of the camera and using it to solve for the camera’s parameters.
For more information about the mathematics behind the process, review the appropriate learning experience.
Calibration board#
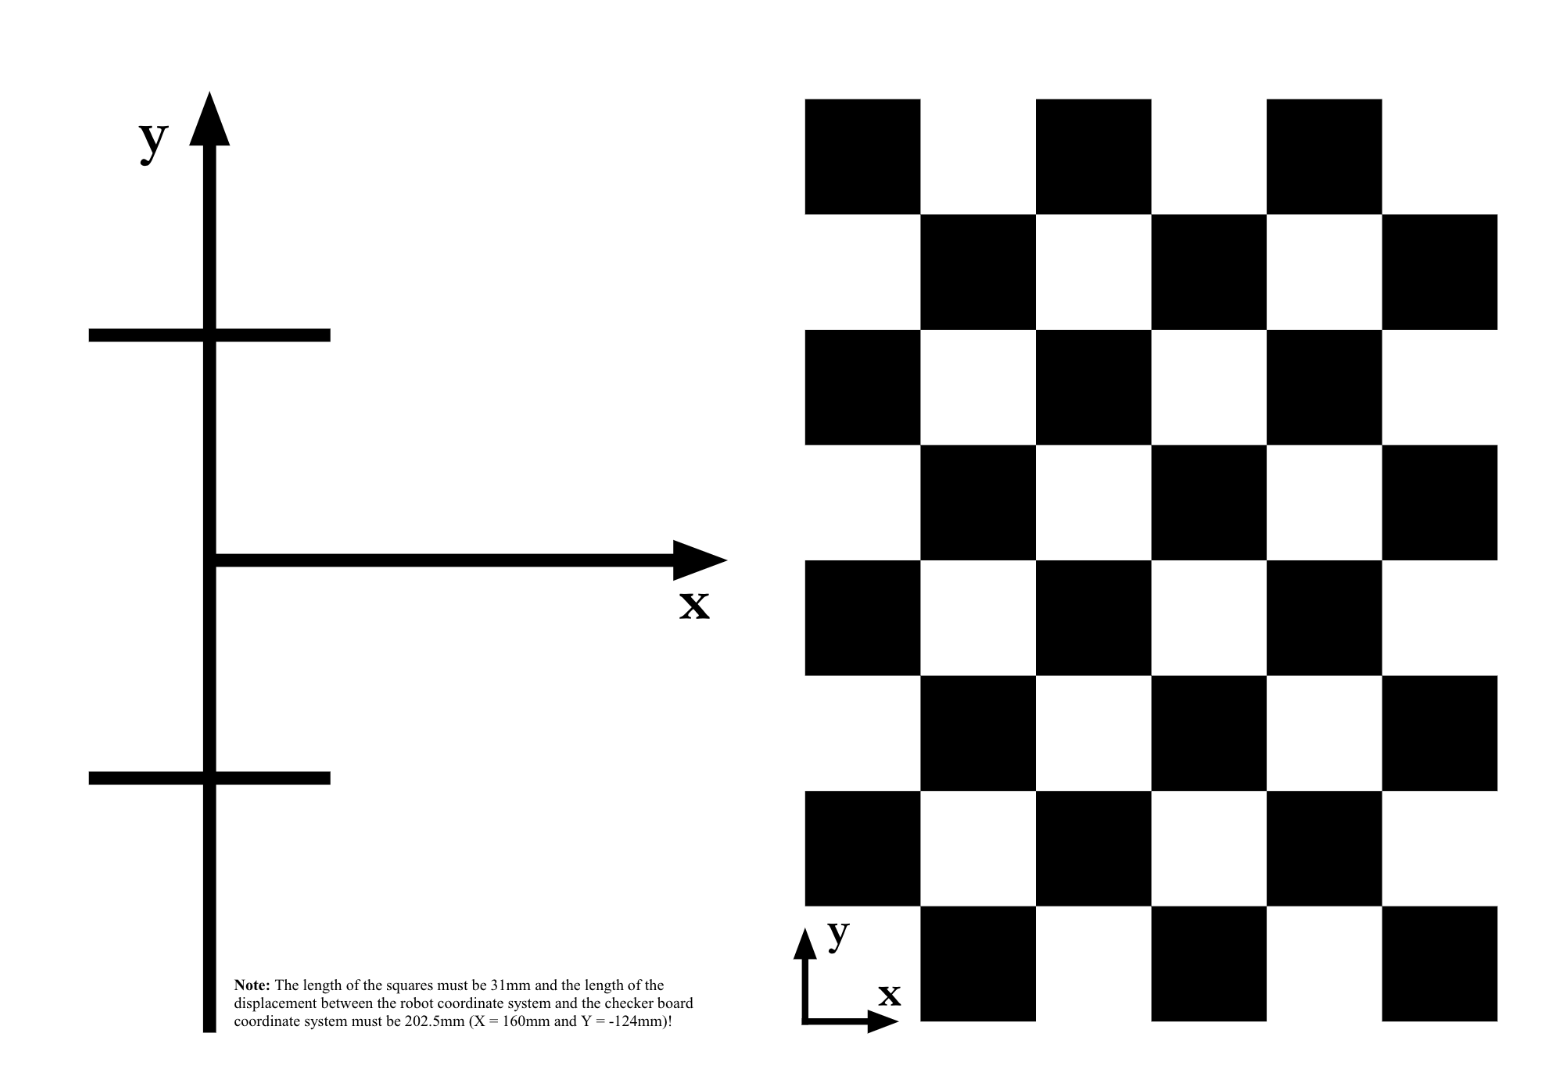
Fig. 49 Duckietown camera calibration pattern.#
If you do not already have a Duckietown calibration board:
Download the Duckietown calibration pattern
Print it in A3 format
Make sure the printing settings have not deformed the pattern, by measuring the features as indicated on the pattern itself
Fix it to a rigid planar surface that you can move around
Note
The squares must have side lengths equal to 0.031 m (3.1 cm). Measure this, as having the wrong size may lead to your Duckiebot crashing.
In case your squares are not the correct size, make sure that your printer settings are set to A3 format, with “no automatic scaling” and size set to
100%.
Warning
If the pattern is not rigid, the calibrations should not be used. You can print on thick paper or adhere to something rigid to achieve this.