LX: PID Control
Contents
LX: PID Control#
What you will need
Learning experience computer setup: General Procedure for Running Learning Experiences
(recommended) A successful Duckiematrix installation: Duckiematrix installation
(optional) A “Ready to Go” Duckiebot: Getting Started with your Duckiebot
Mathematical model built in Modeling and Kinematics LX: LX: Kinematics and Odometry
What you will get
Running the PID Control learning experience.
This page describes how to run the PID Control learning experience.
Warning
If you are using a Duckietown Workspace, the WebGL (browser) versions of the Duckietown Viewer and
Duckiematrix can be run inside or outside the Duckietown Workspace. If
dts is installed on the host machine, commands that launch native
Duckietown Viewer apps or the Duckiematrix Renderer, such as dts matrix run, can also be run in either location. When one of these commands is
run inside the Duckietown Workspace, it is automatically delegated to the
host machine, where it launches the native UI. The --standalone flag
starts the Duckiematrix Engine in the environment where the command is run.
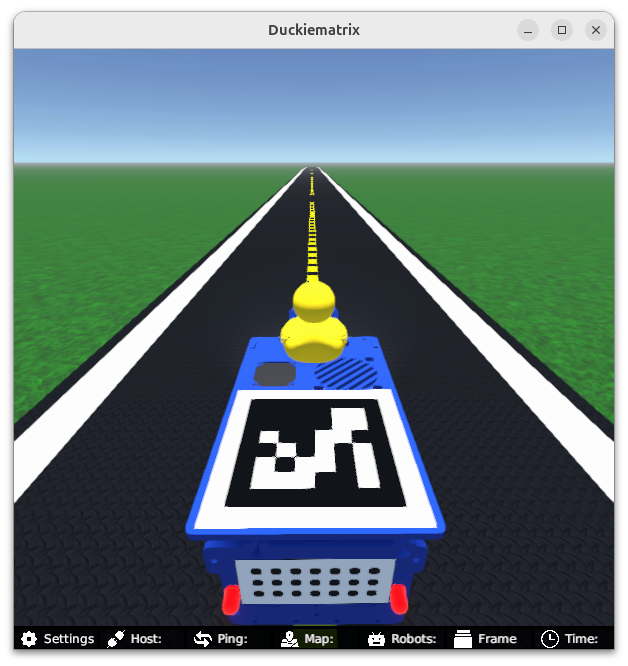
Fig. 171 Welcome to the PID control LX! Are you able to autonomously perform basic driving maneuvres in a simple world? Press R if you get lost to get back to the road!#
Intended Learning Outcomes
After this learning experience, learners will:
Understand what a PID controller is, and how each component (P, I, D) affects the closed loop performance of the controlled robot.
Be able to describe the difference between discrete time and continuous time implementations of derivatives and integrals.
Write a PID controller for regulating the heading of a Duckiebot, in Python.
Write a PID controller for regulating the (lateral) position of a Duckiebot, in Python.
Perform unit tests (i.e., sanity checks) on specific implementation functions.
Deploy and tune the designed PID controller on virtual and/or physical Duckiebots.
About these learning activities#
In this learning experience, you will use the model that we built in the kinematics and odometry learning experience. Now we will build a simple controller to make the Duckiebot follow a specified set of actions based on our knowledge of how it moves.
For guided setup instructions, lecture content, and more related to this LX, see our Self-Driving Cars with Duckietown MOOC on EdX.
Note
This exercise can be run on a physical Duckiebot or on a virtual Duckiebot in the Duckiematrix.
Forking the repository#
1. Create a fork#
Navigate to the (PID) Control repository.
Find and press the “Fork” button on the top right:
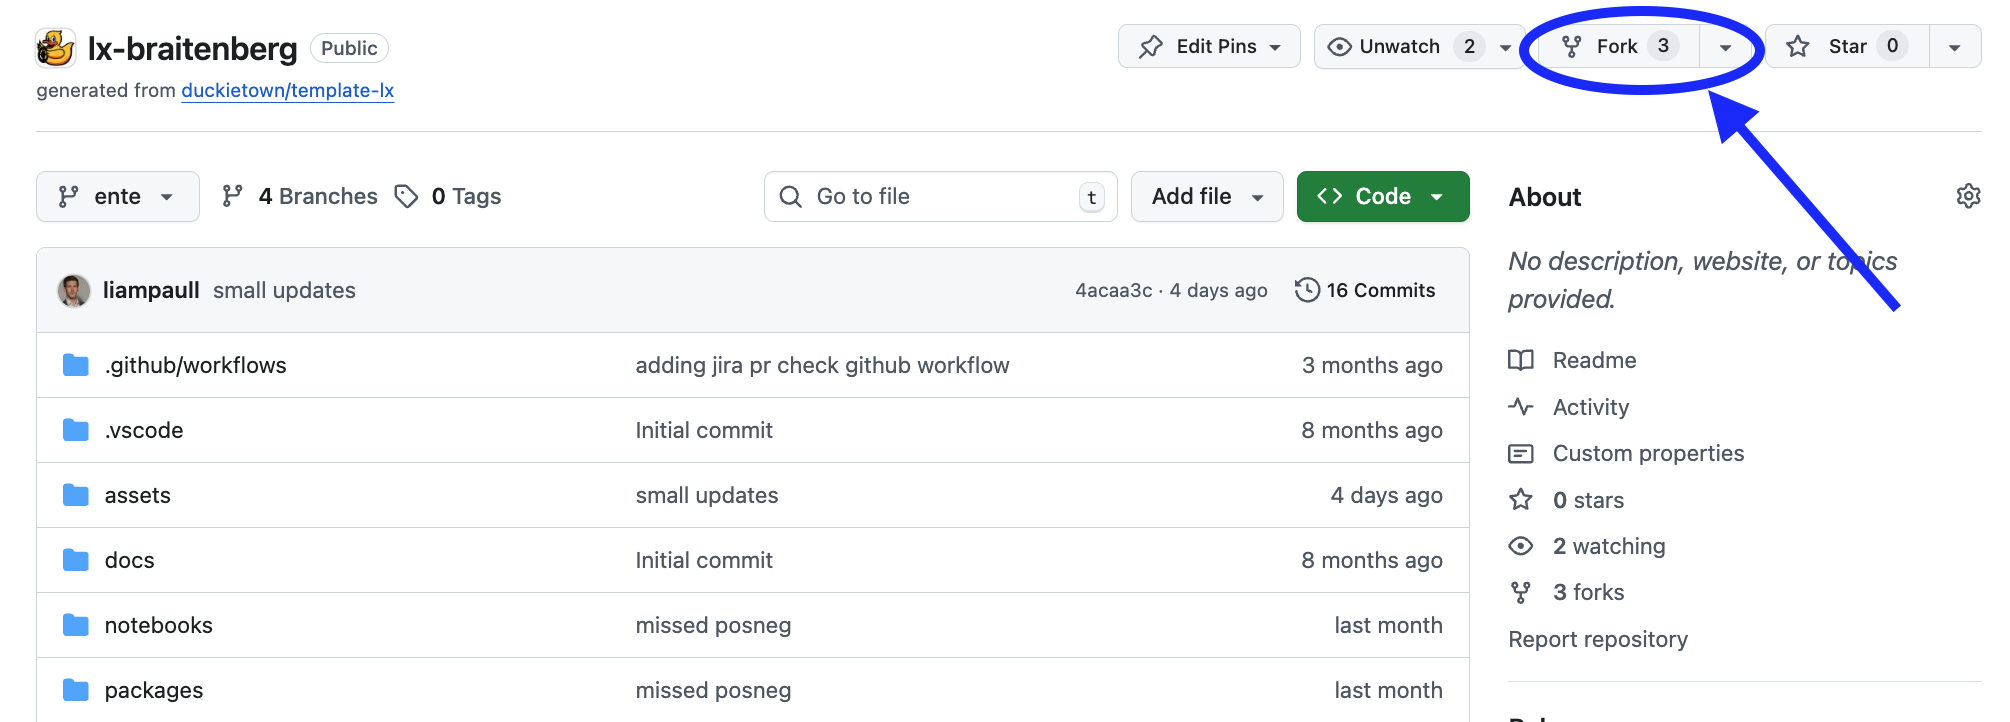
Fig. 172 Fork the LX to be able to make local changes while still being able to receive updates.#
This will create a new repository at: <your_github_username>/lx-control.
2. Clone the fork#
Clone the fork on your computer, replacing your GitHub username in the command below, and navigate to the new folder:
git clone [email protected]:<your_github_username>/lx-control
cd lx-control
3. Configure the upstream repository#
Configure the Duckietown version of this repository as the upstream repository to synchronize with your fork.
List the current remote repository for your fork:
git remote -v
Specify a new remote upstream repository:
git remote add upstream https://github.com/duckietown/lx-control
Confirm that the new upstream repository was added to the list:
git remote -v
You can now push your work to your own repository using the standard GitHub workflow, and the beginning of every exercise will prompt you to pull from the upstream repository, updating your exercises to the latest version (if available).
Keeping your System Up To Date#
💻 These instructions are for
entelearning experiences. Ensure your Duckietown Shell is set to anenteprofile (and not adaffyone). You can check your current profile with:dts profile list
To switch to an ente profile, follow the Duckietown Manual DTS installation instructions.
💻 Pull from the upstream remote to synchronize your fork with the upstream repository:
git pull upstream ente
💻 Make sure your Duckietown Shell is updated to the latest version:
pipx upgrade duckietown-shell
💻 Update the shell commands:
dts update💻 Update your laptop/desktop:
dts desktop update
🚙 Update your Duckiebot:
dts duckiebot update DUCKIEBOT_NAME
(where
DUCKIEBOT_NAMEis the name of your physical or virtual Duckiebot.)
Launching the Code Editor#
Important
All dts code commands should be run from the root directory of the learning experience.
Making sure you are inside the path of the specific learning experience you want to work on, open the code editor by running:
dts code editor
Wait for a URL to appear on the terminal, then click on it or copy-paste it in the address bar of your browser to access the code editor. The first thing you will see in the code editor is a version of these instructions. At this point you can start following the LX-specific indications shown in your code editor.
Walkthrough of Notebooks#
Inside the code editor, use the navigator sidebar on the left-hand side to navigate to the
notebooks directory and open the first notebook.
Follow the instructions on the notebook and work through them in sequence.
In many cases the last notebook will instruct you to write some code inside the learning experience directory.
Once you have done that you will need to build your code before testing it.
Testing with the Duckiematrix#
To test your code in the Duckiematrix, attach either a physical or virtual robot to a Duckiematrix Entity. The steps below use a virtual robot; for instructions on attaching a physical robot, see Attaching a Robot to a Remote Engine.
1. Creating and starting virtual Duckiebot#
You can create one with the command:
dts duckiebot virtual create --type duckiebot --configuration DB21J ROBOT_NAME
When you run the command, DTS prompts you to enter and confirm the password for the virtual robot’s duckie account; the characters you enter are not displayed. ROBOT_NAME is the hostname. It can be anything you like, subject to the same naming constraints of physical Duckiebots. Make sure to remember your robot (host)name for later.
Then you can start your virtual robot with the command:
dts duckiebot virtual start ROBOT_NAME
You should see it with a status Booting and finally Ready if you look at dts fleet discover:
     | Hardware |   Type    | Model |  Status  | Hostname
---  | -------- | --------- | ----- | -------- | ---------
ROBOT_NAME |  virtual | duckiebot | DB21J |  Ready   | ROBOT_NAME.local
Once you are done for the day, do not forget to stop your virtual robot:
dts duckiebot virtual stop ROBOT_NAME
If in doubt, you can check the status of your virtual scuderia at any time with:
dts duckiebot virtual list
2. Starting the Duckiematrix with the virtual Duckiebot#
Now that your virtual robot is ready, you can start the Duckiematrix. From this exercise directory do:
dts code start_matrix
Note
If you are using a Duckietown Workspace, run dts code start_matrix --no-renderer inside the Duckietown
Workspace. If dts is installed on the host machine, then run dts matrix run inside or outside the Duckietown Workspace. When the command is run inside the
Duckietown Workspace, the command is automatically delegated to the host
machine, where it launches the native Renderer.
You should see the Unity-based Duckiematrix simulator start up. For more details about using the Duckiematrix see Simulation and the Duckiematrix.

Fig. 173 You start as a duckie. Click Enter to get started. Move with WASD and rotate the point of view by moving the mouse, as if you were playing a computer game. Approach the Duckiebot and ride it by pressing E.#
To run the WebGL (browser) version of the Duckiematrix, add the --browser flag.
Note
For the WebGL (browser) version of the Duckiematrix, if the colors look desaturated, try a different browser.
Building the Code#
From inside the learning experience root directory, you can build your code with:
dts code build -R ROBOT_NAME
where ROBOT_NAME can be either a physical or virtual robot.
Testing on a Duckiebot or in the Duckiematrix#
🚙 To test your code on your physical Duckiebot you can do:
dts code workbench -R DUCKIEBOT_NAME
💻 To test your code in the Duckiematrix:
dts code workbench -m -R ROBOT_NAME
(note the -m flag which means that we are running in the matrix.)
In another terminal, you can launch the noVNC viewer, which can be useful to interact with the virtual robot in different ways depending on the specific LX:
dts code vnc -R ROBOT_NAME
where ROBOT_NAME could be the physical or the virtual robot (use whichever you ran the dts code workbench and dts code build command with).
Troubleshooting#
Troubleshooting
SYMPTOM
When I run dts code editor, I get the error dts : No valid DTProject found at '/path/to/lx'.
RESOLUTION
Make sure you are executing the commands from inside a learning experience folder (e.g., */lx-control/)
Troubleshooting
SYMPTOM
My virtual robot hangs indefinitely when I try to update it.
RESOLUTION
Try to restart it with the following command, where ROBOT_NAME is the name of your virtual robot:
dts duckiebot virtual restart ROBOT_NAME
Troubleshooting
SYMPTOM
When I run dts code vnc nothing happens in the browser.
RESOLUTION
It can take 10-45 seconds for noVNC to start, depending on your computer’s specifications. Please wait.
Troubleshooting
SYMPTOM
When I click on PID Heading in the noVNC desktop, I do not see the interaction window with heading ref, v_0, etc.
RESOLUTION
Enlarge the noVNC window on your computer to see it. It could pop up out of view of the initial window size.
Troubleshooting
SYMPTOM
When I click on PID Heading in the noVNC desktop, I do not see image in the pre-configured RVIZ window popping up.
RESOLUTION
Terminate the process in the terminal where you ran dts code workbench [-m] -R ROBOT_NAME and run it again after starting the Duckiematrix with dts start_matrix.