Extrinsic camera calibration procedure
Contents
What you will need
A working Duckiebot: Duckiebot Subsystems
A functional
dtsinstallation: Duckietown Shell (dts)A camera calibration pattern, e.g., as provided in a Duckiebox.
What you will get
A Duckiebot with the extrinsics camera calibration performed.
Extrinsic camera calibration procedure#
This camera calibration procedure outputs the relative pose between the camera and Duckiebot frame.
For optimal performance, repeat this procedure if you ship the Duckiebot or otherwise touch the camera holder.
The Extrinsics Calibrator#
The easiest way to perform the extrinsic camera calibration procedure for your Duckiebot is by using the Extrinsics Calibrator.
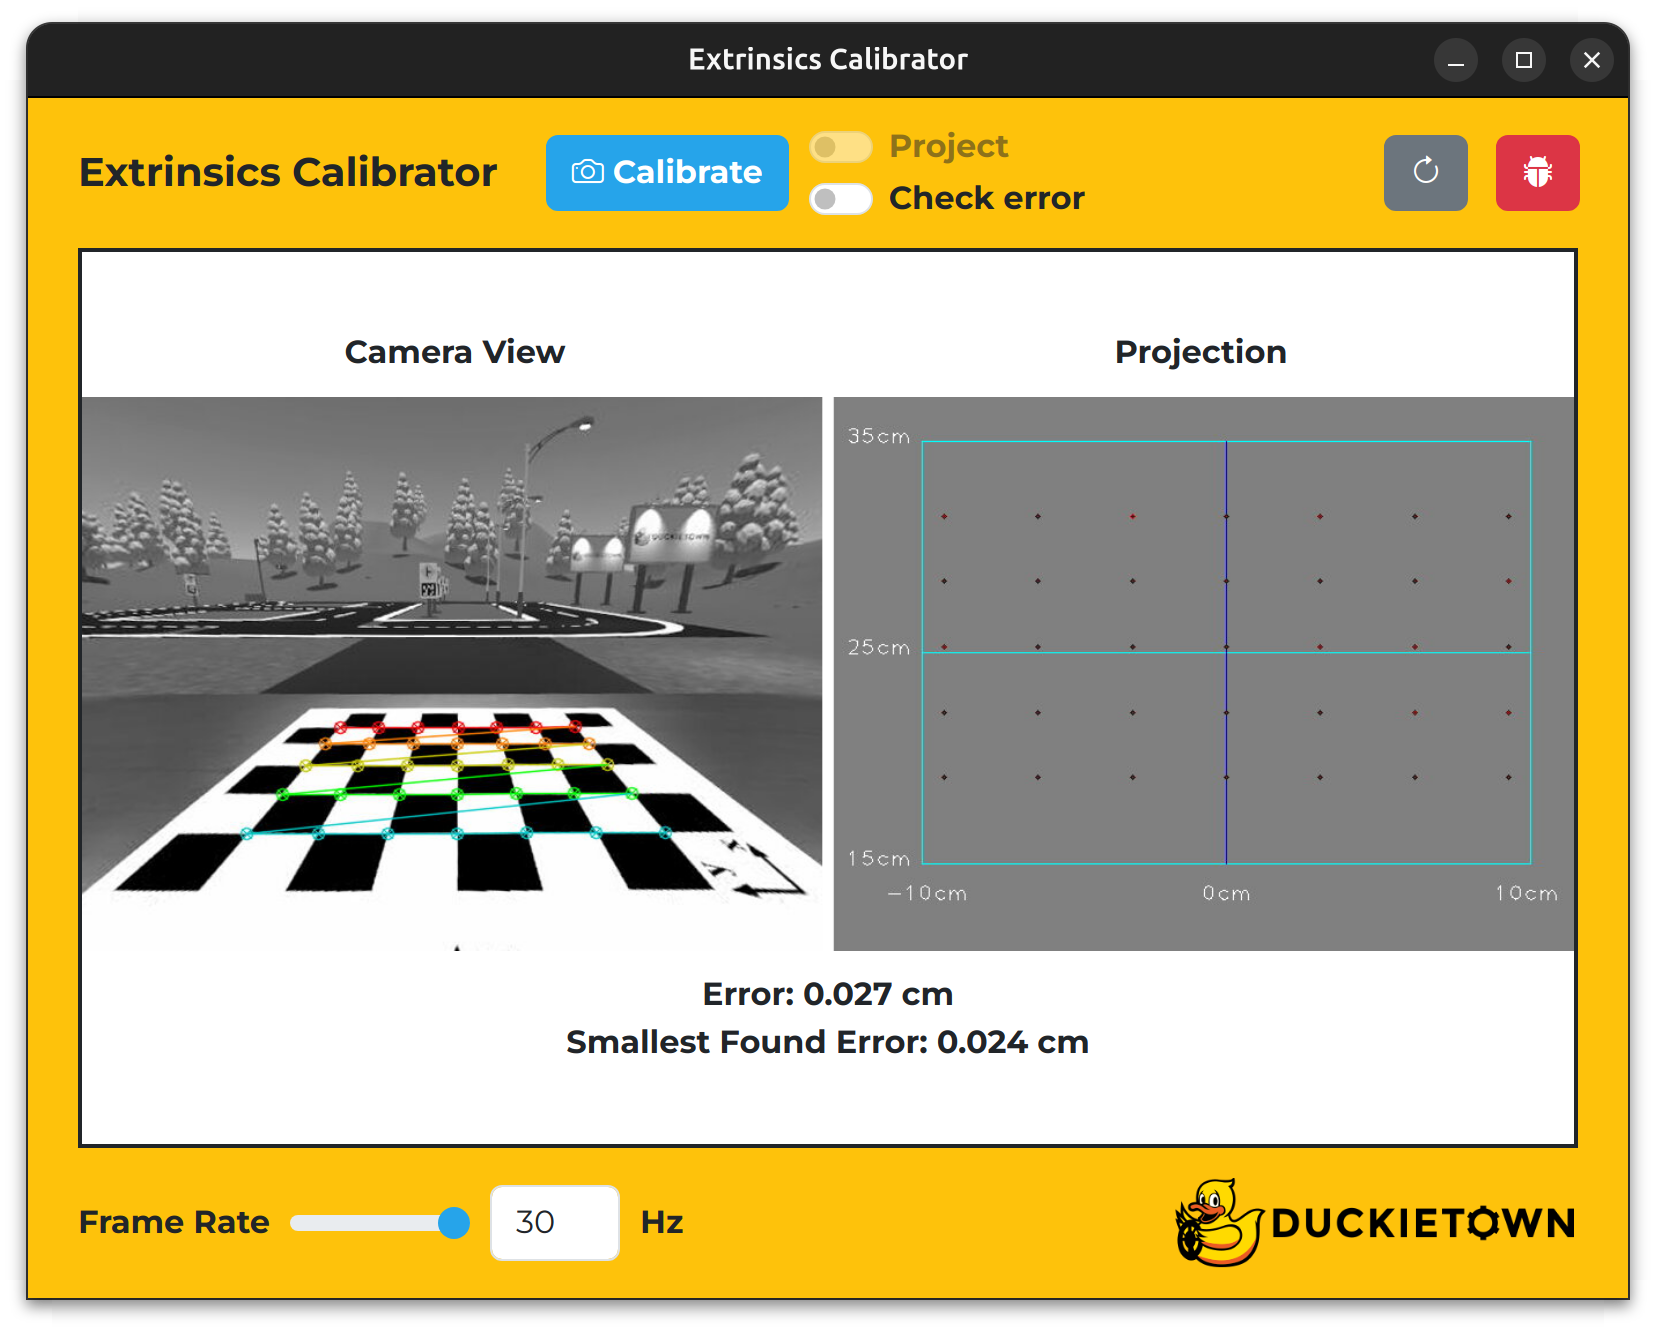
Fig. 54 The Extrinsics Calibrator.#
To open the Extrinsics Calibrator, run:
dts duckiebot calibrate_extrinsics DUCKIEBOT_NAME
Note
If you are using a Duckietown Workspace, run this command from a local terminal outside the dev container. To open the browser-based Viewer instead, use dts duckiebot calibrate_extrinsics DUCKIEBOT_NAME --browser.
Note the keys in the table below.
Key |
Function |
|---|---|
X |
Increase the |
Z |
Decrease the |
Space |
Calibrate the camera |
F |
Toggle the |
E |
Toggle the |
R |
Refresh the window |
T |
Open the |
Extrinsic calibration procedure#
To perform the extrinsic calibration procedure:
(optional) Click the
Check errorswitch to enforce a pose error bound for your Duckiebot’s camera based on its known intrinsic parameters (a trapezoid in the image underCamera Viewshould appear).Position your Duckiebot on the calibration board such that it faces the checkerboard pattern, your Duckiebot’s axle is parallel to and directly above the large
y-axis of the calibration board, and the axis that is perpendicular to and midway between your Duckiebot’s axle is directly above the largex-axis of the calibration board (if theCheck errorswitch is set toon, the trapezoid in the image underCamera Viewshould turn from black to blue).Click the
Calibratebutton.Wait for the spinner to disappear.
(optional) Click the
Projectswitch to see a top-down view of what your Duckiebot sees underProjection.
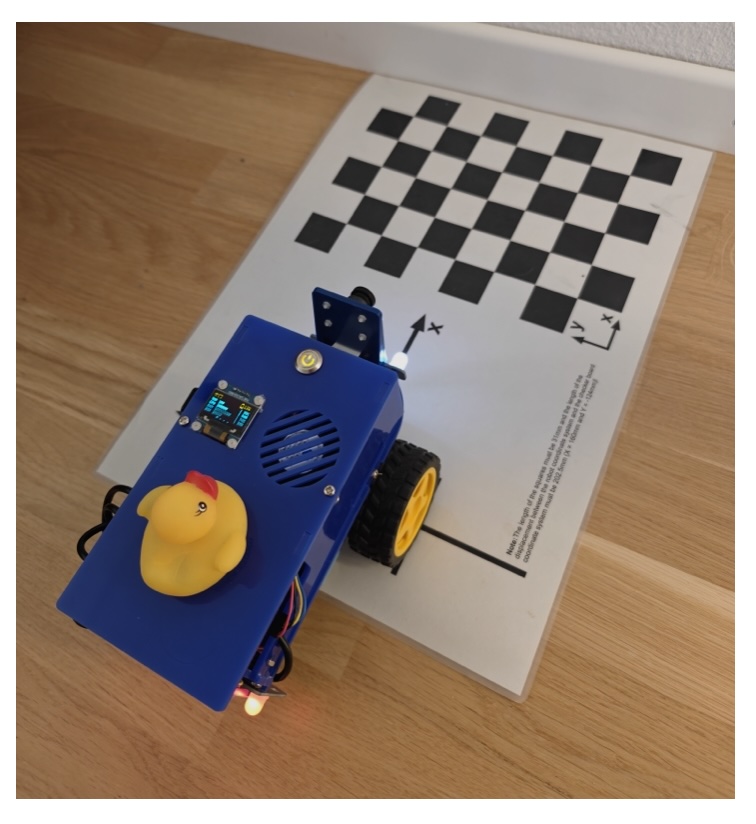
Fig. 55 Extrinsic calibration setup: align the Duckiebot with the marks on the calibration pattern, on a white backdrop.#
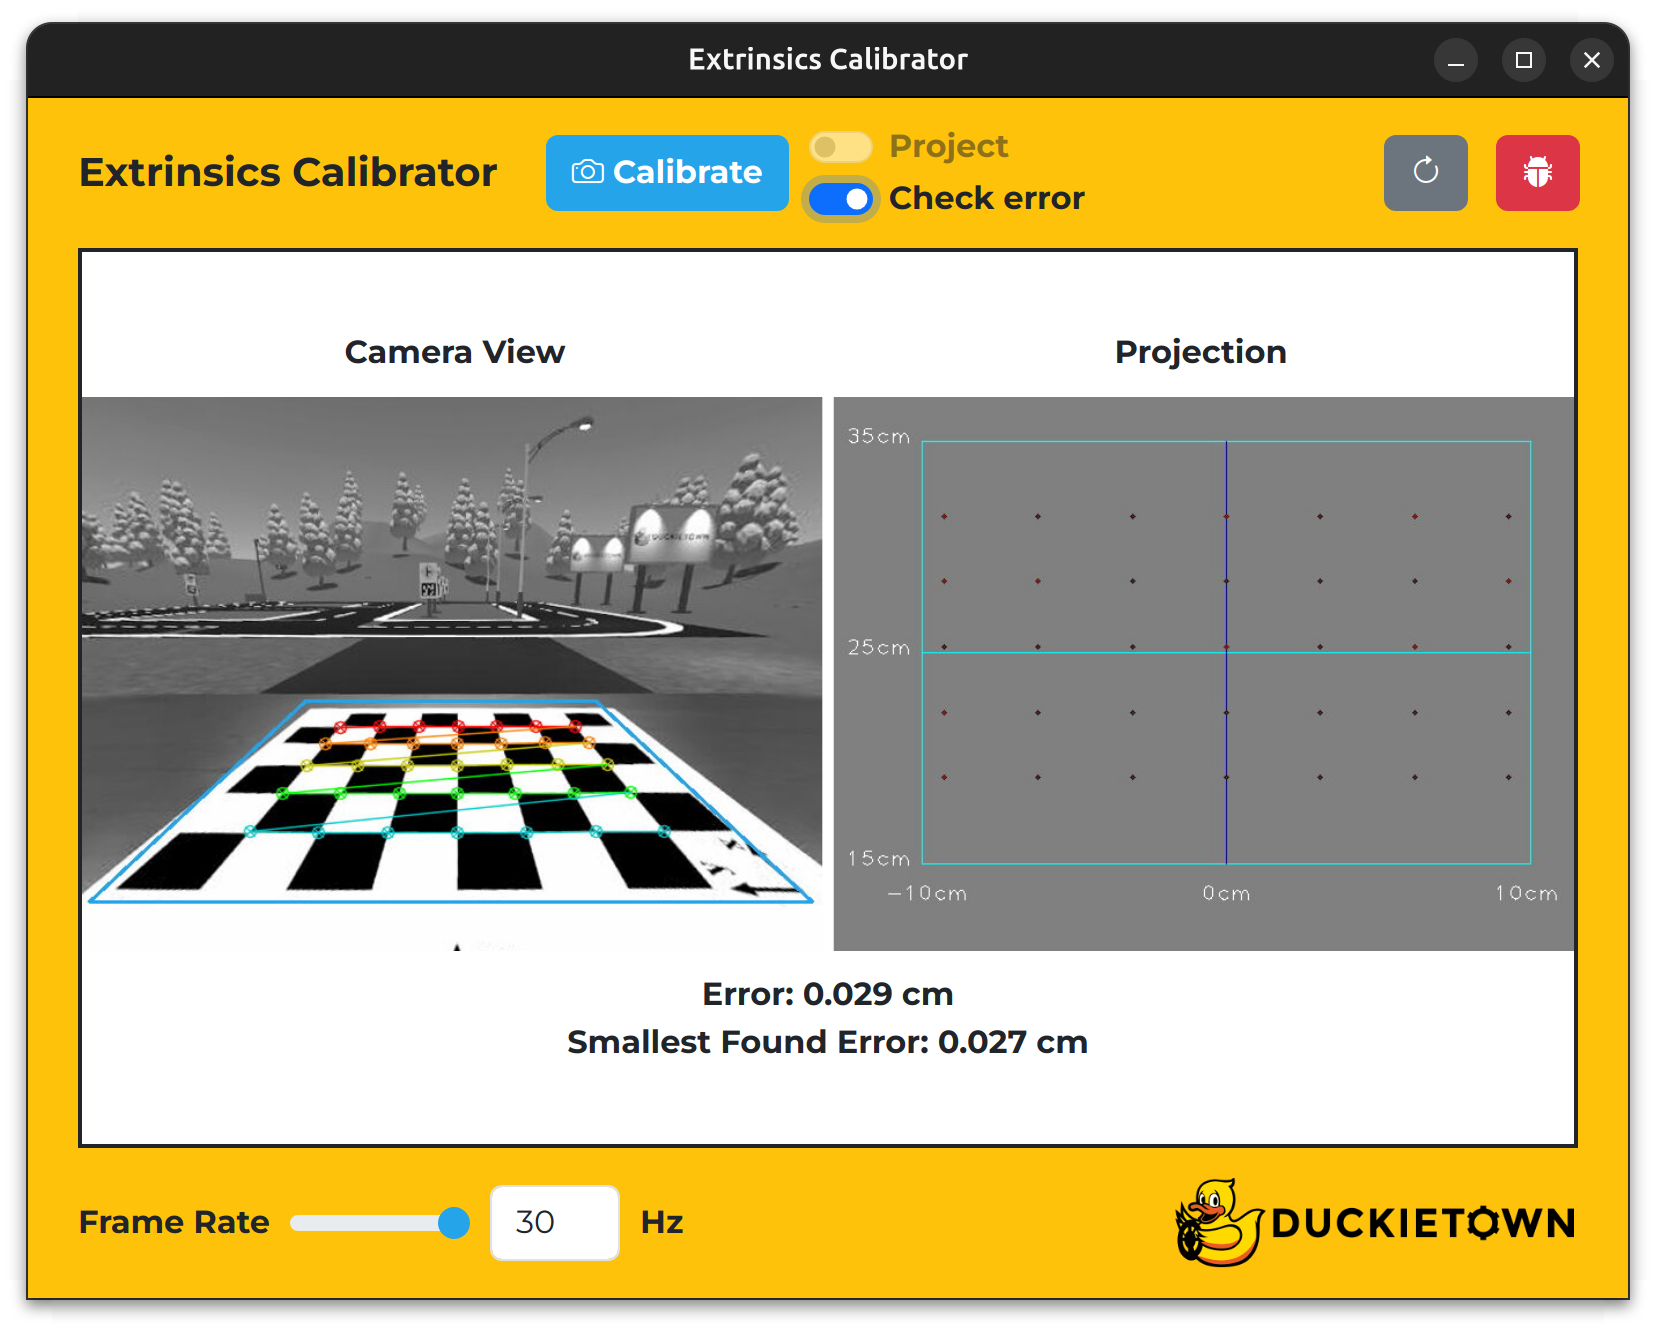
Fig. 56 The Extrinsics Calibrator with the Check error switch set to on.#
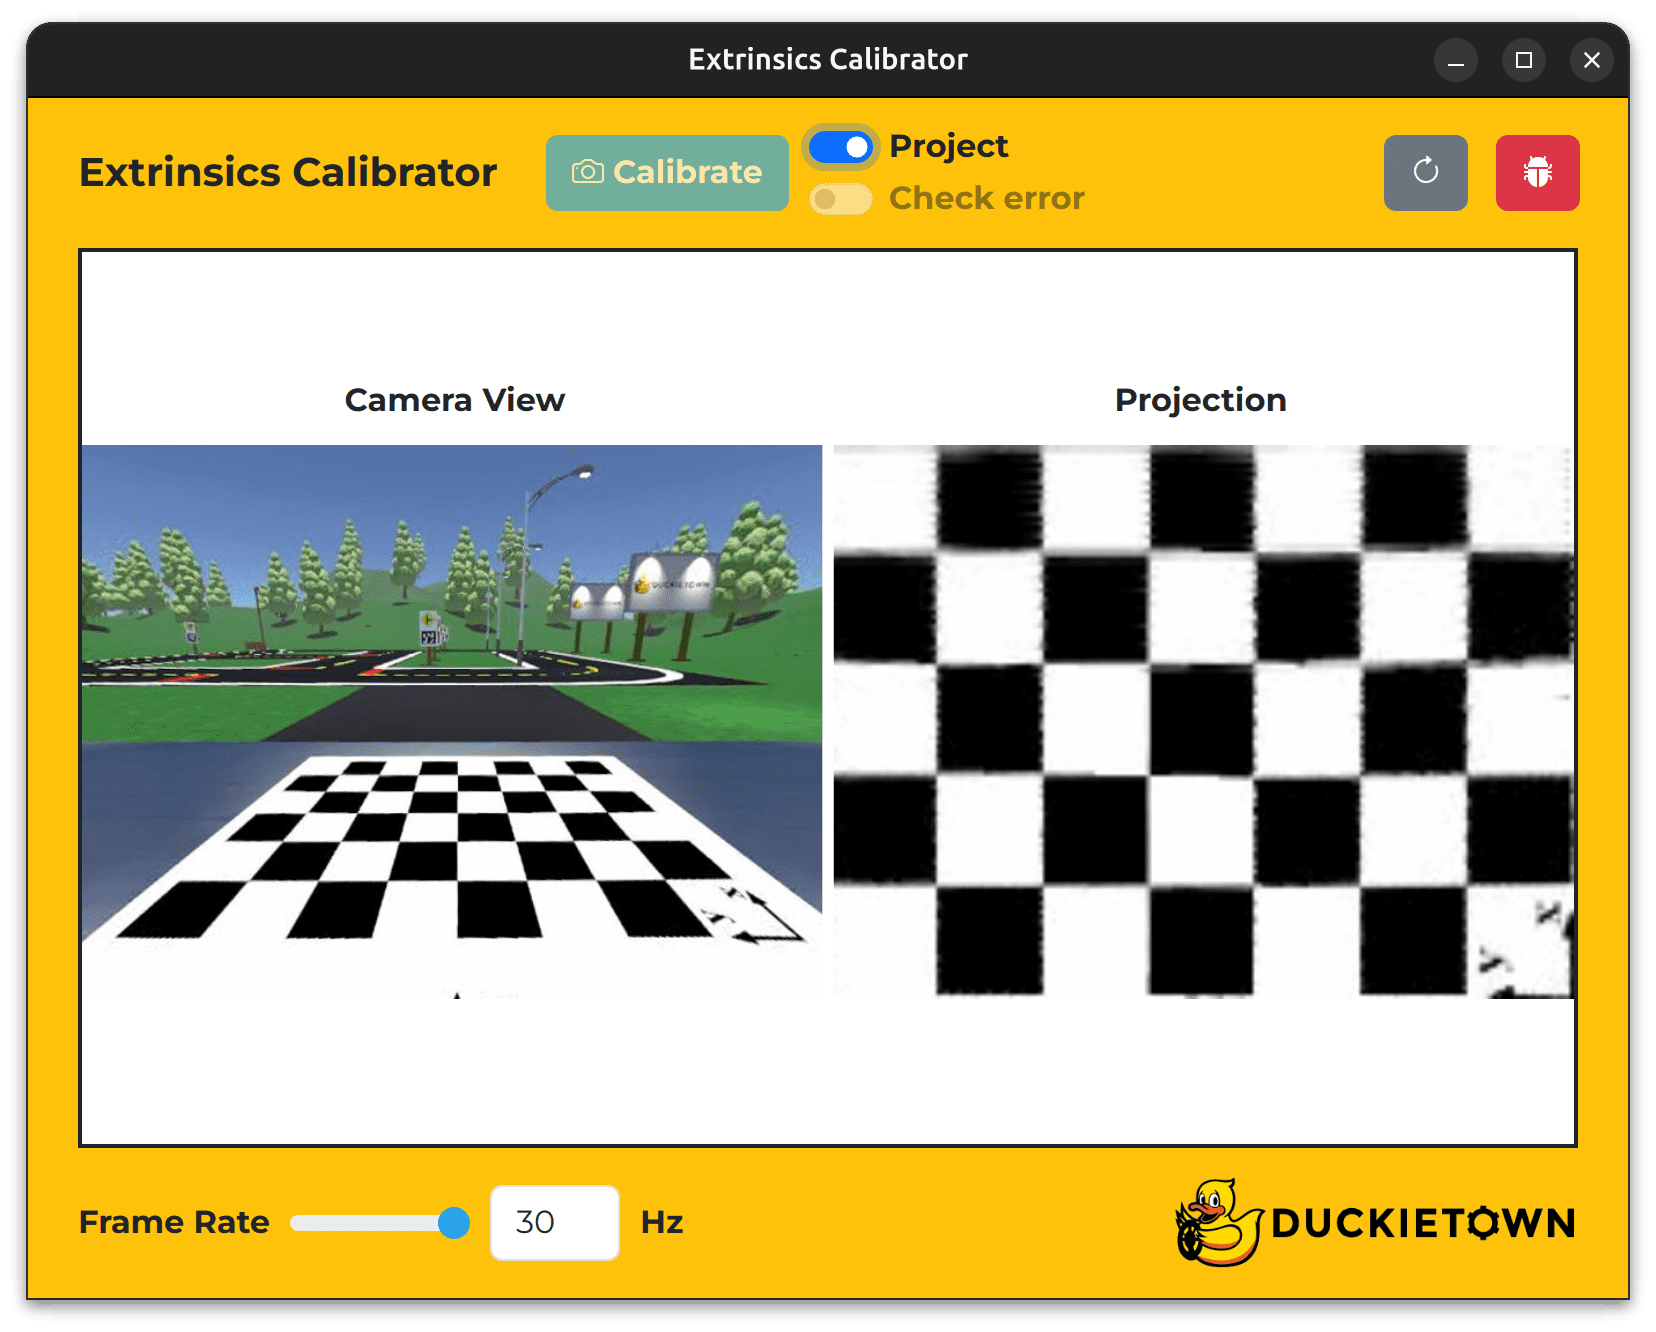
Fig. 57 The Extrinsics Calibrator with the Project switch set to on.#
To confirm that a new extrinsic calibration file has been created on your Duckiebot, run the following command and inspect the contents of the Camera Extrinsic panel:
dts duckiebot dashboard DUCKIEBOT_NAME --page robot/calibrations
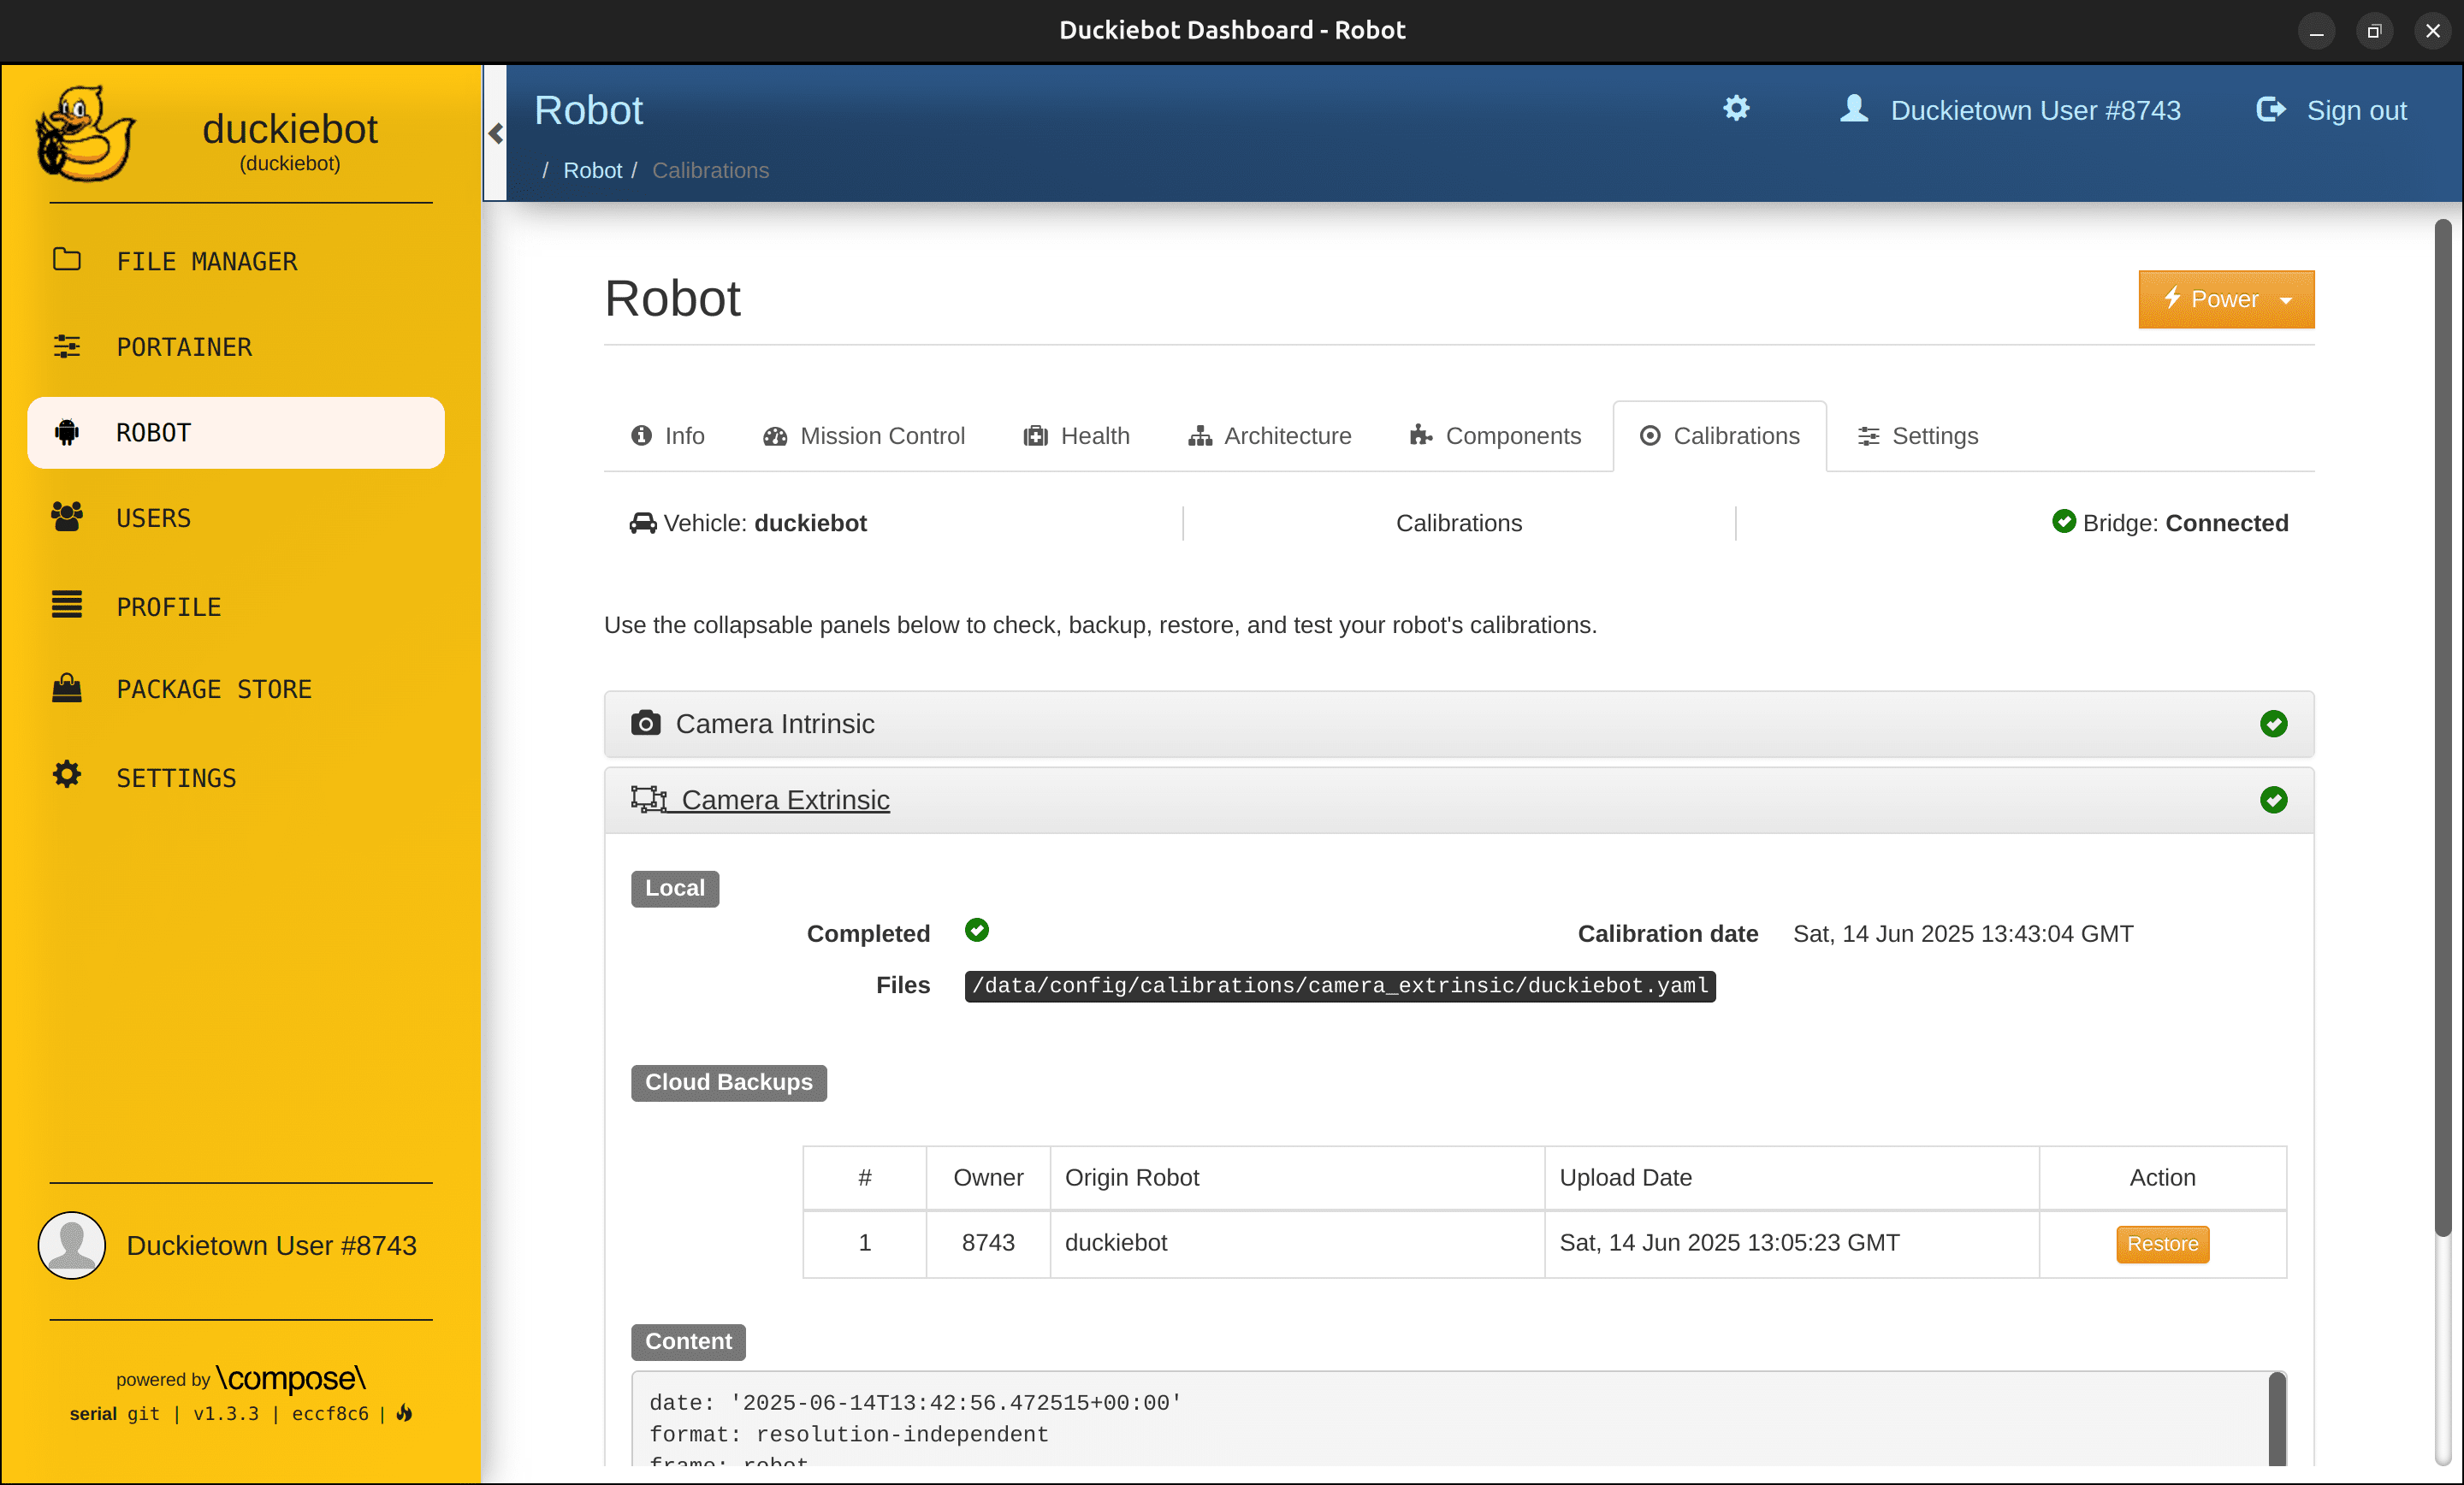
Fig. 58 The Camera Extrinsic panel on the Robot page of the Dashboard.#
Note
Within the Camera Extrinsic panel, under Local, you should see a tick next to Completed, the calibration date next to Calibration date and /data/config/calibrations/camera_extrinsic/DUCKIEBOT_NAME.yaml next to Files.
Troubleshooting#
Troubleshooting
SYMPTOM
When I open a calibrator window, I do not see images at the center but a gray loading screen instead. I know the camera otherwise works on my Duckiebot.
RESOLUTION
Press the refresh icon on the top right of the calibrator window to restart the image stream.